
Instruction Manual


5
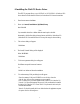
Note: The ‘Wait On Tx’ option is unchecked by default. For each port, an application
‘write’ will complete when the last data fragment is written to the TX FIFO but
before all the data has been physically transmitted. Each port has a 128 byte deep
TX FIFO and leaving ‘Wait On Tx’ un-checked may improve throughput.
However some applications implicitly assume that a ‘write’ will complete when
all data is physically transmitted. If such an application is to be used then check
the ‘Wait On Tx’ option.
Then Click Next
The device driver and application files will be installed and the message ‘The
operation was completed successfully’ will be displayed.
7. When complete the Install/Uninstall dialog will be displayed with the ‘Finish
Button’ displayed.
Click Finish
8. The system settings change dialog will appear. You must restart your
computer so that the driver will be started
Click YES to invoke the restart.
Your RocketPort 550/ RocketPort 550 Universal WinNT4 Driver is now
installation is complete.
The driver and application files have been copied to the relevant folders. You may delete the installation
folder C:\Comtrol\Installations\Rp550nt4 and its contents should you wish to do so
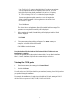
Viewing the COM ports
1. From the start menu, select settings, click Control Panel
2. Double-click Ports
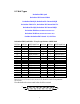
You will see the new COM Ports listed they are numbered, starting from COM port that
you specified during the installation .
For example, the installation of a single 4 port RocketPort 550 card, starting at COM 5
will show the new ports as COM5, COM6, COM7 and COM8