SECURED TO SW, WITH SCREW (1) / SECURED TO TOP OF BOOKCASE WITH SCREW (q) Young children may be injured by tipping furniture. The use of a tipping restraint is highly recommended. This hardware, when properly installed, could provide protection against the unexpected tipping of furniture due to improper use. WARNING: This product is only a deterrent. It is not a substitute for proper adult supervision. Installation Instructions: 1.
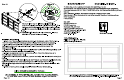
PARTS a) Top (1 pe.) b) Bottom (1 pc.) h) Top Apron (1 pc.) i) Bottom Apron (1 pe.) PS ¢) Side Moldings (2 cps) d) Left Side (1 pe.) e) Right Side {1 pc.) j) Divider Molding (2 pea) f) Adjustable Shelves (6 cps) g) Divider (2 cps) k) Back Panel {1 pc.) NOTE: DO NOT LIFT OR TILT ON SIDE OR EDGES. DO NOT LIFT UP THE STORAGE CABINET UNTIL BACK PANEL 1S INSTALLED. DO NOT REMOVE TAPE Finally screw 4 Screws (q) with washer (p) along the tape, as shown in step 13. See the diagram above.
Step 11 lift the top of the Bookcase and Bottom Apron slide Top Apron underneath. Make sure the cleats are inside the top. Step 12 DO NOT REMOVE TAPE IMPORTANT: Back Panel must be completely aligned with TOP and side edges NOTE: DO NOT LIFT OR TILT ON SIDE OR EDGES. DO NOT LIFT UP THE STORAGE CABINET UNTIL BACK PANEL IS INSTALLED. Install Top Apron (h) to the Top and Bottom Apron (i) to the Bottom with Flat screws (r), press down firmly and carefully to close all gaps. See Diagram above.
Step 3 (c) (c) Page 4 Insert and screw 3-Metal Fasteners (n) into each Side Molding (c). See Diagram above. DO NOT OVER TIGHTEN Insert and screw 3-Metal Fasteners (n) into each Divider Molding (j). See Diagram above. DO NOT OVER TIGHTEN Soft surface es Attach Top (a) and Bo! Divider Panel attach down as showing. (b) with Step 10 Attach Left Side and Right Side attached to the previous sub assembly as shown.
Step 6 LABEL : THIS SIDE UP Insert 6-Cam Locks (m) into the large prevailed holes ( 3 per each side), point the arrow on the Cam in the direction of the side edge. Push the Cam into the hole. Then use a screwdriver, to turn each Cam approximately 1/2 turn in the direction of the arrow (clock-wise) to lock it in place. See Diagram above. Insert 3-Cam Locks (m) into the large prevailed holes on each divider, point the arrow on the Cam in the direction of the side edge. Push the Cam into the hole.
Step 3 (c) (c) Page 4 Insert and screw 3-Metal Fasteners (n) into each Side Molding (c). See Diagram above. DO NOT OVER TIGHTEN Insert and screw 3-Metal Fasteners (n) into each Divider Molding (j). See Diagram above. DO NOT OVER TIGHTEN Soft surface es Attach Top (a) and Bo! Divider Panel attach down as showing. (b) with Step 10 Attach Left Side and Right Side attached to the previous sub assembly as shown.
Step 11 lift the top of the Bookcase and Bottom Apron slide Top Apron underneath. Make sure the cleats are inside the top. Step 12 DO NOT REMOVE TAPE IMPORTANT: Back Panel must be completely aligned with TOP and side edges NOTE: DO NOT LIFT OR TILT ON SIDE OR EDGES. DO NOT LIFT UP THE STORAGE CABINET UNTIL BACK PANEL IS INSTALLED. Install Top Apron (h) to the Top and Bottom Apron (i) to the Bottom with Flat screws (r), press down firmly and carefully to close all gaps. See Diagram above.
PARTS a) Top (1 pe.) b) Bottom (1 pc.) h) Top Apron (1 pc.) i) Bottom Apron (1 pe.) PS ¢) Side Moldings (2 cps) d) Left Side (1 pe.) e) Right Side {1 pc.) j) Divider Molding (2 pea) f) Adjustable Shelves (6 cps) g) Divider (2 cps) k) Back Panel {1 pc.) NOTE: DO NOT LIFT OR TILT ON SIDE OR EDGES. DO NOT LIFT UP THE STORAGE CABINET UNTIL BACK PANEL 1S INSTALLED. DO NOT REMOVE TAPE Finally screw 4 Screws (q) with washer (p) along the tape, as shown in step 13. See the diagram above.
SECURED TO SW, WITH SCREW (1) / SECURED TO TOP OF BOOKCASE WITH SCREW (q) Young children may be injured by tipping furniture. The use of a tipping restraint is highly recommended. This hardware, when properly installed, could provide protection against the unexpected tipping of furniture due to improper use. WARNING: This product is only a deterrent. It is not a substitute for proper adult supervision. Installation Instructions: 1.