User’s Guide 1
ENGLISH TABLE OF CONTENTS CAMERA OVERVIEW System Requirements ...................................................................................................................................3 Safety Information ..........................................................................................................................................3 FCC Compliance and Advisory .....................................................................................................................
Copying Files ...............................................................................................................................................20 Formatting Internal or SD Card Memory......................................................................................................20 SETTING FILE NUMBER & PRINTING ORDER About File Number and Folder Capacity ....................................................................................................21 Setting File Number ...........
CAMERA OVERVIEW CAMERA OVERVIEW SYSTEM REQUIREMENTS Windows: • PC with processor better than MMX Pentium 300 MHz • Windows 98 SE (Second Edition)/2000/ME/XP • Minimum 128 MB RAM • USB port • CD-ROM drive • 1024 x 768 monitor, 24-bit color (true color) Macintosh: • Power Mac G3 or later • Mac OS 9.0, 9.1, 9.2 and OS X • Minimum 64 MB RAM • USB port • CD-ROM drive • 640 x 480 monitor with thousands of color (millions of color recommended) Specifications are subject to change without prior notice.
CAMERA OVERVIEW FCC COMPLIANCE AND ADVISORY This device complies with Part 15 of the FCC Rules. Operation is subject to the following two conditions: 1.) This device may not cause harmful interference, and 2.) This device must accept any interference received, including interference that may cause unsatisfactory operation. This equipment has been tested and found to comply with the limits for a Class B peripheral, pursuant to Part 15 of the FCC Rules.
CAMERA OVERVIEW PACKAGE CONTENTS Please contact your dealer immediately if any of the items below are missing or damaged.
CAMERA OVERVIEW CAMERA COMPONENTS 5 6 2 1 8 9 10 3 7 4 1. 2. 3. 4. 5. 6. 7. 8. Strap mount Flash Lens Self-timer lamp Power button Operation lamp LCD screen Camera mode button 9. MENU button 10. Multi-controller ) = Set Flash mode / Move cursor up - Push upward ( - Push downward ( ) = Set Self-Timer / Move cursor down - Push to right ( ) = Zoom in / Move cursor to right - Push to left ( ) = Zoom out / Move cursor to left - Press down = SET 11 14 15 12 13 16 17 6 18 11. Macro switch 12.
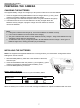
PREPARING THE CAMERA PREPARING THE CAMERA CHARGING THE BATTERIES The supplied battery charger can charge up to two pieces of AAA and or AA size batteries. 1. Insert the supplied rechargeable batteries into the charger with its (+) and (-) ends matching the polarity indication engraved inside the charger. 2. Plug the charger into a standard AC power outlet. The green indicators will light up. 3. It will take around 25 hours for the batteries to be fully charged.
PREPARING THE CAMERA INSERTING AN SD CARD The digital camera is equipped with a 32MB internal memory. If no SD card is inserted in the camera, all pictures/video clips/audio clips recorded by the camera will be stored in the internal memory. When SD card is inserted in the camera, all files recorded by the camera will be stored on the SD card by using the Design Rule for Camera File System (DCF) protocol.
PREPARING THE CAMERA SETTING THE DATE AND TIME The setting Date/Time screen will pop up when powering the camera on for the first time or when the batteries are removed for an extended time. 1. Press or to select a field to change. 2. Press or to set the values. 3. After the Date and Time is set, press the SET button to confirm the settings and to exit. 07/25/2004 21:45 MM/DD/YY To adjust Date/Time or to change Date/Time format: 1. Press the MENU button. 2. Press to select the Setup Menu. 3.
PREPARING THE CAMERA INFORMATION DISPLAYED ON THE LCD MONITOR The LCD displays information such as the camera settings, remaining image capacity and shooting date etc.
PREPARING THE CAMERA OPERATING THE MULTI-CONTROLLER The multi-controller is used to set shooting mode, to move cursor when the camera Menu is shown, and to confirm the selection. Multi-controller Push Up (“ ” is named hereafter) • To set Flash mode in Shooting Mode. • To move the cursor up when MENU screen is shown. Push to Right (“ ” is named hereafter) • To zoom in subjects in shooting mode or to magnify image in review mode. • To move the cursor to right when MENU screen is shown • To enter submenu.
PREPARING THE CAMERA This chart shows the options for each menu settings. Shooting Mode Menu Setup Menu Playback Mode Menu Movie Mode REC Menu Menu Item Available Setting Resolution 2592x1944,2048x1536,1280x960, 640x480 Quality Fine / Normal Exposure +2/+1.7/+1.3/+1.0/+0.7/+0.3/Auto/-0.3/-0.7/-1.0/-1.3/1.7/-2.
PREPARING THE CAMERA DATE STAMP By default the Date Stamp is set at OFF mode. If you want to have Date and Time shown on the pictures, set the Date Stamp to ON mode. 1. Press the MENU button. 2592 x1944 2. Press or to select Date Stamp then press the SET button or enter its submenu. 3. Press or to to select On or Off. 4. Press the SET button to confirm the selection. 5. Press the MENU button twice to close the menu window. SETTING THE LANGUAGE 1. Press the MENU button. 2.
TAKING PICTURES TAKING PICTURES BASIC STILL IMAGE SHOOTING 1. Make sure the camera is in still image shooting mode ( ). 2. Frame the subject in the LCD. 3. Press the Shutter button fully down to capture the image. USING THE DIGITAL ZOOM The current approximate zoom factor The camera provides up to 4x digital zoom. 1. Press to zoom in subject for a telephoto shot. • The zoom indicator shows the current approximate zoom factor. 2. Press to zoom out for a wide angle shot.
TAKING PICTURES TAKING CLOSE-UP PICTURES Use the macro mode to shoot close-up of subjects in the range of 20 cm (7.87 inches). 1. Slide the Macro switch to the( )position. icon appears on the LCD monitor. • The 2. Shoot the image. Macro switch Note: ) when close-up 1. Always remember to slide the Macro switch back to Landscape position ( shooting is not required. 2. Focus range mentioned is the distance between the camera lens surface and the subject.
TAKING PICTURES TAKING PICTURES WITH SELF-TIMER Use the self-timer to set a delay from the time the shutter button is pressed to the time the image is shot. 1. Press to switch between self-timer modes until the desired mode icon appears on the LCD. 2. Shoot the image.
TAKING VIDEO CLIPS / AUDIO CLIPS 3. Press or to set the desired white balance mode then press the SET button to confirm. 2592 x1944 TAKING VIDEO CLIPS The digital camera can shoot video clips with audio. 1. Press the MODE button repeatedly until the video mode icon ( ) appears on the LCD. • The LCD monitor displays the maximum recordable time (in minute). 2. Press the Shutter button to start recording. 3. Press the shutter button again to stop recording.
REPLAYING STORED FILES REPLAYING STORED FILES REVIEWING THE STORED FILES You can view the recorded images, video clips and audio clips on the camera. 1. Press the MODE button repeatedly until the review mode icon ( ) appears on the LCD. The last recorded file appears on the LCD monitor. 2. Press to move to the previous file and press to move to the next file. 3. When a video clip or audio clip is selected, press the SET button to start playing the file.
REPLAYING STORED FILES 7. Press or to look for other files to be protected, then press the SET button to lock the selected file. 8. Press the MENU button to exit file-protecting mode. Locking All Files ) appears on the LCD. 1. Press the MODE button repeatedly until the review mode icon ( 2. Press the MENU button. 3. Press to highlight Protect and then press the SET button or to enter its submenu. 4. Press or to select Lock All, then press the SET button or to enter its submenu. 5.
REPLAYING STORED FILES PLAYING A SLIDE SHOW (AUTO PLAY) Use the slide show feature to automatically display your pictures and videos on the LCD screen at a selectable interval. 1. Press the MODE button repeatedly until the review mode icon ( ) appears on the LCD. 2. Press MENU button. 3. Press to select Slide Show then press the SET button or to enter its submenu. 4. Press or to select 5 sec or 10 sec and then press SET. The slide show starts at once from the last displayed image. 5.
FILE NAMES & PRINTING Note: 1. Formatting will erases all the data in the internal memory or on the SD card, including protected files. Please check the contents in the memory before formatting it. 2. SD cards formatted in another camera, computer or peripheral device may not operate correctly. When that happens, reformat the SD card with this camera.
FILE NAMES & PRINTING To number files from 0001 on when memory is formatted: 1. Follow steps 2-6 above to set the File No. Reset to ON mode. 2. Format the memory. (Refer to p.20) SETTINGS DIRECT PRINTING ORDER The camera allows you to select images for printing on a direct printing compatible printer and specify the number of print copies in advance using the camera. 1. Press MODE button to enter the Playback Mode ( ). 2. Press or to select the images to be printed.
FILE NAMES & PRINTING 1. 2. 3. 4. Press the MENU button. Press to select the Setup Menu. Press or to select USB then press the SET button. Press or to select Computer or Printer and then press the SET button. PRINTING PICTURES DIRECTLY There are two ways to print the stored pictures without the help of computer: Printing Pictures by Using SD Card 1. 2. 3. 4. Transfer the stored pictures from internal memory to SD card. (If necessary) (p. 20) Set the printing order (p. 22).
FILE NAMES & PRINTING 7. Press or to select Print then press the SET or . 8. Press or to select Custom then press the SET or . 9. Press or be printed. to select Start then press the SET button. The images will Note: Before proceeding to print, you can set paper size by pressing or to select Custom, then press SET or to enter custom submenu, and then select Size by pressing the or again. Note: The options of the direct-printing settings differ slightly for different.
MAKING CONNECTIONS MAKING CONNECTIONS VIEWING FILES ON THE TV The camera allows you to view individual files on the television. To begin, check your television documentation to determine what video standard you should set your camera to. NTSC Japan, U.S.A., Canada, etc. PAL Europe, Asia (excluding Japan), Oceania, etc. Setting Video Output Signal Mode 1. Press MENU button. 2. Press to select Setup Menu. 3. Press the or to highlight TV Output, then press the SET or 4. Press the or to select NTSC or PAL.
MAKING CONNECTIONS Downloading files by using an USB cable Note for Win 98SE users: You must install the camera driver supplied in the CD-ROM before connecting the camera to the computer. Connect the supplied USB cable to the computer’s USB port and to the camera’s USB port. FOR WINDOWS USERS 1. Double-click on My Computer. 2. Double-click Removable Disk. 3. Double-click DCIM. 4. Double-click the folder that contains the desired images to view. 5.
INSTALLING SOFTWARE (FOR WINDOWS USERS) INSTALLING SOFTWARE (FOR WINDOWS USERS) USING THE INSTALLER SPLASH SCREEN The installer will automatically detect which software applications need to be installed or if they are not necessary. This will be indicated by the buttons on the splash screen that appears when the CD-ROM is inserted into the computer: Color • • Yellow ( Gray ( Description ) ) Required or highly recommended to install.
INSTALLING SOFTWARE (FOR WINDOWS USERS) INSTALLING THE CAMERA DRIVER (FOR WIN 98 SE USERS ) Note for Win 98 SE user: You must install the camera driver before proceeding to download files from the camera to your computer by using the USB cable. Step 1 Make sure your camera is powered off and not connected to the computer. Step 2 Make sure the computer is powered on and Windows 98SE is running. Step 3 Close any other applications or software you may be running.
INSTALLING SOFTWARE (FOR WINDOWS USERS) INSTALLING WINDOWS MEDIA PLAYER 9 Note for Win 98 SE user: You must install the supplied Windows Media Player 9 before proceeding to view the video clips recorded with the camera. Otherwise you may not able to view the video clips. Step 1 Make sure your camera is powered off and not connected to the computer. Step 2 Make sure the computer is powered on and Windows is running. Step 3 Close any other applications or software you may be running.
INSTALLING SOFTWARE (FOR WINDOWS USERS) Step 9 The screen shows installing progress bars. Step 10 Click “Next”. Step 11 Choose the privacy options according to your preference, then click “Next”. Step 12 Select or dis-select the file types that will use the Windows Media Player as default player. Then click “Finish”.
INSTALLING SOFTWARE (FOR WINDOWS USERS) Step 13 The screen shows the Windows Media Player window. Step 14 Close the Windows Media player by clicking on the “X” on the left top corner or clicking “File ‡ Exit”. Note: If you have downloaded the video clips recorded with the camera onto your computer, you can click “File ‡ Open …” to view the video clips immediately. INSTALLING ARCSOFT PHOTOIMPRESSION 2000 Step 1 Make sure your camera is powered off and not connected to the computer.
INSTALLING SOFTWARE (FOR WINDOWS USERS) Step 6 When the installation screen appears, click on Install ArcSoft PhotoImpression 2000. Step 7 Click [Next >]. Step 8 Read the agreement and then click [Yes]. Step 9 Select folder where Setup will install files and then click [Next >].
INSTALLING SOFTWARE (FOR WINDOWS USERS) Step 10 Make sure the two applications are checked and then click [Next >]. Step 11 Click [Next >]. The screen will show the installation status. Step 13 Click [Finish]. Win 98 SE will request for restart.
INSTALLING SOFTWARE (FOR WINDOWS USERS) INSTALLING ADOBE ACROBAT READER Step 1 Make sure your camera is powered off and not connected to the computer. Step 2 Make sure the computer is powered on and Windows is running. Step 3 Close any other applications or software you may be running. Step 4 Insert the supplied CD-ROM into your computer’s CD-ROM Drive. Step 5 Select the language. Click [OK].
INSTALLING SOFTWARE (FOR WINDOWS USERS) Step 9 Click [Next >]. Step 10 Click [Next >]. The files will be saved into C:\Program Files\Adobe\Acrobat 6.0 automatically. You may change the default folder by clicking [Change Destination Folder …] and selecting a different folder. Step 11 Click [Install] to start install the Adobe Reader 6.
INSTALLING SOFTWARE (FOR WINDOWS USERS) Note: 1. Windows 2000 computer might need to reboot after installed Acrobat Reader 6. Please restart the computer upon required. 2. As Adobe Reader 6 requires Internet Explorer 5.01 or greater, Win 98 SE users may meet below message at the end of step 6, and Win 2000 users may see the message shown below as Adobe Reader 6 need the support of Win 2000 Service Pack 2.
INSTALLING SOFTWARE (FOR WINDOWS USERS) USING ARCSOFT PHOTOIMPRESSION (FOR WINDOWS USERS ) 1. Connect the camera to the computer. 2. Launch ArcSoft PhotoImpression software by clicking on Start ‡ Programs ‡ ArcSoft Camera Suite and choosing PhotoImpression from the application list on your screen. Fig. 1.1 Fig. 1.2 3. When the Application opens (fig. 1.1), click on the Camera/Scanner button.(fig. 1.2) 4. Click on the drop-down list under Select Source and choose Concord 5040. ). 5.
APPENDIX APPENDIX TROUBLESHOOTING Problem Cause Solution The camera cannot be turned on. Batteries are inserted in the wrong direction Reload the batteries properly (p.7). Battery is dead. Replace or recharge the batteries The battery compartment door is open. Make sure the battery compartment door is securely closed. The flash is charging. Insert a new SD card. Memory is full. Delete unwanted files or insert a new SD card. Maximum file number is exceeded.
APPENDIX SPECIFICATIONS Sensor 5.1 Mega Pixels CMOS Lens Focal length: f 8.22mm, 4x digital zoom Color LCD Display 1.8” LTPS LCD Focus Range Normal mode: 1 m (3.28 ft.) ~ infinity Macro mode: 20 cm (7.
APPENDIX GETTING HELP You can get help from the troubleshooting section, FAQ or Customer Support on our website. Troubleshooting Section in this User’s Guide Please refer to the Troubleshooting section first, as it contains some of the most common problems that users encounter. Website FAQ Please visit our website at www.concord-camera.com to view the Frequently Asked Questions (FAQ).
Visit Concord on the Internet www.concord-camera.com Concord 5040 User’s Guide Copyright 2005 Concord Camera Corp. Version 1.