
Operation Manual

11
TAKING PICTURES AND VIDEOS CLIPS
TAKING PICTURES
1. Power on the camera.
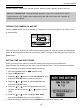
2. Slide the Function switch to
(Capture mode).
Note: In picture taking mode, the icon will be shown on the
lower left side of the LCD. If this icon is not shown, press the
button repeatedly until the icon is shown.
3. Frame your subject with the LCD or viewfinder.
4. Hold the camera still and press the Shutter button to take the
picture.
• The
and icon will be shown briefly on the LCD after the Shutter button is pressed, which
indicates that the camera is saving the picture. Do not power the camera off or remove the
batteries before the picture is saved.
Note: If Quick View function is turned on(See ‘Customizing Your Camera Settings’), the LCD will
show the image just taken and the options of:
Save: Press the Enter button to save the image.
Delete: Press the
button to select “delete” and then press the Enter button to delete the image.
If no action is taken, the picture will be saved in 15 seconds or so.
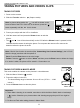
TAKING PICTURES IN MARCO MODE
This mode enables the camera to take pictures in close distances.
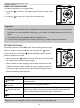
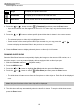
1. Slide the Macro Switch to
position.
2. Frame the subject in the LCD.
• The best shooting range is between 40 cm to 50 cm (15.76 in. – 19.89
inches.)
3. Press the Shutter button to take the picture.
Important:
1. When Macro shooting is not needed, remember to slide the Macro Switch back to Landscape
(
) mode. Otherwise your pictures taken with shooting range go beyond 50 cm might be
blurry.
2. Do Not use Flash when taking pictures in Macro Mode.
TAKING PICTURES AND VIDEOS CLIPS
1
2
3
Macro Switch