En ENGLISH CONGRATULATIONS Congratulations on the purchase of your new camera. Your camera has been carefully engineered and manufactured to give you dependable operation. Read this manual before operating the camera to become more familiar with it. This manual has been written and formatted with depth and detail so that you can easily follow the instructions to maximize the features of your camera.
CAMERA OVERVIEW En CAMERA OVERVIEW Top/Front 1 5 2 6 1. 2. 3. 4. 5. 6. 3 7 8 Power Button Shutter Button Flash Lens/Lens Door Viewfinder Flash Sensor 7. Red-eye Reduction LED/ Self-Timer LED/ AF Assist Light 8. Port Cover 9. Mini-USB port 10. TV-Out port 9 10 4 Bottom/Back 11. 12. 13. 14. 15. 16. 17. 18. 19. 20. 21. 22.
En TABLE OF CONTENTS CAMERA OVERVIEW ........................................................................................................................................... 2 Top/Front ........................................................................................................................................................ 2 Bottom/Back ...................................................................................................................................................
CUSTOMIZING THE CAMERA SETTINGS......................................................................................................... 37 Setup Menu and Features ............................................................................................................................ 39 Setting the Auto Off Time ............................................................................................................................. 39 Setting the Language ............................................
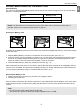
GETTING STARTED A En A Ú GETTING STARTED AWB Ú Ú A Ú ATTACHING THE WRIST STRAP AWB Be sure to use the wrist strap to avoid dropping the camera accidentally. When carrying the camera by the strap, don’t let it dangle to avoid shocks/damage to the exterior and/or interior of the camera. 1 2 3 A LOADING THE BATTERIES A A AWB AWB Ú Ú Ú Ú A fig.1.1 fig.1.2 fig.1.3 The camera uses 2x AA alkaline, lithium or rechargeable batteries. Rechargeable Batteries (NiMH) are highly recommended. 1.
2 GETTING STARTED 3 En SETTING THE LANGUAGE, DATE AND TIME When the camera is powered on for the first time, the Language, Date and Time menus will appear. DATE/TIME SETUP 01 - 01 - 2004 01 : 01 AM MM - DD - YYYY 12 - HOUR RETURN fig. 1.1 OK SET fig. 1.2 1. Press or to highlight the desired language. (fig. 1.1) 2. Press the OK button to select. The next screen will show the DATE/TIME SETUP page. (fig. 1.2) 3.
En GETTING STARTED CHECKING THE BATTERY POWER LEVEL The battery power level indicator represents the level of power of the batteries. The meaning of each icon is as follows: A AWB Battery power is not full, but it is still sufficient for camera operations. Batteries are fully charged. Battery power is low. Replace or recharge (rechargeable batteries only) as soon as possible. A AWB Battery power is running low. Prepare a fresh set of batteries. Batteries are flat. Replace them immediately.
GETTING STARTED Internal Memory The camera is equipped with 6MB of internal memory that can be used for storage as soon as you start taking pictures or recording video clips. Status Memory in Use Memory card is not inserted. Internal Memory Memory card is inserted. Memory Card NOTE!: The files stored in the internal memory will remain there until the Transferring Files option is selected. Refer to the Transferring Files section on page 35. Inserting the Memory Card fig.1.1 fig.1.2 fig.1.
GETTING STARTED / TAKING A PICTURE En SETTING THE CAMERA’S OPERATIONAL MODES The camera has 3 operational modes: Camera Mode, Review Mode and Video Clip Mode. A To change the camera operational mode, slide the mode switch horizontally to the corresponding position. A AWB AWB Ú Ú A AWB Camera Mode For taking pictures or customizing your camera settings for picture taking.
TAKING A PICTURE En Flash Ready LED A Lit The camera is recording a video clip. Blinking The flash is recharging, or LCD is in standby mode. A A Note: When the camera is capturing or storing a picture or video clip, do not power the camera off; otherwise, the picture or video clip may become corrupted. AWB AWB LIVE VIEW THROUGH THE LCD A 3M 28/45 AWB WB AWB AWB A fig. 1.1 4M AWB A 28/45 fig. 1.2 AWB AWB 4M 28/45 fig. 1.3 1. Turn the camera on. 2. Set it to ( ) Camera Mode.
AWB TAKING A PICTURE AWB Ú Ú Ú Ú En USING AUTO-FOCUS LOCK When the subject is not located at the center of the picture, use this feature to lock the focus on the subject before using the usual procedures to take a picture. Auto-Focus LED When the Shutter button is pressed halfway, the Auto-Focus feature will be activated and the Auto Focus (green) LED will display the status of the Auto-Focus lock. A AWB Lit The subject is in focus. A Blinking The camera is adjusting the focus.
AWB AWB TAKING A PICTURE A A 3M A 28/45 A A A 3M 28/45 A AWB AWB WB AWB AWB fig. 1.1 AWB AWB fig. 1.2 AWB WB AWB fig. 1.3 To set the flash: Press / repeatedly until the desired indicator appears on the LCD. 2 5 Flash Mode Description 10 30 A Auto Flash (Default) A Auto + Red-Eye Flash ON Flash OFF AWB The camera judges if a flash is required. If the environment is too dark, the flash will fire.
TAKING A PICTURE AWB AWB AWB En USING THE OPTICAL ZOOM The camera provides up to 3x optical zoom to take pictures. 3M A 28/45 A X1 3M 28/45 X2 2 AWB fig. 1.1 AWB WB AWB fig. 1.2 fig. 1.3 3 1. Press T (Tele) to zoom in to your subject. A The optical zoom status is displayed in white in the zoom bar on the LCD( 2. Press W (Wide) to zoom out. USING THE DIGITAL ZOOM 2 3 A ). AWB AWB The camera also provides 4x Digital Zoom.
TAKING PICTURES IN MACRO MODE (CLOSE-UP SHOTS) AWB This mode enables the camera to capture pictures in close distances. A A A A 3M 28/45 AWB AWB AWB AWB WB AWB 1. Press the button. The Macro icon ( ) will be displayed on the LCD. 2. Frame the subject in the LCD. • The best shooting range is between 15 cm to 60 cm. (5.9 in. – 23.6 in.) 3. Press and hold the Shutter button halfway to activate the Auto-Focus function until the green AF LED stops blinking and the AF frame changes to green. 4.
AWB En TAKING A PICTURE TAKING PICTURES WITH SELF-TIMER A A A A 3M 28/45 A AWB AWB AWB WB AWB AWB 1. In ( ) Camera Mode, press button, the Self-Timer icon ( ) will appear on the LCD. 2. Place the camera on a flat surface or tripod. 3. Use the LCD to compose the picture, then press the Shutter button to activate the Self-Timer. The Self -Timer LED will blink slowly for 7 seconds, faster for the remaining 3 seconds, then the image will be captured.
TAKING A PICTURE En USING THE MAIN MENU IN CAMERA MODE CAPTURE MODE + RETURN Q QUALITY SETUP FINE NORMAL ECONOMY RETURN CAMERA MODE PICTURE EFFECT + – EV COMPENSATION ISO METERING AF AUTO FOCUS RETURN SELECT CAMERA MODE SETUP OK SET 2048 x 1536 1600 x 1200 1024 x 768 640 x 480 RETURN OK SET SCENE SELECTION OFF PARTY / INDOOR SNOW BEACH SUNSET OK SET RETURN WHITE BALANCE AWB AUTO SUNNY FLUORESCENT TUNGSTEN RETURN SCENE SELECTION NIGHT LANDSCAPE FIREWORKS NIGHT PORTRAIT OK SET PICTURE EFFECT
TAKING A PICTURE En USING THE MAIN MENU IN CAMERA MODE Follow the steps below to set the advanced shooting options in the camera through the Main Menu. 1. 2. 3. 4. 5. 6. 7. Turn the camera on. Set the camera to ( ) Camera Mode. Press the MENU button to display the Main Menu. Press or repeatedly until the desired option is highlighted. Press to enter the submenu. Press or repeatedly in the submenu to toggle between the options. Press the OK button to make a selection.
TAKING A PICTURE SETTING IMAGE QUALITY AWBAWB En Note: Hold your camera steady to prevent blurriness. your camera on a A A A It is recommended to either Aplace flat, steady surface or mount it on a tripod. A AWB AWBAWB The Image Quality setting determines the amount of compression used to reduce the size of the stored image file in order to economize space in the memory.
TAKING A PICTURE Images Stored on 16MB memory (approx.): Resolution ENU Quality 3MP 2MP 1.3MP VGA (2048 x 1536) (1600 x 1200) (1024 x 768) (640 x 480) Fine 9 14 33 82 Normal 19 31 74 181 Economy 34 53 125 297 Images Stored on 32MB memory (approx.): Resolution Quality 3MP 2MP 1.3MP VGA (2048 x 1536) (1600 x 1200) (1024 x 768) (640 x 480) Fine 20 29 68 171 Normal 41 65 154 376 Economy 71 111 261 616 Images Stored on 64MB memory (approx.
A TAKING A PICTURE En SELECTING SCENE MODES AWB The preset scene modes are helpful to quickly optimize the various settings to get the best capture of specific scenes. A 3M AWB WB 28/45 A CAMERA MODE Preset Scene SCENE SELECTION A CAPTURE MODE Q QUALITY SETUP IMAGE SIZE SCENE SELECTION AWB WHITE BALANCE RETURN SELECT AWB OFF PARTY / INDOOR SNOW BEACH SUNSET OK SET RETURN A AWB Description Off (default) No Scene Selection.
A TAKING A PICTURE En SETTING WHITE BALANCE By default the camera uses Auto White Balance to reproduce colors under different lighting conditions. For mixed lighting conditions, it is recommended to use the Auto White Balance option.
A TAKING A PICTURE En SETTING EXPOSURE COMPENSATION The camera uses Auto Exposure to give well-exposed pictures under most lighting conditions. If the captured AWB picture of the main subject turns out to be too light or too dark, use the Exposure Compensation feature to improve the exposure aspect.
TAKING A PICTURE En SETTING THE ISO SENSITIVITY Raise the ISO speed when you wish to reduce jittery camera movement or to turn the flash off when shooting in dark surroundings. ISO Setting Description Auto (default) Equivalent to setting of ISO 100 under normal conditions. When lighting is poor, camera raises sensitivity automatically to compensate. 100 100 is best for shooting clear, sharp images in daylight. 200 200 is ideal for shooting in cloudy situations.
TAKING A PICTURE You can choose the desired part of the image to use for measuring the brightness and determine the exposure. A A A Metering Mode A Description Spot Meters the light in the center area of the image. Use this mode when the subject is backlit or surrounded by strong light. Matrix(default) Metering the light in different zones. Use this mode when the lighting condition is complex.
A En TAKING VIDEO CLIPS AWB TAKING VIDEO CLIPS AWB TAKING VIDEO CLIPS 28 SEC A Press Shutter to Record AWB To record a video clip: 1. Slide the Mode Switch to ( ) Video Clip Mode. X1 X2 • The time limit is showed on the upper-right corner of the screen. 2. Position the subject in the LCD. 3. Press the Shutter button down fully to start recording a video clip. The time recorded will be shown on LCD. The camera records a video clip until the memory is full. To stop recording: 1.
TAKING VIDEO CLIPS En RECORDING A VIDEO CLIP WITH THE SELF-TIMER A 1 SEC 28 SEC A AWB Press Shutter to Record AWB 28 SEC 1. In the ( ) Video Clip Mode, press button, and the Self-Timer icon ( ) will appear on the LCD. 2. Place the camera on a flat surface or mount it on a tripod. 3. Use the LCD to compose the picture, then press the Shutter button to activate the Self-Timer. The Self -Timer LED will blink slowly for 7 seconds, faster for the remaining 3 seconds then starts recording. 4.
TAKING VIDEO CLIPS En Note: • To understand the differences between the various White Balance settings, refer to p.21. • To set the different Picture Effects, refer to p.21. • For more information about Exposure Compensation, refer to p.22. • For more information about Metering differences, refer to p.24. SETTING VIDEO CLIP RESOLUTION Note: 160x120 resolution is ideal for email.
REVIEWING YOUR FILES En REVIEWING YOUR FILES REVIEWING THE PICTURES/VIDEO CLIPS In ( ) review mode, you can review your stored pictures and video clips through the LCD. 28 SEC 28 SEC Note: When a memory card1 SEC is1 SEC inserted into the camera, only the pictures stored Ain Athe memory card will be displayed in the Review Mode. To view the pictures in the internal memory, ttransfer files from internal memory to the SD card (refer to p.35).
28 SEC 28 SEC REVIEWING YOUR FILES En ENLARGING THE PICTURES In ( ) Review Mode, you can enlarge your pictures to take a closer look at the subject on the LCD. This feature is for viewing purposes only and will not affect the stored image. X1 X2 X2 X4 2x Enlargement A A A Resolution AWB A 2048 x 1536 AWB AWB A 4x Enlargement A A A Maximum Enlargement 4x AWB 1600 x 1200 4x 1024 x 768 4x 640 x 480 2x AWB To enlarge: 1.
REVIEWING YOUR FILES REVIEWING YOUR FILES IN THUMBNAIL 3AM 28 SEC ) Review Mode by pressing either Menu or Wide button. 0001/0003 AWB 2004:03:30 MENU 0012/0012 13:30:41 fig. 1.1 A A X1 fig. 1.2 Using the Quick AccessX2Button: 1. In the ( ) Review Mode, press W button, nine thumbnail images or video clips will appear on the LCD display in a few seconds. (fig. 1.2) The first file will be shown first. 2. Press , , or repeatedly to look through all the pictures and video clips.
En REVIEWING YOUR FILES Deleting in Review Mode Delete One 1. In ( ) Review Mode, press button once, the screen will display the message “Are you sure?” 2. Press or to highlight No or Yes. 3. Press the OK button to select. • If No is selected, no change will be made, and the camera will return to the Review Mode. • If Yes is selected, the file will be deleted. Delete All 1. In ( ) Review Mode, press button twice, the screen will display the message “Delete All, Are you sure?” 2.
REVIEWING YOUR FILES En USING THE REVIEW MENU DELETE FILE Are You Sure? DELETE ONE DELETE ALL No Yes REVIEW 1 2 DELETE FILE THUMBNAIL SLIDE SHOW FILE TRANSFER ROTATE RETURN SELECT RETURN OK SELECT SELECT 0012/0012 1 2 DELAY INTERVAL SLIDE SHOW START SLIDE SHOW DELAY INTERVAL CONTINUOUS REPEAT 2 5 10 30 RETURN SELECT 2 SEC 5 SEC 10 SEC 30 SEC RETURN SELECT CONTINUOUS REPEAT Transfer all files from internal memory to memory card? Yes No No Yes OK SELECT How to use the Menu in Review m
REVIEWING YOUR FILES 1 SEC 28 SEC A En DELETING YOUR FILES Note: Once the files are deleted, they cannot be recovered. AWB Deleting One File by Using the Review Menu DELETE FILE 28 SEC DELETE ONE DELETE ALL Are You Sure? No Yes RETURN 1. 2. 3. 4. 5. 6. 7. 1 SEC 8. SELECT OK SELECT DELETE OK In ( ) Review Mode, press the MENU button to enter Review Menu. Press or X2 to highlight Delete File. Press to enter its submenu. Press or to highlight Delete One, then press OK.
A TROUBLESHOOTING 28 SEC A RUNNING A SLIDE SHOW Use the Slide Show feature to automatically display your pictures and videos on the camera LCD screen at a selectable interval rate. You can also run a Slide Show on any video device that is equipped with a video input, such as a television or digital projector. AWB En 1 SEC The Slide Show feature is available when you have at least one picture stored. 3M 28 SEC 1 2 2004:03:30 To 1. 2. 3. 4. 5. 6. 7. 8.
En REVIEWING YOUR FILES AWBAWB AWBAWB AWBAWB AWBAWB AWBAWB To set the slide show time interval: The default slide show interval is 2 seconds. You may change the time following the steps below: 1 2 REVIEW 1 2 SLIDE SHOW START SLIDE SHOW DELAY INTERVAL CONTINUOUS REPEAT DELETE FILE THUMBNAIL SLIDE SHOW FILE TRANSFER ROTATE RETURN SELECT RETURN DELAY INTERVAL 2 2 5 5 10 10 30 30 SELECT 2 SEC 5 SEC 10 SEC 30 SEC RETURN SELECT A A 1. 2. 3. 4. 5. 6.
A1 SEC 1 SEC A 28 SEC 28 SEC 1 SEC AWB A AWB A A REVIEWING YOUR FILES 28 SEC A 1. In ( ) Review Mode, press MENU to enter Review Menu. AWB AWB AWBAWB 2. Press or repeatedly to select and highlight File Transfer. 3. Press . The next screen will display the message “Transfer all files from internal memory to memory card”? AWB 4. Press or to highlight No or Yes. 28 SEC 28 SEC 5. Press OK to confirm selection.
En CUSTOMIZING THE CAMERA SETTINGS CUSTOMIZING THE CAMERA SETTINGS SET AUTO OFF TIME T 2 3 2 MIN 3 MIN RETURN OK SET TV OPTION NTSC PAL N P SETUP T SET AUTO OFF TIME TV OPTION LANGUAGE OPTION RESTORE DEFAULT LCD BRIGHTNESS RETURN SELECT RETURN OK SET SETUP CAMERA MODE SETUP RETURN FORMAT DATE/TIME SETUP DIGITAL ZOOM BEEP QUICK VIEW RETURN SELECT SELECT SETUP AF ASSIST LIGHT CAMERA INFO.
DATE/TIME SETUP 01 - 01 - 2004 01 : 01 AM MM - DD - YYYY 12- HOUR RETURN OK SET DIGITAL ZOOM YES NO SETUP T SET AUTO OFF TIME TV OPTION LANGUAGE OPTION RESTORE DEFAULT LCD BRIGHTNESS RETURN SELECT RETURN OK SET BEEP ON OFF SETUP CAMERA MODE SETUP FORMAT DATE/TIME SETUP DIGITAL ZOOM BEEP QUICK VIEW RETURN SELECT RETURN QUICK VIEW 1 3 RETURN SELECT 5 SETUP OFF 1 SEC 3 SEC 5 SEC RETURN AF ASSIST LIGHT CAMERA INFO.
CUSTOMIZING THE CAMERA SETTINGS En SETUP MENU AND FEATURES Setup Setting Set Auto Off Time Options 2 min, 3 min TV Broadcast Standards Language Option NTSC, PAL Description Enables the camera to automatically power off when it is idle. Sets the mode that the camera needs to adapt to your TV. (Page 59) Sets the language for display on your camera’s LCD.
3 3 CUSTOMIZING THE CAMERA SETTINGS En SETTING THE LANGUAGE SETUP T To 1. 2. 3. 4. SET AUTO OFF TIME TV OPTION LANGUAGE OPTION RESTORE DEFAULT LCD BRIGHTNESS RETURN SELECT set the Language: In the Setup menu, press or repeatedly until Language option is highlighted. Press to enter the Language option submenu. Press or repeatedly to highlight the desired language. Press the OK button to set.
En CUSTOMIZING THE CAMERA SETTINGS FORMATTING THE INTERNAL MEMORY OR MEMORY CARD X1 X1 X2 X2 CAUTION: ! ! 1. Formatting will delete all pictures and video clips from the memory. 2. During the formatting process, NEVER REMOVE the memory card nor batteries, as it will damage the card and/or the camera. 3. When a memory card is not inserted into the camera, selecting the formatting function will format the internal memory instead. All pictures and video clips stored in the internal memory will be deleted.
CUSTOMIZING THE CAMERA SETTINGS The camera provides an option to enable or disable the beep. By default, the beep is turned ON. The camera beeps in any of the following situations: • When the camera is powered on. • After an image is captured. (For this situation, the camera will beep, regardless of the beep setting.) • When any button is pressed, except the Power Button, the Mode Slide Button and the Zoom Buttons.
CUSTOMIZING THE CAMERA SETTINGS En SETTING AF ASSIST LIGHT In low-lighting environment, the camera will turn on the built-in AF (Auto Focus) Assist Light to illuminate the subject that is being focused on. AF Assist Light Description Auto (Default) The camera will turn on AF assist light if it is needed. Off The camera will not turn on the AF assist light even if the subject is in a low-light condition.
To restore the default settings in your camera: 1. In the Setup Menu, press or until Restore Default is highlighted. 2. Press or to highlight No or Yes, and then press OK to confirm. • If No is selected, no change is made. The LCD returns to the previous screen. • If Yes is selected, the LCD shows “Are you sure?” 3. Press or to highlight Yes or No, then press OK. • If No is selected, no change will be made. The LCD returns Setup page.
En SOFTWARE INSTALLATION GUIDE SOFTWARE INSTALLATION GUIDE The software that comes with your Concord 3 Megapixel Digital Camera includes driver, reader, and photo editing programs. These programs transfer the pictures or video clips from your camera to your computer, and enable you to view them on your computer monitor. Refer to the following list of computer system requirements for installation of the programs. Computer System Requirements Windows • 300MHz Pentium II processor or equivalent.
SOFTWARE INSTALLATION GUIDE The installer will automatically detect which software applications need to be installed or if they are not necessary. This will be indicated by the buttons on the splash screen that appears when the CD-ROM is inserted into the computer: Color Description Yellow ( Gray ( ) ) Required or highly recommended to install. Already installed or not necessary to install.
SOFTWARE INSTALLATION GUIDE En FLOW DIAGRAM FOR SOFTWARE INSTALLATION To transfer the pictures and video clips from the memory, the camera must be connected to a computer with the provided Mini-USB cable. Additional setup may be required by some operating systems before connecting the camera to the computer for the first time. Identifying your operating system Windows 98/98SE Windows 2000 Professional Installing the USB Mass Storage Drivers and DirectX 9 p.49 Windows Me/XP Mac OS 9.x/10.
SOFTWARE INSTALLATION GUIDE Windows 1. Right click the My Computer icon on your desktop, and go to Properties. 2. The System Properties Box will appear.(fig.1.1) The information about your computer is listed under the system area. 3.
SOFTWARE INSTALLATION GUIDE En INSTALLING THE DRIVER AND DIRECTX 9 – WINDOWS 98/98SE Do not connect the camera to your computer BEFORE the camera drivers and Microsoft DirectX 9 installation is completed. Step 1 Make sure your camera is powered off and not connected to the computer. Step 2 Make sure the computer is powered on and Windows 98 or 98SE is running. Step 3 Close any other applications or software you may be running. Step 4 Insert the supplied CD-ROM into your computer’s CD-ROM Drive.
Step 9 Click [Install]. Step 10 Install progress bar Step 11 En SOFTWARE INSTALLATION GUIDE The next screen will begin the DirectX setup. Select “ I accept the agreement “ then click [Next >]. Step 12 Step 13 Click [Next >]. Click [Finish]. Your computer will automatically restart.
SOFTWARE INSTALLATION GUIDE En INSTALLING DIRECTX 9– WINDOWS 2000 Step 1 Make sure your camera is powered off and not connected to the computer. Step 2 Make sure the computer is powered on and Windows 2000 is running. Step 3 Close any other applications or software you may be running. Step 4 Insert the supplied CD-ROM into your computer’s CD-ROM Drive.
SOFTWARE INSTALLATION GUIDE Step 1 Make sure your camera is powered off and not connected to the computer. Step 2 Make sure the computer is powered on and Windows is running. Step 3 Close any other applications or software you may be running. Step 4 Insert the supplied CD-ROM into your computer’s CD-ROM Drive.
En SOFTWARE INSTALLATION GUIDE Step 9 Click [Next >]. Step 10 Make sure the two applications are checked and then click [Next >]. Step 11 Click [Next >]. Step 12 The screen will show the status of the installation. Step 13 Click [Finish]. Win98 will request for restart.
Step 1 Make sure your camera is powered off and not connected to the computer. Step 2 Make sure the computer is powered on and Windows is running. Step 3 Close any other applications or software you may be running. Step 4 Insert the supplied CD-ROM into your computer’s CD-ROM Drive. NOTE: If the installer does not start automatically within 30 seconds after the CD-ROM has been inserted, click on “My Computer” either on the Desktop or in the Start Menu and locate the CD-ROM Drive.
En SOFTWARE INSTALLATION GUIDE Step 9 The files will be saved into C:\Program Files\Adobe\ Acrobat 5 automatically. OR You may change the default folder by clicking [Browse…] and selecting a different folder in your computer. Click [Next >]. Step 10 Installation progress Step 11 Select Yes, to restart the computer or No, to restart the computer later. Click [Finish >].
Windows 98/98SE users - Do not connect the camera to your computer BEFORE the camera drivers and Microsoft DirectX 9 installation is completed. 1. Power the camera on. 2. Connect the camera to the computer with the Mini-USB cable provided. • Plug the larger end of the Mini-USB cable that is included with the camera into your PC’s USB port. (Please refer to your computer’s documentation for more information on the location of the USB port.
CONNECTING THE CAMERA TO THE COMPUTER En USING ARCSOFT PHOTOIMPRESSION (WINDOWS ONLY) 1. Connect the camera to the computer. 2. Launch ArcSoft PhotoImpression software by clicking on Start-Programs-ArcSoft Camera Suite and choosing PhotoImpression from the application list on your screen. (fig. 1.1) fig. 1.1 fig. 1.2 3. When the Application opens, click on the Camera/Scanner button.(fig. 1.2) 4. Click on the drop-down list under Select Source and choose Concord Camera. 5.
CONNECTING THE CAMERA TO THE COMPUTER Windows ME/2000/XP: 1. Click once on the “Unplug or Eject Hardware” icon on the right hand side of your task bar. (fig.1.1) 2. Select “Stop Concord Camera USB Mass Storage Device” 3. Click [OK] in the “Safe to Remove Hardware” prompt. 4. Unplug the Mini-USB from the camera. (fig.1.2) Macintosh: 1. Drag the “CONCORD” removable drive icon on the desktop to the Trash. Or click on “CONCORD”, then click “Eject” under “File” or “Special” (if the mouse is not available). 2.
En TV MODE TV MODE CHANGING THE TV MODE SETTING The camera allows you to view individual files and to take pictures or record clips on the television. To begin, check your television documentation to determine the suitable type of TV broadcast standard (TV OPTION): NTSC or PAL. SETUP T 2 3 1. 2. 3. 4. 5. 6. 7. 8.
Error Messages appear on the LCD when the memory is full or when there is a problem with the SD card. Error Message Cause Solution Memory Full Memory (either internal memory or SD card) is full. Follow one of the below methods: 1) Delete unwanted files. 2) Insert an SD card or replace the SD card with another that has free memory space. 3) Transfer the photos/video clips onto your computer. Memory Full The SD card memory isn’t enough to hold the files saved in the internal memory.
En TROUBLESHOOTING TROUBLESHOOTING SYMPTOM POSSIBLE CAUSE POSSIBLE SOLUTION Batteries are not installed correctly. Install batteries correctly by following the indication engraved on the edge of the battery compartment or that on the battery contact. Batteries are flat or weak. Replace batteries. Battery door is not closed properly. Close the battery compartment door properly. To prevent accidentally powering on the camera, it is designed to power on with a set delay.
POSSIBLE CAUSE POSSIBLE SOLUTION The images are dark on the computer and when printing, but all images look fine in Review Mode. Configuration and settings of computer and printer need to be adjusted. The display setting of the computer can be adjusted via the Control Panel’s Display section or the actual display settings of the monitor. The printer’s setting can be adjusted via the Control Panel’s Printers. Refer to the user’s documentation that comes with the computer and printer.
En TROUBLESHOOTING SYMPTOM POSSIBLE CAUSE POSSIBLE SOLUTION My fresh set of batteries took only a few pictures and they are now flat. Are the fresh batteries newly purchased? So-called fresh batteries that have been purchased a long time ago cannot be considered fresh; as battery power tends to drop over an extended period of time. Are the battery contacts dirty? Every once in a while battery contacts need to be cleaned. Refer to the Safety Tips and Maintenance section (p. 71).
POSSIBLE SOLUTION Camera is not set in picture/video clip taking mode. Set the camera to the proper mode for recording video clips, or taking photographs. Power is off. Turn the power on. Camera is in Auto Power off Mode. Turn the power on. The remaining battery power is low. Replace the batteries. Camera is connected to a computer. Disconnect the camera from the computer before taking pictures. The SD card is locked or writeprotected.
En GETTING HELP SYMPTOM POSSIBLE CAUSE POSSIBLE SOLUTION Protective plastic film is still in place on the camera. Make sure the protective plastic film covering the LCD (for protection purposes during shipment) has been removed. LCD The LCD display is dark. Increase the brightness level on The LCD brightness level is set too low or the surrounding lighting your LCD to meet your personal needs. See p.40 for setting the condition is poor. brightness. The LCD is dim or visibility is poor.
POSSIBLE CAUSE POSSIBLE SOLUTION Camera is not responding during picture download to the computer. The USB port of computer is damaged. The USB cable is damaged. Replace or repair the USB port. Replace the USB cable. Computer cannot detect the newly Update the driver in My Computer installed driver > Properties > Hardware > Device Manager. Cannot transfer pictures to the computer. The New Hardware Wizard cannot locate drivers. (Windows 98/98SE) The driver did not install successfully.
GETTING HELP En GETTING HELP Troubleshooting Section in this User’s Guide Please refer to the Troubleshooting section (page 61) first, as it contains some of the most common problems that users encounter. The section lists a number of possible quick-and-easy solutions, which might solve the problem, allowing you to continue enjoying your new Concord 3-Megapixel 3x Optical Zoom Digital Camera .
CAMERA SPECIFICATIONS En CAMERA SPECIFICATIONS Lens 7.25 - 21.7mm (equivalent to 38-114 mm in 35mm format), f/2.8 - f/4.7, 6 groups 6 elements all glass. Aperture 2 steps: f/2.8 and f/5.6 at wide zoom position Shutter Electronic, 4s – 1/1000s Optical Zoom 3x in 6 steps Digital Zoom 4x Focus Range Auto Focus from 60cm to infinity (23.6 in. to infinity), macro from 15 cm to 60 cm (5.9 in. to 23.6 in.) Focusing System 5 area Multi-area AF, Center Spot AF Image Sensor Type 1/1.
CAMERA SPECIFICATIONS Storage Capacity Images Stored on 6MB memory (approx.): Image Quality Image Size 3MP 2MP 1.3MP VGA (2048 x 1536) (1600 x 1200) (1024 x 768) (640 x 480) 36 Fine (4.5:1) 4 6 14 Normal (11:1) 8 13 32 79 Economy (17:1) 15 23 55 130 Images Stored on 16MB memory (approx.): ENU Image Quality Image Size 3MP 2MP 1.3MP VGA (2048 x 1536) (1600 x 1200) (1024 x 768) (640 x 480) Fine (4.
2x, 4x (for 2048 x 1536, 1600x1200, 1280x960); 2x (for 640x480) Flash Mode Auto, Auto + RER, Flash ON and Flash off. Flash Range 0.6 to 2.6m (1.97 to 8.53ft) in Wide; 0.6 to 1.7m(1.97 to 5.58ft) in Tele@ISO100 0.6 to 3.5m (1.97 to 11.48ft) in Wide; 0.6 to 2.1m(1.97 to 6.89ft) in Tele@ISO200 User Interface All information and menus are displayed on TFT LCD display, Review Image, shows frame counter, flash status, self timer, focus mode, image quality, image size, battery status and memory card.
En SAFETY TIPS AND MAINTENANCE SAFETY TIPS AND MAINTENANCE Cleaning the camera body: 1. Please use a soft, dry and dust-free cloth to clean the camera. Cleaning the lens, viewfinder and LCD: 1. Blow off dirt or dust with a blower or canned air. 2. Gently wipe the lens, viewfinder and/or LCD with a micro-fiber cloth. 3. To remove dirt or residue, moisten the cloth with lens cleaning fluid and gently wipe the lens, viewfinder and/or LCD.
SAFETY TIPS AND MAINTENANCE Precautions for the camera: • Do not attempt to modify this camera in any way. This may cause a fire, electric shock or severe damage to the camera. • Do not use the flash in close proximity to people or animals. • When taking photographs, never point the lens of the camera directly into very strong light. • Please do not use this product in close proximity to flammable or explosive gases as this could increase the risk of explosion.
En SAFETY TIPS AND MAINTENANCE • • • • • • • • • • • • repair or malfunction. When using SD Memory Cards do not change the attributes (read-only, etc.) of the files (pictures (JPEG) or video clips (AVI) on the card. Doing so may prevent the camera from working properly when deleting, etc. Do not change the file names or the directory name of the pictures or video clips using a computer or save files other than pictures or video clips taken by this camera onto the SD memory card.
TROUBLESHOOTING En REGULATOR INFORMATION FCC INFORMATION FCC WARNING: This equipment meets the limits for a Class B digital device, pursuant to Part 15 of FCC rules. Only the cable supplied with the camera should be used. Operation with other cables is likely to result in interference to radio and TV reception and could void the user’s authorization to operate this equipment. This device complies with Part 15 of the FCC Rules.
Visit Concord on the Internet www.concord-camera.com Concord 3 Megapixel Digital Camera User’s Guide Copyright 2005 Concord Camera Corp. Version 1.