Mackie Control Mackie Control Extender Mackie Control for Pro Tools User’s Guide CONTROL EXTENDER CONTROL MACKIE FADER PACK VERSION 1.0 HOURS MINUTES SECONDS FRAMES BARS BEATS SUB DIVISION TICKS RUDE SMPTE MACKIE FADER PACK VERSION 2.
Mackie Control CAUTION AVIS RISK OF ELECTRIC SHOCK DO NOT OPEN RISQUE DE CHOC ELECTRIQUE NE PAS OUVRIR CAUTION: TO REDUCE THE RISK OF ELECTRIC SHOCK DO NOT REMOVE COVER (OR BACK) NO USER-SERVICEABLE PARTS INSIDE REFER SERVICING TO QUALIFIED PERSONNEL ATTENTION: POUR EVITER LES RISQUES DE CHOC ELECTRIQUE, NE PAS ENLEVER LE COUVERCLE. AUCUN ENTRETIEN DE PIECES INTERIEURES PAR L’USAGER. CONFIER L’ENTRETIEN AU PERSONNEL QUALIFIE.
User’s Guide Note: If you purchased a Mackie Control on or after March 1, 2003 that has not yet been upgraded, you can receive a free upgrade kit by going to our website at http://www.mackie.com/products/ mackiecontrol/upgrade_kit.html (or you can call Mackie Tech Support at 1-800-258-6883). If you prefer, you can send the unit to the Mackie Woodinville Service Center for the upgrade (a labor charge will apply).
Mackie Control Connection and Setup Set Up OMS Connecting a single Mackie Control: • Connect the Mackie Control to your MIDI interface. The MIDI Output of your interface should connect to the MIDI Input of the Mackie Control. Likewise, the MIDI output of the Mackie Control should be connected to a corresponding MIDI Input of your interface. • (Macintosh OS 9.x or lower only) Mac users will need to set up a device for their Mackie Control under OMS. 1.
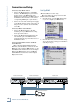
6. OMS will now ask you to save your OMS Studio Setup. User’s Guide 3. OMS will then ask which ports you would like to search for MIDI interfaces. If your MIDI device is USB or PCI you do not need to check anything. 7. Now that you have configured OMS for your MIDI interface, you need to setup your MIDI controller device. 4. Once OMS is done searching for your MIDI interfaces, you will see the screen below. Make sure your MIDI device is listed.
Mackie Control Configuring Pro Tools Set Up Input Devices As stated earlier, Mackie Control HUI mode is a hardware emulation of the original Mackie HUI, created by Mackie Designs in 1997. As far as Pro Tools (or any HUI-compatible software for that matter) is concerned, the Mackie Control is a HUI, meaning that it is compatible with every version of Pro Tools from version 4.1 on.
• Move a fader or knob on your Mackie Control and the corresponding on-screen control should move. If it doesn’t, first check all the MIDI connections. Try using different cables to make the connections. • Move an on-screen fader and see if the corresponding Mackie Control fader moves. If it doesn’t, make sure the settings are correct as described above and in Digidesign’s MIDI Control Surfaces Guide. • Try using a different set of MIDI ports.
Mackie Control Assign a Send Let’s assign a send to Send A on channel 8. Press ASSIGN [10] and then press SEND [13]. Press and hold SEND again and press SEND A [28]. Notice the LCD changes. Turn the V-Pot on channel 8 to choose the desired Send A destination (e.g., Bus 1) and press ASSIGN again to apply the change.
User’s Guide To set up a channel for auto-touch automation, hold down the button in the automation section of Mackie Control labeled TOUCH [30], and press the V-Pot on the channel you want to automate. This step can also apply to the other automation modes (READ, WRITE, LATCH, TRIM, and OFF).
Mackie Control Insert View: Assignment Buttons When Insert view is selected in the Plug-In screen, the LCD displays the available inserts and the type of plug-in assigned to each insert. [8] PAN • Pressing the PAN button changes the V-Pot function to Pan. • The LED next to the PAN button lights. • The ASSIGNMENT display indicates “Pn.” • Pressing PAN a second time sets the V-Pots into Pan Right mode. This mode is used to pan only the right channel on stereo tracks.
To assign the outputs of the current bank of channels: Press the ASSIGN button [10] to enter Assign Mode. The ASSIGN LED should be flashing. • Press the OUTPUT button [12] to select channel outputs for assignment. The current channel output settings will appear on the LCD. • Use the V-Pots to adjust the outputs of the channels and press the ASSIGN button to apply the changes and exit assignment mode.
Mackie Control [14] BANK [18] METERS buttons • Pressing the left or right BANK button jumps over to the next adjacent eight channels on either the left or right side of the current location. • If one or more Mackie Control Extenders are present, the BANK buttons jump over by 8 times the number of devices present. For example, if two Mackie Control Extenders are present in addition to the Mackie Control, the BANK buttons will jump 8 x 3 or 24 channels at a time.
• To return a channel strip’s Pan to its default setting: • Press PAN [8] in the VIEW section. Press and hold the DEFAULT and V-SEL [17] buttons, and press the channel’s V-Pot button [6]. Puts the corresponding Pro Tools channel into Read mode. To return a channel strip’s Send to its default setting: • Press and hold SEND [13] in the VIEW section and select a SEND A-E button [28-32]. Press and hold the DEFAULT and V-SEL [17] buttons, and press the channel’s V-Pot button [6].
Mackie Control UTILITIES [38] CTRL/CLUTCH • Press this button to temporarily disengage a fader from any Mix group. Release the button and the fader obeys group behavior again. This can be used to offset a fader’s level within a group. [46] SAVE • The LED in the SAVE button lights if the session has changed from its currently saved state. Press the SAVE button twice to save the Pro Tools session.
• Sets the Pro Tools Edit selection “out” point to the current locator position. [52] LOOP • Toggles loop playback mode in the Pro Tools Operations menu. Places Pro Tools online or offline when Pro Tools is synchronized to incoming time code (LED is lit when Pro Tools is online). This button is used in combination with several of the transport keys to access additional transport operations. Hold down the Transport Function key and press one of these buttons to execute these functions.
Mackie Control [59] ZOOM and Navigation Buttons This consists of four navigation arrows plus the ZOOM button. The ZOOM button is used to select one of three modes. Selection Mode • Navigation Mode • In Navigation mode, the ZOOM LED is off. The navigation arrows act as region/edit/track location selectors. To position the edit cursor: • The Left arrow moves the edit cursor to the previous region boundary or sync point. Press the ZOOM button again to enter Selection mode.
If you think your Mackie Control or Mackie Control Extender has a problem, please do everything you can to confirm it before calling for service. If the problem is related to setting up and using Mackie Control with your DAW software, contact your software manufacturer’s technical support. If you are absolutely, positively sure it is a hardware related problem, then go to the repair section next for further instructions.
Mackie Designs Inc. 16220 Wood-Red Road NE • Woodinville, WA 98071 • USA US and Canada: 800.898.3211 Europe, Asia, Central and South America: 425.487.4333 Middle East and Africa: 31.20.654.4000 Fax: 425.487.4337 • www.mackie.com E-mail: sales@mackie.