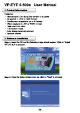
USB Digital Microscope User’s Manual Revision 2.
1. Product Important Issues 1.1 Safety Precautions 1. Avoid touching the lens with your hands. Keep the product safe from electrostatic damage. 2. Store and operate the USB digital microscope within the temperatures of 0° ~ 40°C, humidity: 10% ~ 85%, as this will extend Product life and prevent damage to the product. 3. Keep the product away from liquids. If water or other liquids enter the product interior, immediately unplug it from PC. Continued use product may result in a fire or an electrical shock. 4.
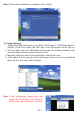
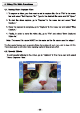
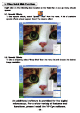
Step 3: Once the installation is complete, click “Finish” . 3.1 Image Viewing 1. To start the digital microscope, go to “Start > All Programs > USB Video Device > AMCap” Once this is done, the LED light in the microscope should light up. 2. Put the object near the USB digital microscope, the distance between both (lens and object distances) don’t exceed to 3cm. 3. Manually rotate the roller in the microscope to adjust the focus. 4.
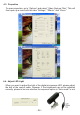
4.3. Properties To open properties, go to “Options” and select “Video Capture Filter.” This will then open up a menu with the tabs “Settings,” “Effects,” and “Zoom.” 4.4. Adjust LED Light When you want to adjust the light of the digital microscope LED, please adjust the dial of the control cable. However, if the brightness can not be adjusted correctly, please to be sure whether the exposure option is “Auto mode” or not.
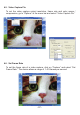
4.5. Video Capture Pin To set the video capture output resolution, frame rate and color space / compression, go to “Options” in the menu bar and select “Video Capture Pin.” 4.6. Set Frame Rate To set the frame rate of a video capture, click on “Capture” and select “Set Frame Rate.” The device allows a range of 1~30 frames per second.