
User's Manual


Introduction Getting Ready
Taking Pictures
Playback Set Up
EN-140
NEXTBACK
Contents Glossary Index Nomenclature Menus and Settings Troubleshooting
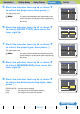
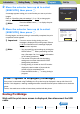
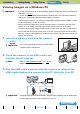
4 Press the POWER button H to turn the
camera on.
[PC MODE] appears on the LCD monitor and you can check the images
stored on the camera's memory card from your PC and copy the
images to your PC.
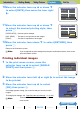
5 A [Removable Disk] icon appears in the
[My Computer] window. Double-click the
icon to open the disk window.
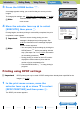
6 Open the [xxxCXBOX] folder or the [xxxCXRSZ] resized
images folder in the DCIM folder and then select and double-
click the image file you want to view.
A Important
• In Windows XP, the Scanner and Camera Wizard window may appear. If this
happens, click the Cancel button to close the window.
• When the camera is connected to a PC and you are viewing or copying images, the
card access LED flashes. Do not do any of the following:
• Remove the camera from the USB cradle.
• Unplug the USB cable.
• Turn off the PC.
BNote
• When the camera is connected to the PC and the two are communicating so that
files can be exchanged, the self-timer LED lights.
• The procedure for disconnecting the USB cable once the camera and PC have
established communication differs according to the version of Windows you are
using. (Æ p.142
)
A Important
If [PC MODE] is displayed on the LCD monitor but no [Removable Disk] icon appears
in the [My Computer] window on the PC, check that the USB cable is securely
connected.
BNote
A number between 100 and 999 is substituted for "xxx" in the [xxxCXBOX] and
[xxxCXRSZ] folder names. (Æ p.182
)
PC
MODE