
Owners Manual


9
OPERATIONS MANUAL
REACH-INS & ROLL-INS
length and width of the floor to provide enough support for the
cabinet and its contents.
NOTE: Shims and sealant are provided with all new roll-
thru models, to aide proper installation. Any shim mate-
rial used must be high density plastic, metal or other solid
that will not deteriorate due to moisture. Wedge shaped
or flat shims 1/16”, 1/8” and 1/4” thick, and at least 3”
wide to match thickness of the cabinet walls, may be
used. Failure to properly shim under the entire floor of
the cabinet will cause it to bend.
IMPORTANT NOTE: It is extremely important that your
cabinet is perfectly level for proper operation. If not level,
the following adverse conditions may occur:
1. The door(s) will not be properly aligned and conse-
quently will not provide a good seal.
2. Your unit may run excessively.
3. An excessive amount of ice will accumulate inside
the cabinet, around the door opening(s) and on
the evaporator coil. If allowed to continue, ice will
eventually block the coil and the unit will fail. This
can result in the loss of all food stored in the cabinet.
4. Defrost water will fail to drain properly and will
overflow the evaporator coil drain pan and into the
cabinet of both refrigerator and freezer models.
CABINET AND DOOR ADJUSTMENT
After the unit is completely level, reinstall all grills, upper end
panels and ramps. Check alignment and adjust as required.
Caulk around the perimeter with NSF-approved sealant to secure
the cabinet in place and comply with sanitation requirements.
Reinstall all doors and verify gaskets seal properly. Adjust hing-
es as required (see “Door Removal and Adjusment”). Make
sure the adjustable flexible wiper on the bottom of each Roll-In
door gently contacts the ramp when the door is closed. Any gaps
must be eliminated, to avoid air leaks which will adversely effect
the performance of the refrigeration system. To check for gaps,
place a flashlight inside the cabinet, close the door(s) and look
under the door for visible light. Adjust the door wiper as needed,
by loosening the attachment screws slightly, then reposition the
wiper, recheck alignment, and retighten the screws.
NOTE: If your cabinet is adjacent to another Roll-Thru,
Tie-In Strips (see “Optional Accessories”) may be
installed for additional stability. Contact the factory for
more information and to order part kits.
SITE PREPARATION
IMPORTANT: The floor where any roll-in or roll-thru unit
is to be located must be level and flat. If not, it must be
made level prior to attempting to install the cabinet. THIS
IS CRITICAL FOR ROLL-THRU MODELS.
The best way to ensure a trouble-free installation is to have a
flat, level surface where the unit will be located, prior to setting
the cabinet in place. If the building floor is sloped or uneven,
due to floor drains or other conditions, a leveling bed should
be constructed. Otherwise it will be necessary to shim and
anchor the cabinet thoroughly, to ensure it remains stable and
the doors operate correctly. Make sure flooring is fully cured
before moving the cabinet into position. Grout and concrete can
release chemicals while curing, which may corrode stainless
steel.
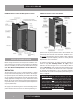
CABINET INSTALLATION
Your cabinet should remain on the skid, with the protective
packaging in place, until transported to the final location. After
the cabinet is in the proper area, remove the door(s) by lifting
them off the hinges and setting in a safe location. Remove cart
ramp(s) at each opening by lifting off the fasteners attached
to the bottom face of the cabinet. The cabinet can be moved a
short distance, into its final position, by carefully pushing on the
lower half of the sides.
NOTE: Use care when handling the doors, as they are
large and heavy. Do not to damage the flexible wipers at
bottom of the doors. To avoid damaging or racking your
cabinet, only push on the sides at a height between 24”
and 48” from the floor.
CABINET LEVELING AND SHIMMING
After the cabinet is in its final location, remove the grills and
upper end panels. Place a 2 foot (or longer) carpenter’s along
the top edges and floor of the cabinet to check level. Use the
level to check if the sides of the cabinet are plumb (vertically).
Use a framing square to check the corners of the cabinet. If the
cabinet is not level, plumb and square, use a level to check the
cabinet floor in all directions and determine the highest area.
The cabinet must be shimmed to level the unit up to this point.
Determine the starting point for leveling, by identifying where
the cabinet is most plumb, straight and square. Insert a tapered
wedge under the adjacent walls, as needed, to raise them up to
a level position. Place shims under the side walls, on 12” cen-
ters or less, for adequate support along the entire length. After
the walls are level and plumb, place additional shims under the