
User's Manual


™
• Press and hold the top button to ramp the light up. Release the button at the
desired light level.
• Press and hold the bottom button to fade the light down. Release the button
at the desired light level.
Air Gap Switch
During routine lamp replacement, remove power from the lamp by engaging the
air gap mechanism. To engage, press on the right side of the top actuator bar until
the left side pops out. All LEDs on the dimmer will turn o and the dimmer will no
longer control the light when the air gap mechanism has been engaged.
Button Tap Sequences
The button tap sequences are defined in the table below. Button tap sequences
that require a single (1) button should use the top-most button installed on the
dimmer. Button tap sequences requiring two (2) buttons should use the top-most
and bottom-most buttons installed on the dimmer.
Function Sequence Button
Identify 4
ZigBee Channel 7
Reboot 15
Factory Reset 9-4-9
Leave Mesh and Reset 13-4-13
Troubleshooting
If the light does not turn on:
• Ensure at least one LED on the face of the dimmer is lit.
• Ensure the light bulb is not burned out and is screwed in tightly.
• Ensure that the circuit breaker is not turned OFF or tripped.
• Check for proper wiring (see “Sample Wiring Configurations”).
• For help on the installation or operation of this product, email or call the
Control4 Technical Support Center. Please provide your exact model number.
Contact support@control4.com or see the web site www.control4.com.
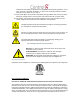
Care and Cleaning
• Do NOT paint the dimmer or its wall plate.
• Do NOT use any chemical cleaners to clean the dimmer.
• Clean surface of the dimmer with a soft damp cloth as needed.
Regulatory/Safety Information
To review Regulatory information for your particular Control4 products, see
the information located on the Control4 website at: http://www.control4.com/
regulatory/.
Patent Information
Protected under U.S. Patents 7,106,261, 7,336,463 and licensed under U.S. Patents
5,905,442 and 5,982,103.
Warranty
For complete warranty information, including details on consumer legal rights as
well as warranty exclusions, review the Warranty card or visit www.control4.com/
warranty.
Figure 5. Multiple Device Location Using Auxiliary Keypad, With Neutral
Connection
Figure 6. Multiple Device Location with Auxiliary Keypad, Without Neutral
Connection
Figure 7. Multiple Device Location Using Configurable Keypad, Neutral Required
Copyright ©2013 Control4. . All rights reserved. Control4, the Control4 logo, the Control4 iQ logo and the Control4 certified logo are registered trademarks or trademarks of Control4 Corporation in
the United States and/or other countries. All other names and brands may be claimed as the property of their respective owners Pricing and specifications are subject to change without notice
About this Document
Part Number: 200-00307, Rev A 11/12/2012
Wiring Diagrams
Figure 3. Single Device Location, With Neutral Connection
Figure 4. Single Device Location, Without Neutral Connection