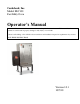
Cookshack, Inc. Model FEC100 Fast Eddy Oven Operator’s Manual Please read this entire manual installation and use of this pellet fired smoker oven. Failure to follow these instructions could result in property damage, bodily injury or even death. Contact local building or fire officials about restrictions and installation inspection requirements in your area. SAVE THESE INSTRUCTIONS Version 10.
Dear Cookshack Customer Your model FEC100 “FAST EDDY’S BARBEQUE OVEN” by Cookshack will produce great barbecue and smoked foods. It is easy to operate, clean and maintain. Use this operator’s Manual to familiarize yourself with the smoker and its operation. If you have a question or problem not covered in the manual, call us as 1.800.423.0698 Monday through Friday, 9:00 AM to 4:00 PM or e-mail us at info@cookshack.com. You can also join the Cookshack Barbecue Forum on our website at www.cookshack.
TABLE OF CONTENTS Fast Eddy’s Smoker Oven Model FEC100 Version 10.
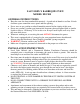
FAST EDDY’S BARBEQUE OVEN MODEL FEC100 GENERAL INSTRUCTIONS Keep the oven free from combustible materials. A good rule of thumb is to allow 24 inch clearance space around the access panel and flue opening. Never store or use gasoline or other flammable material in the vicinity of this oven. Never use gasoline, gasoline-type lantern fuel, kerosene, charcoal lighter fluid, or similar liquids to start or “freshen up” a fire in this oven. Keep all such liquids well away from the oven while in use.
Minimum spacing from combustible material is 6”; these clearances must be maintained unless materials used are non-combustible. Following is the recommended service spacing: Top – 18” Left Side – 24” to load pellets and access to service panel. Right Side – 24” Front – 48” for loading and unloading of product. Back –6” Floor – Must be a non-combustible material and must extend 6” beyond each side of the unit. Install vent at clearances specified by the vent manufacturer.
OPERATING INSTRUCTIONS Before starting check the following: 1. Pellet level 2. Insure that the fire pot is clean and clear of ash. 3. Check to insure that there is not a build –up of grease in the bottom of the cooking chamber. 4. Insure that the heat deflector is in place and clean. 5. Make sure that the pellet slide is clean. Push the “START” button on the control panel. Unit has an automatic ignition system.
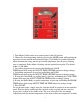
1. Turn Master Switch on the oven control panel to the ON position. 2. Choose the desired operating mode by pressing the MODE button while pushing the up or down arrow until the desired mode flashes: Cook Mode for standard operation, which automatically drops into the preset hold temperature after the preset cooking time is completed; Probe Mode if cooking with the optional meat probe. The default mode is Cook Mode. 3.
the probe is set. At that point the controller will change to the set holding temperature and remain there until the unit is manually shut down. An audible signal indicates that the cook cycle is complete and that the oven is going to the Hold Temperature Mode. If cooking in the default Cook Mode the smoker will cook the product at the selected cooking temperature for the selected cooking time and then change to the selected holding temperature until it is shut off manually.
***CAUTION*** the “RESET BUTTON” is used to clear the current instructions and cause the IQ4 to start over from the beginning. ALWAYS CLEAN THE FIRE POT BEFORE USING THE RESTARTING THE OVEN. Recommended cooking times and temperatures are based on full loads with no holding cycle. Larger or smaller loads or the addition of holding time may require adjustment of cooking time and temperature.
and restrict the flow of the flue gases. Incomplete combustion such as occurs during startup, shutdown, or incorrect operation of the smoker oven will lead to some soot formation which will collect in the exhaust venting system. The exhaust venting system should be inspected at least once every year to determine if cleaning is necessary. Clean Ashes from fire pot and combustion chamber weekly or if it appears as if there is a buildup of ash.
TROUBLE SHOOTING GUIDE Trouble Control Panel does not power up Probable Cause Solution Unit not plugged into a working outlet (110VAC) Check the outlet to insure working. Plug into alternate source. High Temperature limit switch tripped. Unplug Unit Remove control panel access cover. Reset limit switch by pushing in on button. If these procedures to not allow control panel power up, call Customer Service.
Fire does not light Excessive pellet feed Pellet auger not cycling, call Customer Service. Pellet hopper empty Inspect hopper and clean pellet dust out and fill with pellets. Switch on pellet hopper not in contact with lid Clear pellets so lid will fully close or adjust switch to make contact with closed hopper lid. Dirty combustion pot Open fire box and clean combustion pot and try to restart unit. Trouble with igniter Open pellet hopper lid (stops pellet feed). Push start button.
LIMITED WARRANTY POLICY Cookshack Smoker Ovens are guaranteed to be free from defects in material and workmanship under normal use and when installed in accordance with factory recommendations. This limited warranty includes parts and labor for the first 90 days. Following the 90 day period, the two (2) year limited warranty is for parts only. Cookshack, Inc.’s obligation under this warranty shall be to repair or replace at its option any part deemed defective upon examination by Cookshack, Inc.
Service Companies to repair their equipment. This allows each customer to use the service company of their choice. It your unit needs repairs, please contact your preferred local service company. If warranty work is deemed necessary, equipment owners should have their local service company contact Cookshack, Inc. for authorization to perform the repairs. Repair phone number is 580.765.3669.
APPENDIX C 15
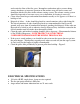
APPENDIX D Keypad Label LA152 Transformer PV627 Control Board PV687 Power Supply PV520 Relay PV631 Relay PV634 Relay PV682 Switch PV361 Probe Jack PV535 Probe Jack Cover PV536 Limit Switch PV552 Behind control panel Door Latch PV169 Hopper Switch PV366 Inside hopper Grill PV005 Hopper Latch PV166 Not shown Probe PV718 Drip Tray Drain Trough Igniter PV310 Inside Fire Pot Power Cord PV461 Auger Motor PV518 Draft Fan PV517 Drain Pan PV702 Casters PV175 16