
Full Product Manual


5
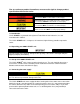
4.3 Starting the pump and adjusting the water flow
DO NOT flood the pads with water, keep them moist. New pads will take a few days before they
become completely saturated. It is normal to have several dry streaks on the face of the pads
about 1 to 2 inches wide. If the streaks are larger adjust the flow control knob to allow more water
to flow onto the pads. NOTE: New pads may also emanate an odor under initial operating
conditions from the resin used to construct the media. Flush the pads by running the pump
without the fan running for at least 12 hours; overnight is best. Empty the sump and refill. Repeat
if odor still exists.
NOTE: Run fan while adjusting the water flow
Once the sump is full, the pump switch may be turned to the ‘ON’ position. The flow control
knob will need to be adjusted on initial start-up. It is located at the side of the unit; it controls
the volume of water that is delivered to the top of the cooling pads.
Prolonged use of hard water without proper water treatment will create mineral deposit
build up causing the pump to fail which is NOT COVERED BY WARRANTY
Pump is equipped with a LOW WATER CUT OFF which may take up to 5 minutes to reset each
time.
5.0 Maintenance and storage
ELECTRICAL SHOCK HAZARD
Disconnect the power supply before performing any service or maintenance on the unit. Failure
to do so may result in serious injury or death.
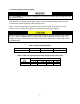
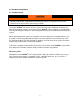
5.1 Removing the cooling media to access the inside of the unit
In order to perform any maintenance on internal components, the cooling pads must be
removed to access the inside of the unit.
1. Remove the (4) bolts connecting the pad retainer bar (pad-side) from the housing.
2. Starting with one of the center pads, tilt pads from the top; lift out of the unit.
Note: Reinstall pads correctly according to the markings on the pads.
An instructional video for removing the cooling media can be found at www.cool-space.com