
Camcorder User Manual
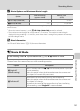

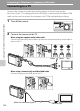
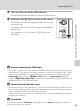
Table Of Contents
- For Your Safety
- Notices
- Introduction
- First Steps
- Basic Photography and Playback: Auto Mode
- More on Shooting
- More on Playback
- Operations in Full-frame Playback Mode
- Viewing Multiple Images: Thumbnail Playback
- Taking a Closer Look: Playback Zoom
- Selecting Playback Mode
- Sorting Favorite Pictures (Favorite Pictures Mode)
- Image Searching in Auto Sort Mode
- Selecting Images Captured on a Specific Day (List by Date Mode)
- Playback Options
- Setting the Image Rating
- Enjoying Slide Show
- Protecting Important Images (Protect)
- Creating a DPOF Print Order
- Rotate Image
- Voice Memo: Recording and Playback
- Editing Images
- Movie Recording and Playback
- Connecting to Televisions, Computers and Printers
- Basic Camera Setup
- Setup Menu
- Welcome Screen
- Time Zone and Date
- Monitor Settings
- Print Date (Imprinting Date and Time)
- Vibration Reduction
- Motion Detection
- AF Assist
- Digital Zoom
- Sound Settings
- Auto Off
- Format Memory/Format Card
- Language
- TV Settings
- Charge by Computer
- Blink Warning
- Reset All
- Copy (Copy Between Internal Memory and Memory Card)
- Firmware Version
- Setup Menu
- Caring for the Camera
- Technical Notes and Index
138
Connecting to a Computer
Connecting to Televisions, Computers and Printers
B Notes on Power Source
• When connecting the camera to a computer, use a battery with a sufficient amount of charge
remaining to prevent the camera from turning off unexpectedly.
• When the camera is connected to a computer via the supplied USB cable with Auto (default
setting) selected for the Charge by computer option in the setup menu, the battery inserted into
the camera is automatically charged using power supplied by the computer (A 142, 165).
• If the AC Adapter EH-62F (A 176) (available separately) is used, COOLPIX S6100 can be powered
from an electrical outlet. Do not use any other make or model of AC adapter as they may cause the
camera to overheat or malfunction.
Transferring Images from a Camera to a Computer
1 Start the computer to which ViewNX 2 was installed.
2 Be sure that the camera is off.
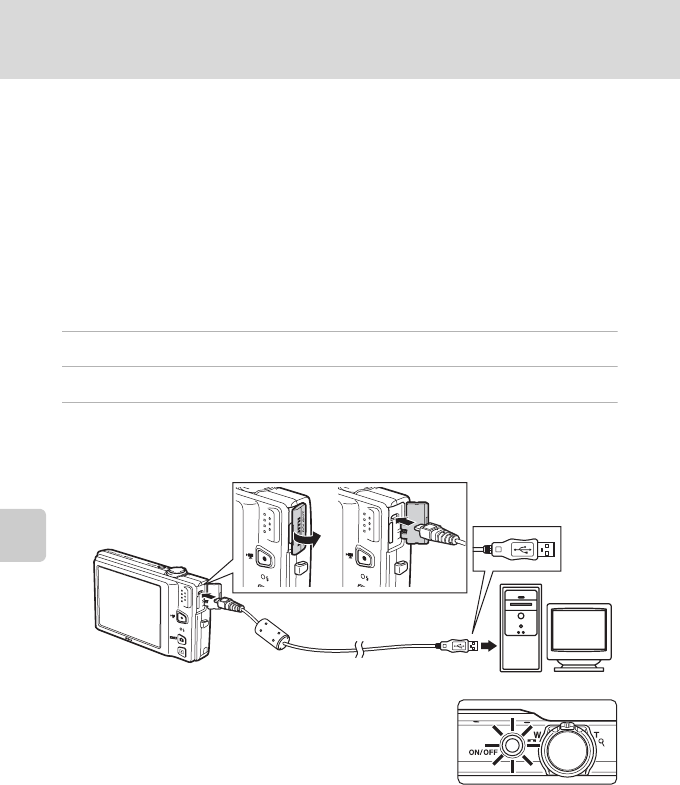
3 Connect the camera to the computer using the supplied USB cable.
Be sure that connectors are properly oriented. Do not attempt to insert connectors at an
angle, and do not use force when connecting or disconnecting the USB cable.
The camera is automatically turned on and the power-on
lamp will light. The camera monitor will remain off.
B Connecting the USB Cable
T
he connection may not be recognized if the camera is connected to the computer via a USB hub.