
user manual
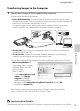
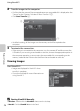

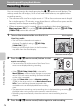
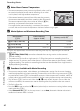

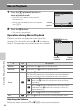
Table Of Contents
- Introduction
- Parts of the Camera and Basic Operation
- Basic Steps for Shooting and Playback
- Shooting Features
- Auto Mode
- Scene Mode (Shooting Suited to Scenes)
- Special Effects Mode (Applying Effects When Shooting)
- Smart Portrait Mode (Capturing Images of Smiling Faces)
- Features That Can Be Set Using the Multi Selector
- Changing the Image Size (Image Mode)
- Functions That Cannot Be Applied Simultaneously
- Face Detection
- Skin Softening
- Focus Lock
- Playback Features
- Recording and Playing Back Movies
- General Camera Setup
- Reference Section
- Using Panorama Assist
- Favorite Pictures Mode
- Auto Sort Mode
- List by Date Mode
- Editing Images (Still Images)
- Editing Functions
- Quick Retouch: Enhancing Contrast and Saturation
- D-Lighting: Enhancing Brightness and Contrast
- Glamour Retouch: Softening Skin and Making Faces Looking Smaller with Larger Eyes
- Filter Effects: Applying Digital Filter Effects
- Small Picture: Reducing Image Size
- Crop: Creating a Cropped Copy
- Connecting the Camera to a TV (Playback on a TV)
- Connecting the Camera to a Printer (Direct Print)
- The Shooting Menu (for Auto Mode)
- Smart Portrait Menu
- The Playback Menu
- The Movie Menu
- The Setup Menu
- Image/Sound File and Folder Names
- Optional Accessories
- Error Messages
- Technical Notes and Index
75
Using ViewNX 2
Playback Features
Transferring Images to the Computer
1 Choose how images will be copied to the computer.
Choose one of the following methods:
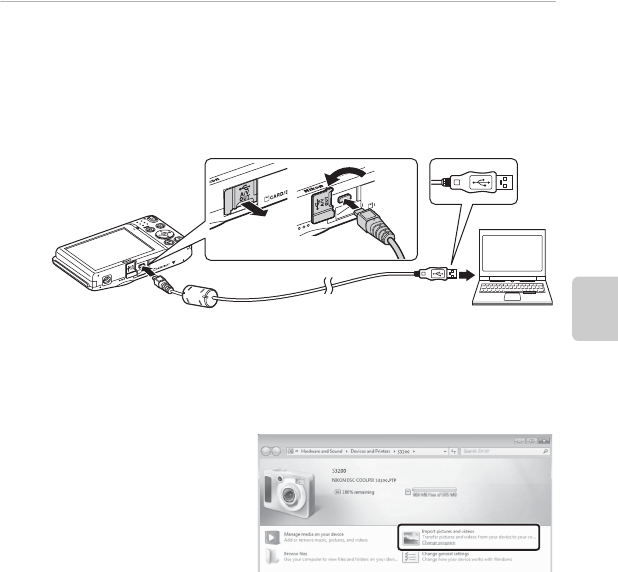
• Direct USB connection: Turn the camera off and ensure that the memory card is
inserted in the camera. Connect the camera to the computer using the supplied USB
Cable UC-E6. The camera automatically turns on.
To transfer images that are saved in the camera’s internal memory, remove the
memory card from the camera before connecting it to the computer.
• SD card slot: If your computer is equipped with an SD card slot, the card can be
inserted directly in the slot.
• SD card reader: Connect a card reader (available separately from third-party
suppliers) to the computer and insert the memory card.
If a message is displayed prompting you to choose a program, select Nikon Transfer 2.
• When using Windows 7
If the dialog shown at right is
displayed, follow the steps
below to select
Nikon Transfer 2.
1Under Import pictures and
videos, click Change
program. A program
selection dialog will be
displayed; select Import File using Nikon Transfer 2 and click OK.
2Double-click Import File.
If the memory card contains a large number of images, it may take a while for
Nikon Transfer 2 to start. Wait until Nikon Transfer 2 starts.
B Connecting the USB Cable
The connection may not be recognized if the camera is connected to the computer via a USB hub.