
user manual

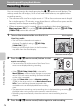
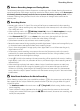
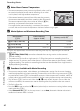

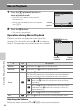
Table Of Contents
- Introduction
- Parts of the Camera and Basic Operation
- Basic Steps for Shooting and Playback
- Shooting Features
- Auto Mode
- Scene Mode (Shooting Suited to Scenes)
- Special Effects Mode (Applying Effects When Shooting)
- Smart Portrait Mode (Capturing Images of Smiling Faces)
- Features That Can Be Set Using the Multi Selector
- Changing the Image Size (Image Mode)
- Functions That Cannot Be Applied Simultaneously
- Face Detection
- Skin Softening
- Focus Lock
- Playback Features
- Recording and Playing Back Movies
- General Camera Setup
- Reference Section
- Using Panorama Assist
- Favorite Pictures Mode
- Auto Sort Mode
- List by Date Mode
- Editing Images (Still Images)
- Editing Functions
- Quick Retouch: Enhancing Contrast and Saturation
- D-Lighting: Enhancing Brightness and Contrast
- Glamour Retouch: Softening Skin and Making Faces Looking Smaller with Larger Eyes
- Filter Effects: Applying Digital Filter Effects
- Small Picture: Reducing Image Size
- Crop: Creating a Cropped Copy
- Connecting the Camera to a TV (Playback on a TV)
- Connecting the Camera to a Printer (Direct Print)
- The Shooting Menu (for Auto Mode)
- Smart Portrait Menu
- The Playback Menu
- The Movie Menu
- The Setup Menu
- Image/Sound File and Folder Names
- Optional Accessories
- Error Messages
- Technical Notes and Index
78
Recording and Playing Back Movies
Recording and Playing Back Movies
Recording Movies
You can record movies by simply pressing the b (e movie-record) button. The
settings made for still images, such as hue and white balance, are applied when
recording movies.
• The maximum file size for a single movie is 2 GB or the maximum movie length
for a single movie is 29 minutes, even when there is sufficient free space on the
memory card for longer recording (A80).
• When no memory card is inserted (when recording in the internal memory),
Movie options (E47) is set to m VGA (640×480) by default. n HD 720 p
(1280×720) cannot be selected.
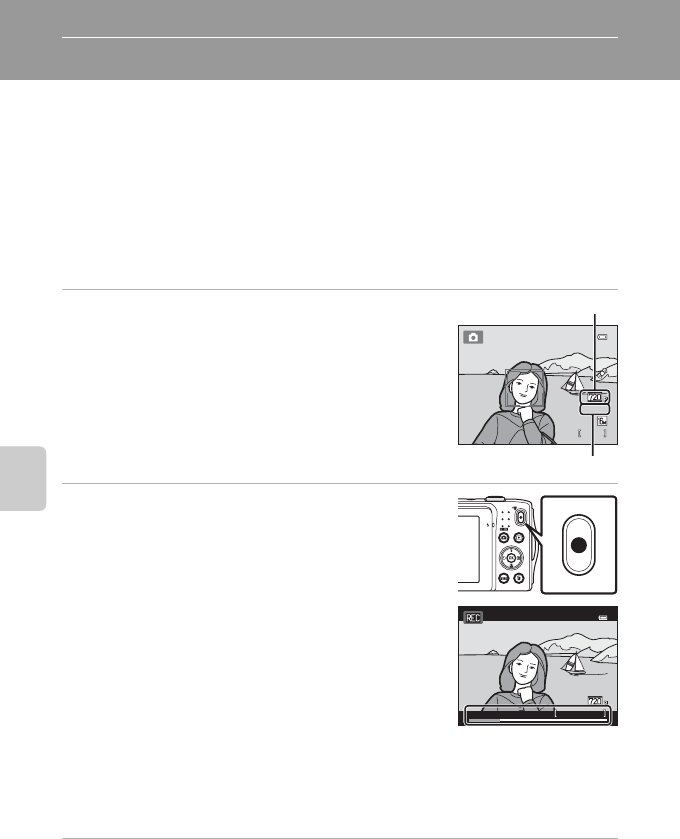
1 Turn on the camera and be sure that it is in
shooting mode.
• The icon for the selected movie option is
displayed. The default setting is n HD 720p
(1280×720) (A81).
* Maximum movie length shown in the illustrations
may differ from the actual display.
2 Press the b (e movie-record) button to start
movie recording.
• The camera focuses at the center of the frame. Focus
areas are not displayed during recording.
• When n HD 720p (1280×720) is selected for
Movie options, monitor display changes to an aspect
ratio of 16:9 with movie recording (the area indicated
on the right is recorded).
• When the Photo info option in Monitor settings
(A86) in the setup menu is set to Movie frame+auto
info, a frame indicating the area captured in the
recorded movie can be displayed before recording
starts.
• The approximate remaining movie recording time is displayed during recording. C is
displayed when saving movies to the camera’s internal memory.
• Recording stops automatically when the maximum movie recording time has
elapsed.
3 Press the b (e movie-record) button again to end recording.
9 5 0
950
8 m 0 s
8 m 0s
Maximum movie length*
Movie options
1 5 s
15s