
User's Manual
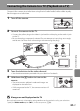
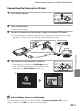
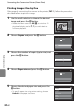
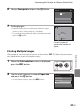


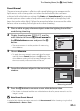
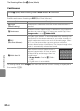
Table Of Contents
- Introduction
- Parts of the Camera and Basic Operation
- Basic Steps for Shooting and Playback
- Shooting Features
- Auto Mode
- Scene Mode (Shooting Suited to Scenes)
- Special Effects Mode (Applying Effects When Shooting)
- Smart Portrait Mode (Capturing Images of Smiling Faces)
- Features That Can Be Set Using the Multi Selector
- Changing the Image Size (Image Mode)
- Functions That Cannot Be Applied Simultaneously
- Face Detection
- Skin Softening
- Focus Lock
- Playback Features
- Recording and Playing Back Movies
- General Camera Setup
- Reference Section
- Using Panorama Assist
- Favorite Pictures Mode
- Auto Sort Mode
- List by Date Mode
- Editing Images (Still Images)
- Editing Functions
- Quick Retouch: Enhancing Contrast and Saturation
- D-Lighting: Enhancing Brightness and Contrast
- Glamour Retouch: Softening Skin and Making Faces Looking Smaller with Larger Eyes
- Filter Effects: Applying Digital Filter Effects
- Small Picture: Reducing Image Size
- Crop: Creating a Cropped Copy
- Connecting the Camera to a TV (Playback on a TV)
- Connecting the Camera to a Printer (Direct Print)
- The Shooting Menu (for Auto Mode)
- Smart Portrait Menu
- The Playback Menu
- The Movie Menu
- The Setup Menu
- Image/Sound File and Folder Names
- Optional Accessories
- Error Messages
- Technical Notes and Index
E20
Connecting the Camera to a Printer (Direct Print)
Reference Section
Printing Images One by One
After properly connecting the camera to the printer (E19), follow the procedure
described below to print an image.
1 Use the multi selector to choose the desired
image and press the k button.
• Rotate the zoom control to f (h) to switch to 12-
thumbnail display, and to g (i) to switch back to
full-frame playback.
2 Choose Copies and press the k button.
3 Choose the number of copies (up to nine) and
press the k button.
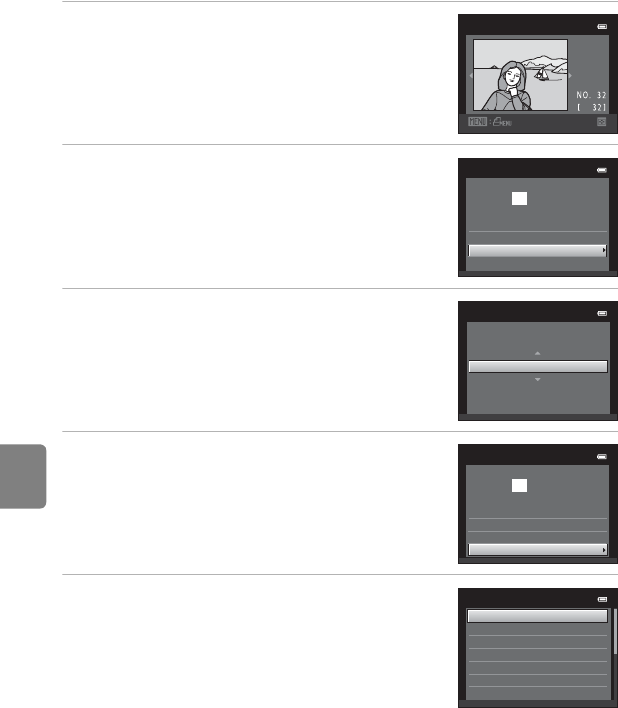
4 Choose Paper size and press the k button.
5 Choose the desired paper size and press the
k button.
• To specify paper size using printer settings, choose
Default in the paper size menu.
Print selection
1 5/05
201 2
Start print
prints
001
PictBridge
Copies
Paper size
Copies
4
Start print
prints
004
PictBridge
Copies
Paper size
Paper size
Default
100
×
150
mm
4
×
6
in.
8
×
10
in.
Letter
5
×
7
in.
3.5
×
5
in.