
Digital Camera User Manual


68
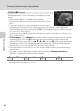
Shooting Suited to Scenes (Scene Mode)
More on Shooting
Shooting for a Panorama
The camera focuses on the subject at the center of the frame. Use a tripod for the
best results. Set Vibration reduction (A 166) to Off in setup menu (A 157)
when using a tripod to stabilize the camera.
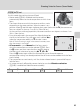
1
Rotate the mode dial to
y
, press the
d
button and choose
p
Panorama assist
(
A
55).
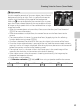
Panorama direction icons are
displayed to show the direction
in which images will be joined.
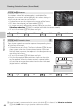
2 Use the rotary multi selector to choose the
direction and press the k
button.
Select the direction in which images will be joined in the
completed panorama; right (I), left (J), up (K), or down
(L).
The yellow panorama direction icon (I I) is displayed for
the current direction and the direction is fixed when the
k button is pressed. The icon changes to the white fixed direction I icon.
If necessary, apply flash mode (A 30), self-timer (A 33), macro mode (A 36), and
exposure compensation (A 37) settings with this step.
Press the k button again to choose a different direction.
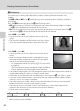
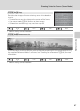
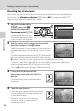
3 Frame the first portion of the
panorama scene and take the first
picture.
One third of the image will be displayed as
translucent.
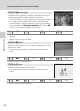
4 Take the next picture.
Frame the next image so that one third of the
frame overlaps the first image, and press the
shutter-release button.
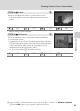
Repeat this process until the necessary
number of images has been taken to
complete the scene.
Exit
Scene menu
Panorama assist
Image mode
3 5
35
F 3.5
F 3.5
1 / 25 0
1/250
End
End
End
3 4
34