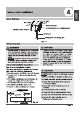
Table of Contents ye ERT ACCESSORIES airs ensnare ones 04 Safety Precautions... 05 Installation Overview 06 a. Outdoor Unit Installation Instructions... b. Outdoor Unit Types and Specifications. c. Notes on Drilling Hole in Wall.
Refrigerant Piping Connection. 18 A. Notes on Pipe Length and Refrigerant Piping Connection Instructions...19,, 2s Wiring 27 ® a. Outdoor Unit Wiring. eo b. Indoor Unit Wiring... Power Specifications. pa BPE Air Evacuation. 26 a. Evacuation Instructions. 26 b. Note on Adding Refrigerant. 27 J Test Run.
The air conditioning system comes with the following accessories. Use all of the installation parts and accessories to install the air conditioner. Improper installation may result in water leakage, electrical shock and fire, or cause the equipment to fail Tubing & Fittings Soundproof / insulation sheath a > 2 Owner's manual _— 1 Installation manual _ 1 Others Component of display control unit (some models) «+ There are two types of remote controls: wired and wireless.
Read Safety Precautions Before Installation Incorrect installation due to ignoring instructions can cause serious damage or injury. The seriousness of potential damage or injuries is classified as either a WARNING or CAUTION. A WARNING 0 CAUTION » Carefully read the Safety Precautions before installation. + In certain functional environments, such as kitchens, server rooms, etc, the use of specially designed air-conditioning units is highly recommended.
i ain 4 Lady has Sle INSTALLATION ORDER Install the indoor unit Install the outdoor unit Install the drainpipe (Page 7) (Page 13) (Page Evacuate the refrigeration system Connect the wires Connect the refrigerant pipes (Page 25) (Page 21) (Page Perform a test run (Page 27) +4 Page 6 >
Indoor Unit Parts '] Electric control cabinet won! / A 3 TTT i i bei Air inlet _— Heat exchange Air filter(inside air-in Drain hose Refrigerant connecting pipe Safety Precautions » Securely install the indoor unit on a structure that can sustain its weight. If the structure is too weak, the unit may fall causing personal injury, unit and property damage, or even death » DO NOT install the indoor unit in a bathroom or laundry room as excessive moisture can short the unit and corrode the wiring.
hi iat es Step 2: Hang indoor unit. 1. Please refer to the following diagrams to locate the four positioning screw bolt holes on the ceiling. Be sure to mark the paces where you will drill ceiling hook holes. This unit has been installed air intake pipe flange, but there is no air filter. (see Fig. mm 1.44720 mm i 1.44728 oss Bye E ACHE 3 EH Efe g 3 Els 110 nu [4] NOTE: 12 groups all around NOTE: 14 groups all around Fig. 4.
RFT 270m apes pus) 17 47/440mm ret 18rtidmm lis ato] LH JH nl EEE Lome [T3 <7 1515785 mm far inst fare) 3 , | NOTE!16 groups all around {the same of the air inlet flange) Fig. 4.5 (Applicable to 60K series only) Table 4-1 (Applicable to 24~60K series only) EC Gas pipe connection 315.
es hi iat The size of installation for indoor unit following the This unit has installed with air filter. Table.4-2 (unit: inch/mm) eli al RT {symmetry of air inlet opening) 24K | | | | 6.31160 | | | | 8.9226 | 8.4215 | 120.6525 4320110 10.8270 45/1146 72/185 8.6220 | 37.8060 41.7108] 8.9226 12.4315 | 344/875 143/110 45K~60K | 15/380 } 10/253 | 10.6270 | 354/900 | 45/1145 12.8325 S5K-60K | 33.8858 155 1/1400 27. 5/700 56 5/1436 46 7/1188 15/485 20/500 0.91000 11/280 146.
Wood 3. Install hanging screw bolts. Place the wood mounting across the roof beam, « Cut off the roof beam. then install the hanging screw Fig.4.7) + Strengthen the point at which the cut was made. Consolidate the roof beam. . After you select an installation location, align the refrigerant pipes, drain pipes, as well as indoor and outdoor wires with their connection points before mounting the unit. Hanging screw bolts 5. Drill 4 holes 4” (10cm) deep at the ceiling Fig. 4.
aneurysm JUN Loopy Step 3: Diagrammatic sketch for installing the main body Installing the dust proof net and canvas air passage 1. Install the dust proof net according to the installation manual; 2. Install the canvas air passage underneath the dust proof net. Step 4: Duct and accessories installation 1. The air inlet and air outlet duct should be far enough apart enough to prevent air outlet entering Air Inlet. 2. There is dust filter on the indoor unit. 3.
Outdoor Unit Installation Instructions Step 1: Select installation location. The outdoor unit should be installed in the location that meets the following requirements: 6 Place the outdoor unit as close to the indoor unit as possible. 6 Ensure that there is enough room for installation and maintenance. & The air inlet and outlet must not be obstructed or exposed to strong wind. B Ensure the location of the unit will not be subject to snowdrifts, accumulation of leaves or other seasonal debris.
kh Teed Split Type Outdoor Unit Vertical Discharge Type Outdoor Unit (Refer to Fig 5.4, 5.5, 5.6, 5.10 and Table 5.1) (Refer to Fig 5.7, 5.8, 5.9 and Table 5.2) Wall or obstacle) ERR H Air Outlet >120acm / 47% Fig. Fig. Fig. 5.5 — J Fig. 5.8 {Wall or obstacle) Fig. 5.6 J >11.8" 30am Air on Table 5.1: Length Specifications of Split Type Outdoor Unit (unit: mm/inch) Fran LET ET 760x590x285 (29.9x23.2x11.2) 530 (20.85) | 290 (11.4) 810x558x310 (31.9x22x12.2) 549.216) 13250128) Pw >11.8° /30am 845x700x320 (33.
NOTE: The minimum distance between the Drain Joint Installation outdoor unit and walls described in the installation guide does not apply to airtight rooms, Be sure to keep the unit unobstructed in at least two of the three directions (M, N, P} (See Fig. 5.10) Before bolting the outdoor unit in place, you must install the drain joint at the bottom of the unit. (See Fig. 5.12) 1. Fit the rubber seal on the end of the drain joint that will connect to the outdoor unit. 2.
The drainpipe is used to drain water away from the unit. Improper installation may cause unit and property damage. te all piping to prevent condensation, which could lead to water damage. « If the drainpipe is bent or installed incorrectly, water may leak and cause a water-level switch malfunction, « In HEAT mode, the outdoor unit will discharge water. Ensure that the drain hose is placed in an appropriate area to avoid water damage and slippage. + DO NOT pull the drainpipe forcefully.
3. Using a 2.5” (65-mm) core drill, drill a hole in The unit with pump. the wall. Make sure that the hole is drilled ata 4 pa move the test cover. slight downward angle, so that the outdoor Fill the water pan with 2 liters of water. end of the hole is lower than the indoor end by about 0.5” (12mm). This will ensure proper water drainage (See Fig. 6.5). Place the protective wall cuff in the hole. This protects the edges of the hole and will help seal it when you finish the installation process.
lee Safety Precautions Notes On Pipe Length and Elevation Ensure that the length of the refrigerant pipe, the number of bends, and the drop height between = All field piping must be completed by a the indoor and outdoor units meets the licensed technician and must comply with requirements shown in Table 7.1: the local and national regulations. » When the air conditioner is installed in a small room. measures must be taken to Table 7.
Refrigerant Piping Connection Instructions Step 2: Remove burrs. Burrs can affect the air-tight seal of refrigerant piping connection. They must be completely removed. 1. Hold the pipe at a downward angle to prevent burrs from falling into the pipe. . Using a reamer or debarring tool, remove » The branching pipe must be installed horizontally. An angle of more than 10° may 2 cause malfunction. all burrs from the cut section of the pipe.
6. 7. Table 7.2: PIPING EXTENSION BEYOND FLARE LE gauge ihe Place flaring tool onto the form. Turn the handle of the flaring tool clockwise until the pipe is fully flared. Flare the pipe in accordance with the dimensions shown in table 7.2. FORM LL {Unit chumming] Ar] » Ensure to wrap insulation around the piping. Goa | ZITS ans | ase Direct contact with the bare piping may result mane in burns or frostbite.
Safety Precautions = Disconnect the power supply before working on the unit, » All wiring must be performed according to local and national regulations. * Wiring must be done by a qualified technician. Improper connections may cause electrical malfunction, injury, or fire. ¢ An independent circuit and single outlet must be used for this unit.
Table 8.2: Other World Regions indoor Unit Wiring Lab Epp GREET Re Et all TE 1 Prepare the cable for connection Appliance (A) Gale G31) a. Using wire strippers, strip the rubber jacket <6 0.75 from both ends of the signal cable to reveal 6-10 1 about 15¢m (5.9) of the wire. 10-16 15 b. Strip the insulation from the ends of the TE 3% SE wires. ¢. Using a wire crisper, crimp the u-lugs to 25-32 4 y the ends of the wires. 32-45 6 . 2. Remove the cover of the electric control box b.
Using the wire control to set external static pressure (some models) + You can use the unit's automatic airflow adjustment function to set external static pressure. « Automatic airflow adjustment is the volume of blow-off air that has been automatically adjusted to the quantity rated. 1. Make sure the test run is done with a dry coil. If the coil is not dry, run the unit for 2 hours in FAN ONLY mode to dry the coil. 2.
Safety Precautions * Use a vacuum pump with a gauge reading lower than -0 pampas and an air discharge capacity above 40L/min. + The outdoor unit does not need vacuuming. DO NOT open the outdoor unit's gas and liquid stop valves, * Ensure that the Compound Meter reads -0.1MPa or below after 2 hours. If after three hours the gauge reading is still above -0.1MPa, check if there is a gas leak or water inside the pipe. If there is no leak, perform another evacuation for 1 or 2 hours.
Note On Adding Refrigerant Refrigerant charging must be performed after wiring, vacuuming, and the leak testing. + DO NOT exceed the maximum allowable quantity of refrigerant or overcharge the system. Doing so can damage the unit or impact it's functioning. Charging with unsuitable substances may cause explosions or accidents, Ensure that the appropriate refrigerant is used, » Refrigerant containers must be opened slowly. Always use protective gear when charging the system. « DO NOT mix refrigerants types.
id ad 2. Before Test Run A test run must be performed after the entire system has been completely installed. Confirm the following points before performing the test: a) Indoor and outdoor units are properly installed. b) Piping and wiring are properly connected. ©) No obstacles near the inlet and outlet of the unit that might cause poor performance or product malfunction. d) Refrigeration system does not leak. e) Drainage system is unimpeded and draining to a safe location.