
Programming Manual


100
WaveLinx User Manual
www.eaton.com/wavelinx
Logging into the Wireless Area Controller Webpages
Establish a connection from a computer to the Wireless Area Controller to access administrator functions in the internal webpages.
The steps in this section assume that the Wireless Area Controller has not been connected to a building network and is still in its factory
default state for wireless name and username/password. If the Wireless Area Controller is connected to the building network, or the
wireless name and password has been changed from the default, please refer to the network administrator for access information.
Step 1: Make sure that the computer being used has wireless connectivity and has a compatible web browser installed. The WaveLinx
internal webpage configuration is accessed using Google Chrome version 70 or higher, Internet Explorer version 11 or higher, and Mozilla
Firefox version 63 or higher.
Step 2: Go to the location of the Wireless Area Controller. On the front plate of the Wireless Area Controller below the blue Eaton LED,
locate the label with the MAC ID. Make note of the MAC ID shown.
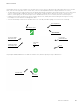
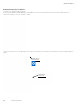
Step 3: Ensure that the computer’s Wi-Fi is active, and then navigate to the list of available Wi-Fi networks. Locate the Wi-Fi network with
the name Eaton-XXXXXXXXXXXX (where X is a string of letters and numbers). If there is more than one Wireless Area Controller in the
facility, more than one wireless ID with this naming criteria may be shown. Select the Wi-Fi network Eaton-XXXXXXXXXXXXXX where the
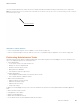
X characters match the MAC ID noted in the last step. Enter the password wclAdmin when prompted matching the case shown and join
the network.
Connect to the
correct Wireless Area
Controller network
Enter the administrator
password
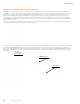
Verify connection