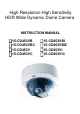
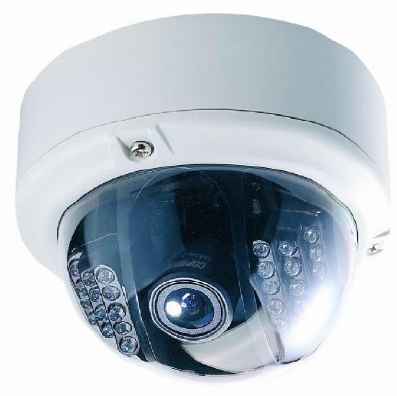
High Resolution High Sensitivity HDR Wide Dynamic Dome Camera INSTRUCTION MANUAL □15-CD453VB □15-CD453VBC □15-CD453V □15-CD453VC □15-CD453VBI □15-CD453VBIC □15-CD453VI □15-CD453VIC
CONTENTS PRECAUTION……………………………………………….2 FEATURES….……………………………………………….3 SPECIFICATIONS…………………………………………..3 INSTALLATION……………………………………………...5 OSD MENU OPERATION INSTRUCTION……………….
PRECAUTION Do not open or modify Do not adjust the camera's internal circuits or power supply modules, as it may cause damage to the unit. For internal set up and repair, please consult our dealer. Do not put objects inside the unit Do not put metal objects or flammable substance inside the camera for it may cause damage to the unit. If water or liquid gets inside of the camera please disconnect power immediately and contact with your dealer.
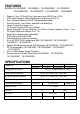
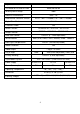
FEATURES MODEL:15-CD453VB、15-CD453V、15-CD453VBC、15-CD453VC 15-CD453VBIC、15-CD453VIC、15-CD453VBI、15-CD453VI l l l l l l l l l l l l Super Hi- Res.
Digital Zoom 2X, Manual, PAN / TILT S/N Ratio WITH Auto 3D-DNR More than 56 dB Wide Dynamic Range 48dB Gamma Characteristic 0.45 / 1.
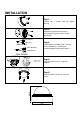
INSTALLATION Step1: Remove the 3 screws from the domes housing. Step2: Attach the base of the housing to the wall/ceiling by fixing the screws into the drilled holes. BNC(VIDEO OUT) Step3: POWER INPUT SINGLE POWER Connect power and video signal (see left) Ensure the polarity is correct when connecting power to the terminal block. +/- BNC(VIDEO OUT) POWERPO W ER + POWER INPUT DUAL POWER Sept 4: Adjust the cameras focus, angle and functions. Step 5: Attach the domes cover and insert the screws.
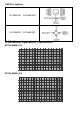
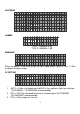
OSD Key explains 15-CD453VBI、15-CD453VBIC 15-CD453VB、15-CD453VBC OSD Menu Operation Instruction SETUP MANU (1/3) I M A G E → 1 I S 2 A G C / 3 G A M M A E N H A N C E 4 I R Q U A L R T Y S E N S 5 I 6 B A C K L S E T T 7 W H I I I N G I G H T T E B A L A N C E SETUP MANU (2/3) F U N C T I O N → 1 M E N U M O T I O N D E T E C T 2 D I G I T A L 3 H / V R E V E R S E 4 F R E E Z 5 C R O S S 6 M A S K 7 P O S I L Z O O M I N E / N E G A 6
SETUP MANU (3/3) E X T R A S E T T I N G → 1 L A N G U A G E 2 T I 3 R E S E T T L E / S Y N C 1. To display OSD MENU on the screen, press the MENU key for 2 seconds. 2. To turn of OSD MENU on the screen, press the RETURN key. 3. Press UP, DOWN and ENTER keys to move and make the decision. IRIS → P E A K → O F F / O N A —— █ — — — — — — P A L C → A U T O / O F F —— █ — — — — — — A E S → A U T O / F I X O F F AES SETTING 1. AUTO: To select MANUAL IRIS lens. 2.
AGC/SENS A G C / S E N S →A G C →A U T O / F I X ———— █ ———— S E N S D N R →A U T O / F I X — █ —————— — O N / O F F GAMMA G AMM A →T Y P E 1 / T Y P E 2 TYPE 1: GAMMA= 0.45 TYPE 2: GAMMA= 1.00 ENHANCE E N H A N C E H G A I N —————— █ —————— V G A I N —————— █ —————— When the picture is too sharp to get the clear video output, adjust H Gain / V Gain to acquire the best image. IR SETTING I R S E T T I NG →O F F / E X T / A U T O 1.
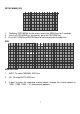
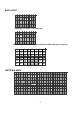
BACK LIGHT B A C K L I G H T →O N / O F F A R E A Backlight function is not working. B A C K L I G H T →O N / O F F A R E A 48 backlight areas can be selected and shown by gray marking.
MOTION DETECT M O T I O N D E T E C T S E C S E N S L ——— — █ —— —— H D I S P L A Y O F F / O N → O F F / O N 6 0 → A R E A 3 0 T I M E → 1 0 48 motion detection areas can be selected and shown by gray marking.
FREEZE F R E E Z E →O F F / O N CROSS LINE C R O S S L I N E →O F F / O N MASK M A S K →N O = 1 O F F / →H H V V O — — — — N S E S E T N T N A R T = D = A R T = D = POSI/NEGA P O S I / N E G A →P O S I / N E G A LANGUAGE L A N G U A G E →E N G L I S H 中文 ( 繁體 ) 11 0 3 0 2 0 8 0 3 0 3 0 9
TITLE T I T L E → ! 0 @ P ` p P O " 1 A Q a q S # 2 B R b r I $ 3 C S c s T % 4 D T d t I & 5 E U e u O ' 6 F V f v N ( 7 G W g w ) 8 H X h x * 9 I Y i y → + : J Z j z O U D ; K [ k { F P O / < L \ l | F = N ] n } > M ^ o ~ ? O _ █ WN RESET/SYNC R E S E T / S Y N C → R E S E T →O N P H A S E →O F F / O N [ U N D E T E C T E D ] → █ ——— ———————————— + [UNDETECTED]: No Line-Lock Signal Input. THIS DEVICE COMPLIES WITH PART 15 OF THE FCC RULES.