
User`s manual

36
administrator is authorized to change it which is comprised of four numbers between 0 and 9.
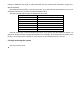
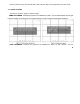
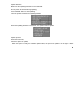
PASSWORD CHECK: If you choose “ON”, users have to input the password before entering menu. You
can setup the DVR’s configuration if you enter the administrator password. And the common user password
just allows you to the check the live image or saved record; if you choose “OFF”, there is no limitation on
configuration. Anyone can enter the system directly without password. (Fig3.2.4 Password check)
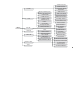
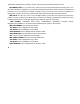
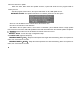
TIME SETUP: Use the “Up” “Down” “Left” and “Right” buttons to move the cursor and use the number key
in panel or remote controller to modify the value. If the DVR is recording or playing back the visit to this menu
is not allowed unless the recording or playing back is stopped. (Fig3.2.5 Time setup)
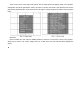
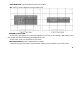
TIME FORMAT: YY/MM/DD: Asian format, Year/Month/Day; DD/MM/YY: European format,
Day/Month/Year; MM/DD/YY: American format, Month/Day/Year. (Fig3.2.6 Time format)
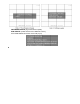
TIME OSD FORMAT: Time format of live-image.
TOP-WHITE: Time is displayed on top in white
TOP-BLACK: Time is displayed on top in black
BOTTOM-WHITE: Time is displayed at the bottom in white
BOTTOM-BLACK: Time is displayed at the bottom in black
OFF: There is no time displayed in the live-image.
TIME STAMP FORMAT: Time format of plays back mode.
TOP-WHITE: Time is displayed on top in white
TOP-BLACK: Time is displayed on top in black
BOTTOM-WHITE: Time is displayed at the bottom in white