
Installation manual


Viper Installation Manual
Publication Number: 621260373INS - 6 - © 2008-2009, IMI Cornelius Inc.
INSTALLATION
DELIVERY, INSPECTION & UNPACKING
NOTE:IMI Cornelius is not responsible for damaged freight. If damage
is found, you must save all packaging material and contact the freight
carrier. Failure to contact the carrier within 48 hours of receipt may
void your claim.
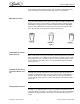
1. Inspect the carton and note any damage, regardless if it appears
minor. If the carton is damaged, note on the consignee copy of the
freight invoice “exterior carton damage – concealed damage
possible” and contact the freight company immediately.
2. Remove any staples along the bottom edge of the carton and lift
the carton off the pallet.
3. Remove the exterior carton sleeve, internal fillers and plastic bag
around the unit. Carefully inspect the unit for damage.
4. Remove the bolts holding the dispenser to the pallet.
5. Remove the packing fillers from the top of the unit.
6. Inspect the dispenser cabinet and make sure it has no scratches,
dents or any other cosmetic defects.
7. Make sure that the glass or plastic merchandiser panels are not
scratched or cracked.
8. Open the packages of loose parts and inspect all of the parts for
damage or missing parts. Check the parts received against the
packing list to insure receipt of all parts.
Seal Replacement:If unit is installed more than three months from
date of production, replace the seals according to the instructions
accompanying the spare seals supplied with the unit. Unite date of
manufacture is included in the unit serial no. as follows: The date
code follows the first letter of the serial number. The next four
numbers reflect the date of manufacture. The first two represent the
year, the next two the week. For example, 62A0815xxxxxx would be a
unit produced during the 15th week of 2008.
COUNTER LOCATION
Select a location in a well ventilated area, close to a grounded electrical outlet
and backroom connections. The counter must be capable of supporting a
minimum of 400 pounds. If possible do not place the unit close to hot and/or
steaming machines.
The minimum clearance is: 2 in. (5.08 cm) in back and 12 in. (30.48 cm) on top
of the unit. If both sides have a minimun clearance of 2” (5.08 cm), then the unit
may be flush to the wall in the back.
For ambient temperatures at or above 100
o
F, 4" of rear clearance is required.
Condenser air is drawn in from the sides or back and discharged out the
top. Failure to maintain clearance space will reduce the capacity of the
unit and cause premature compressor failure.