Data Port Anywhere Setup Guide
Table of Contents Contacting KONEXX Inside Cover Pre-Installation 2 Data Port Anywhere Installation 3 Windows Connection Setup 5 Establishing Your Connection 9 Locating the Host Modem’s Phone Number 11 Level Switch Settings Table 14 Operating Tips & Troubleshooting 18 Warranty Information 22 Why Data Port Anywhere (DPA)? As a mobile notebook user you need modem connectivity to send and receive critical information when you are working at client sites and hotels.
Pre-Installation System Requirements - Windows 98 or later. Compliant with USB 1.1 requirements for bus powered devices. USB Hub supports low power or self powered USB devices (each USB port provides 100 mA). Pre-installation Guidelines - Before installing your DPA, observe the following guidelines: CONNECTION WARNING - Never connect the DPA directly to the telephone line or telephone wall outlet. Use the procedures in this User's Guide to avoid damaging your DPA.
Data Port Anywhere Installation Step 1. Connect the USB cable on the DPA to your computer USB port. The first time you connect the DPA to your computer, you will be prompted to install USB drivers, simply follow the prompts. The DPA uses standard Microsoft drivers. Follow the prompts to identify the DPA to your operating system. Step 2. Remove the coiled handset cord from the telephone handset (2A) and insert it into the DPA jack labeled PHONE (2B). 2A 2B Step 3.
Optional Connection: If you want to use the telephone for voice communications while the modem is not in use, connect the included coiled handset cord to the telephone handset and the DPA jack labeled HANDSET. If you have connected the telephone handset to the DPA lift the telephone handset and listen for a dial tone. If you do not hear the dial tone, check your connections to ensure they match those shown in the diagram below.
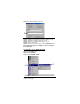
Windows Connection Setup If you use the DPA while traveling we recommend that you modify your modem settings to setup your modem for manual dialing. Why Manual Dial? Because most digital PBX systems, such as Nortel Meridian, Rolm and others do not accept the analog dialing tones generated by the modem. In order to connect with the host modem you will have to manually dial the host modem’s number on the telephone keypad. Why x3? The x3 command makes the manual dial process easier.
Step 5. In the General tab, highlight the modem to be used, then Select PROPERTIES (not Dialing Properties) Step 6. Select CONNECTION TAB Step 7. Under Call preferences uncheck the “Wait for dial tone before dialing” box Step 8.
Step 9. In the Extra Settings box type x3 Step 10. Click OK to exit Advanced Connection Settings screen Step 11. Click OK to exit Modem Properties screen Step 12. Click Close to exit Modems Properties screen Step 13. Close Control Panel Step 14. Reboot your computer and proceed to Establishing Your Connection (Rebooting your computer is only necessary after first installing x3). To enter the “x3” in Windows 2000: Step 1. Select START button Step 2. Select SETTINGS Step 3.
Step 4. Double click PHONE AND MODEM OPTIONS icon Step 5. Click MODEMS tab Step 6. Click PROPERTIES Step 7. In the General Tab, Uncheck – Wait for dial tone before dialing Step 8.
Step 9. In the Extra Initialization commands box type x3 Step 10. Click OK to enter the x3 into the Windows default settings Step 11. Click OK to exit Phone and Modem Options screen Step 12. Close Control Panel Step 13. Reboot your computer and proceed to Establishing Your Connection (Rebooting your computer is only necessary after first installing x3). Establishing Your Connection Step 1. Write down the phone number (including area code if necessary) of the host modem that you wish to call.
Step 3. If the phone has a volume control, ensure that the volume is set to mid-range. Do this by lifting the handset to your ear and adjust the volume control to mid-range. Step 4. Return the telephone handset in the cradle. Step 5. Using your computer, begin the dial up or connection process as normal (choose login, sign on, dial, etc.). Step 6. After the modem completes dialing lift the telephone handset from the cradle and place it on your desktop.
Locating a Host Modem Phone Number (Windows 98) For Windows 2000 see next page Step 1. Double click the MY COMPUTER icon located on your desktop Step 2. Double click the DIAL-UP NETWORKING folder Step 3. Right click on the Dial-Up connection you are trying to connect to and choose Properties.
Step 4. Write down the telephone number that appears (w/ area code) Locating a Host Modem Phone Number (Windows 2000) Step 1. Double click the MY COMPUTER icon located on your desktop Step 2.
Step 3. Double click the Network and Dial-up Connections icon located in the Control Panel Step 4. Right click on the Dial-up connection you are trying to connect to and choose PROPERTIES Step 5.
Level Switch Settings Table The Data Port Anywhere Level switch adjusts the transmit level of your modem to the telephone set. The Level switch is manually set in one of four settings and is dependent on the telephone set you’re using. Level 3 - Approximately 75% of the electronic or digital PBX telephone systems you will encounter use Setting 3.
Level Switch Settings Table (Cont.) Telephone Manufacturer Telephone Switch Set Model Setting Model 227 --Model 432 --Fujitsu Focus 196 --Others 4 GAI-tronics Cohort 3 G.E. none specified --G.T.E. none specified --Harris Lanier 3 Hitachi Digital Model 200 1 HCX-5000 1 Intecom IBX 3 Inter-tel Hitech/1232 1 MPK-2 1 Axxess 3 Premier 1 or 4 Phoenix 1 or 4 Others 1 Isoetec Key Systems 3 Digital PBX 1 ITT/Cortelco None Specified 2 Iwatsu Omega 2 Omega III 2 or 3 Omega IV 1 or 4 Kokyo Co.
Level Switch Settings Table (Cont.
Level Switch Settings Table (Cont.
Operating Tips and Troubleshooting A. USB Drivers - The DPA uses standard Microsoft drivers. When installing the DPA for the first time, you will be prompted by the computer to install/load drivers. Follow the prompts to identify the DPA to your operating system. B. Telephone Handset - The handset must be out of its cradle when the modem is in use. When the modem is in use, the handset will be electronically disconnected and you will not be able to talk on or hear from the telephone handset.
G. Princess and Trimline telephones - DPA will not operate with "Princess" or "Trimline" telephones, which have the keypad in the handset. The electronics with which the DPA interacts are not accessible in these telephones. H. Tone dialing - Make sure your modem is configured for Tone (DTMF) dialing. Your DPA will not work with pulse (rotary) dialing. Your modem user guide or operating instructions should describe this procedure. I.
O. Contacting Technical Support – 800-275-6354. If Tech Support is not available to take your call, please leave a voice mail message including your name, the telephone number you would like us to call, and a brief description of the problem you’re encountering. You can also send questions and comments to our 24-hour fax line at (858) 550-7330 or send e-mail to support@konexx.com.
for you to make necessary modifications in order to maintain uninterrupted service. 6. If trouble is experienced with this equipment, please contact the service center for repair and/or warranty information. If the trouble is causing harm to the telephone network, the telephone company may request you to remove the equipment from the network until the problem is resolved. User repairs must not be made, and doing so will void the warranty. 7.
telecommunications company cause to request the user to disconnect the equipment. User's should ensure for their own protection that electrical ground connections of the power utility, telephone lines and internal metallic water pipe system, if present, are connected together. This precaution may be particularly important in rural areas. CAUTION: Do NOT attempt to make such connections yourself; contact the appropriate electrical inspection authority or electrician.
To receive TECHNICAL SUPPORT at no charge for a 2-year period, complete both sides of this Registration Card. Registration Card must be postmarked to KONEXX within 14 days of purchase. Stamp and mail, or register on our web site at www.konexx.com, or fax both sides to KONEXX at 858-550-7330. Where did you purchase your Data Port Anywhere? Vendor: City: Price Paid (Approx.