
User guide


INSTALLATION, OPERATION AND MAINTENANCE MANUAL – COSA 9610™
Page 14 of 44
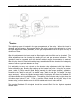
2.4. MECHANICAL CONNECTIONS
2.4.1. General
• Location and amount of connections may vary depending on type and execution of
the analyzer. See the project specific drawings of your order.
• Tubing connections on the COSA 9610™ are Swagelok double ferrule compression
type fittings for imperial sizes. (Reducers to metric fittings or NPT thread are
available)
• Only seamless and annealed imperial size instrument tubing according ASTM A-249 at
a maximum permissible hardness of Rockwell B-90 may be used.
• Tubing must be cut off straight and de-burred thoroughly. (Inside and outside of
tubing cutting edge)
• The outside surface of the tube ends entering the fittings must be clean and free from
scratches.
• Nuts and ferrules do not have to and must not be removed to avoid mixing up of the
nuts and or ferrules
• Tubing must be pushed into the fitting onto the seat
•
Hand-tighten the nut and mark the nut against the fitting
•
Use a correct size wrench to lock the body of the fitting and tighten the nut with another
correct size wrench for 1- 1/4 turn for 1/4" fittings, 3/4 turn for 1/8" fittings. (Watch the marks)
• Before connecting the tubing to the analyzer they must be blown through with dry
nitrogen or instrument air to remove all particles.
• All connections must be checked against leakage prior to putting the analyzer in
operation or installing the tubing.
• Pressurise the lines with nitrogen or instrument air at 7bar maximum to perform leak
test. Check each connection with soap. (e.g. snoop)
• Make sure before pressurizing for leak-test that the power to the analyzer is off
(sample and calibration selection valves closed) and that the instrument air supply
isolation valve in the analyzer is closed.
• Vent connections must not be pressure tested while connected to the analyzer.
Disconnect and cap these tubes if leak test is required.
• Re-connection of the fittings is done by hand tightening the nut followed by wrench
tightening for 1/4 turn.
• If a leak is detected, it might be fixed by tightening the fitting step by step a little
more (up to a 1/4 turn) until it is tight. Then the fitting has to be inspected if it has
not been over-tightened. This is done by disconnecting the fitting and to check if the
ferrules can still be rotated in relation to each other and the pipe. (If the ferrules can
also be moved in an axial direction the fitting is too loose) If the ferrules are stuck, the
pipe has to be cut just after the nut and newly installed according above instructions
using new ferrules. (The nut can be re-used)
•
If this does not solve the problem, remove the fitting and inspect the fitting body for
damage. If it is damaged the complete fitting must be replaced.