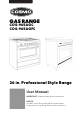
GAS RANGE COS-965AGC COS-965AGFC 36 in. Professional Style Range User Manual IMPORTANT: Read and save these instructions.
THANK YOU FOR YOUR PURCHASE Thank you for your purchase. We know that you have many brands and products to choose from and we are honored to know that you have decided to take one of our products into your home and hope that you enjoy it. COSMO Appliances are designed according to the strictest safety and performance standard for the North American market. We follow the most advanced manufacturing philosophy. Each appliance leaves the factory after thorough quality inspection and testing.
TABLE OF CONTENTS RANGE SAFETY .........................................................................4 The Anti-tip Bracket ..................................................................6 PARTS AND FEATURES ...........................................................11 ELECTRONIC CONTROL .........................................................13 Setting the Clock and Timer ...................................................14 COOKTOP USE ...............................................................
RANGE SAFETY Your safety and the safety of others are very important. We have provided many important safety messages in this manual and on your appliance. Always read and obey all safety messages. This is the safety alert symbol. This symbol alerts you to potential hazards that can kill or hurt you and others. All safety messages will follow the safety alert symbol and either the word “DANGER,” “WARNING” or “CAUTION.” These words mean: DANGER An imminently hazardous situation.
WARNING Fire Hazard If the information in this manual is not followed exactly, a fire or explosion may result causing property damage, personal injury or death. - Do not store or use gasoline or other flammable vapors and liquids in the vicinity of this or any other appliance. - WHAT TO DO IF YOU SMELL GAS • Do not try to light any appliance. • Do not touch any electrical switch. • Do not use any phone in your building. • Clear the room, building, or area of all occupants.
(for COS-965AGC only) 6
IMPORTANT SAFETY INSTRUCTIONS WARNING: or damage when using the range, follow basic precautions, including the following: • WARNING: TO REDUCE THE RISK OF TIPPING OF THE RANGE, THE RANGE MUST BE SECURED BY PROPERLY INSTALLED ANTI-TIP DEVICES. TO CHECK IF THE DEVICES ARE INSTALLED PROPERLY, SLIDE RANGE COMPLETELY FORWARD, LOOK FOR ANTITIP BRACKET SECURELY ATTACHED TO THE FLOOR BEHIND THE RANGE AND SLIDE RANGE COMPLETELY BACK UNTIL THE REAR RANGE FOOT IS UNDER ANTI-TIP BRACKET.
WARNING NEVER use this appliance as a space heater to heat or warm the room. Doing so may result in carbon monoxide poisoning and overheating of the oven. WARNING NEVER cover any slots, holes or passages in the oven bottom or cover an entire rack with materials such as aluminum foil. Doing so blocks airflow through the oven and may cause carbon monoxide poisoning. Aluminum foil linings may also trap heat, causing a fire hazard.
IMPORTANT SAFETY INSTRUCTIONS • DO NOT TOUCH SURFACE • Clean Cooktop With Caution – UNITS OR AREAS NEAR UNITS – Surface units may be hot even though they are dark in color. Areas near surface units may become hot enough to cause burns. During and after use, do not touch, or let clothing or other flammable materials contact surface units or areas near units until they have had sufficient time to cool. Among those areas are the cooktop and surfaces facing the cooktop.
IMPORTANT SAFETY INSTRUCTIONS • Proper Installation – The range, when installed, must be electrically grounded in accordance with local codes or, in the absence of local codes, with the National Electrical Code, ANSI/NFPA 70. In Canada, the range must be electrically grounded in accordance with Canadian Electrical Code. Be sure the range is properly installed • technician. Disconnect the electrical supply before servicing the appliance.
PARTS AND FEATURES This manual covers several different models. The range you have purchased may have some or all of the items listed. The locations and appearances of the features shown here may not match those of your model.
BURNER PARTS OFF MAX a MIN b c d e a Control Knob Off Position b Burner Cap c Burner Head d Electrode e Flame Detector (On Some Models) 12
CONTROL PANEL 36" MODELS Burner Controller Clock and Timer Oven Controller Function Buttons ON FIRST USE: press the center function button to put the oven in manual mode before using. CLOCK AND TIMER Your model has a digital display, 12-hour clock with three Control buttons. IMPORTANT: In the event of a power failure, all settings including the time display will be lost. When the power is returned, the bar above Timer Set and 12:00 will be displayed.
For instructions on how to use your range, scan QR Code: SETTING THE CLOCK AND TIMER Oven Timed Cooking To start cooking time, set the TIMER to desired amount of time. This can be done before or during the middle of the oven heating. 1) Press and release the Function button until the Start indicator blinks. Display - /Decrease Cooking Time Function Setting the Clock 1) When first connected to AC power or after a power outage, the display will blink "12:00" and the Clock indicator will blink.
COOKTOP USE Read the instructions before installing or using this appliance. 1. This appliance shall be installed in accordance with the regulations in force and only used in a well-ventilated space. 2. The use of a gas-cooking appliance results in the production of heat and moisture in the room in which it is installed. Ensure that the kitchen is well ventilated: keep natural ventilation clear or install a mechanical ventilation device (mechanical extractor hood). 3.
COOKWARE MATCH PAN DIAMETER TO FLAME SIZE The flame should be the same size as the bottom of the pan or smaller. Do not use small pans with high flame settings as the flames can lick up the sides of the pan. Oversized pans that span two burners are placed front to rear, not side to side. USE BALANCED PANS Pans must sit level on the cooktop grate without rocking. Center the pan over the burner. USE A LID THAT FITS PROPERLY A well-fitting lid helps shorten the cooking time.
OVEN USE CONTAINER TABLE Burner Min Saucepan Max Saucepan Auxiliary 3.5” (9.0 cm) 6.3” (16 cm) Semi-rapid 5.1” (13 cm) 7.1” (18 cm) Rapid 5.9” (15 cm) 10.2” (26 cm) Triple ring 8.3” (21 cm) 10.2” (26 cm) COOKING WITH THE GAS OVEN BAKING AND ROASTING This oven features a gas burner located under the oven cavity which provides evenly distributed heat from the bottom of the oven. The heat rises naturally to bake food evenly.
OVEN USE FEATURES CONTROL Light The oven cavity light turns ON when the Light or Conv. Fan knob function is selected. Conv (Convection) Fan During convection cooking, the fan provides heated air circulation throughout the oven. The movement of heated air around the food can help to speed up cooking by penetrating the cooler outer surfaces. Food cooks more evenly, browning and crisping outer surfaces while sealing moisture inside. OVEN TIPS AND TECHNIQUES Baking is cooking with heated air.
BAKE CHART RACK POSITION TEMP.
MEATS Pork Loin Roast (boneless or bonein) Shoulder Poultry Chicken whole Turkey Breast Cornish Hen Lamb Half Leg Whole Leg WEIGHT OVEN TEMP. RACK (lb) POSITION °F (°C) TIME (min. per lb) INTERNAL TEMP.
RANGE CARE CLEANING IMPORTANT: Before cleaning, make sure all controls are off and the oven and cooktop are cool. Always follow label instructions on cleaning products. Soap, water and a soft cloth or sponge are suggested first unless otherwise noted. Do not use abrasive cleaning products. Warning: Do not obstruct the flow of combustion and ventilated air. EXTERIOR PORCELAIN ENAMEL SURFACES Food spills containing acids, such as vinegar and tomato, should be cleaned as soon as the entire appliance is cool.
RANGE CARE BURNER SPREADER Wash the burner spreader frequently with boiling water and detergent to remove any deposits which could block the flame outlet. Before reinstalling, dry the burner spreader thoroughly so the burner will ignite properly. COOKTOP CONTROL KNOBS • Pull knobs straight away from control panel to remove. • When replacing knobs, make sure knobs are in the Off position. Cleaning Method: Soap and water or dishwasher: NOTE: Do not use steel wool, abrasive cleansers or oven cleaner.
TROUBLESHOOTING First try the solutions suggested here to possibly avoid the need of a service call. BAKING AND ROASTING PROBLEMS With any oven setting poor results can occur for many reasons other than a malfunctioning oven. Check the chart below for causes of the most common problems. Since the size, shape and material of baking utensils directly affect the baking results, the best solution may be to replace old baking utensils that have darkened and warped with age and use.
TROUBLESHOOTING Cakes high in middle with crack on top Pie crust edges too brown • • • • • • • Oven temperature too high Baking time too long Pans touching each other or oven walls Incorrect rack position Pan size too small Oven temperature too high Edges of crust too thin COOKTOP PROBLEM POSSIBLE CAUSE SOLUTION Burner will not ignite There is no power to the cooktop Plug into a grounded 3 prong outlet. Replace fuse or reset circuit breaker. Burner will not operate First time use.
TROUBLESHOOTING Cooking results are not what expected Using incorrect cookware See the “Cookware” section. The control knob is See the “Controls” section. not set to the proper heat level. OVEN PROBLEM POSSIBLE CAUSE SOLUTION Oven is not heating No power to the oven Reset the circuit breaker or replace the fuse in the electrical box to your oven. Oven control not turned on Make sure the oven temperature has been selected.
WARRANTY AND SERVICE For full warranty details on this product please visit: http://www.cosmoappliances.com/warranty TO RECEIVE WARRANTY SERVICE, YOUR PRODUCT MUST BE REGISTERED. TO REGISTER, VISIT: WWW.COSMOAPPLIANCES.
IMPORTANT Do Not Return This Product To The Store If you have a problem with this product, please contact Cosmo Customer Support at +1(888)784-3108 DATED PROOF OF PURCHASE, MODEL #, AND SERIAL # REQUIRED FOR WARRANTY SERVICE IMPORTANT Ne pas Réexpédier ce Produit au Magasin Pour tout problème concernant ce produit, veuillez contacter le service des consommateurs Cosmo Customer Support au +1(888) 784-3108 UNE PREUVE D’ACHAT DATEE EST REQUISE POUR BENEFICIER DE LA GARANTIE.
NOTE:
Cosmo is constantly making efforts to improve the quality and performance of our products, so we may make changes to our appliances without updating this manual. Electronic version of this manual is available at: www.cosmoappliances.