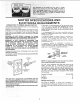
MODEL NO. 113.239201 SHAPER ONLY 113.239390 SHAPER WiTH STEEL LEGS AND MOTOR Serial Number Model and serial number may be found on the front of the table. You should record both model and serial number in a safe place for future use. WOOD CAUTaON: Read GENERAL and ADDITIONAL SAFETY • assembly e operating iNSTRUCTIONS carefully Sold by SEARS, Part No. 72036 SHAPER o repair ROEBUCK AND parts CO., Chicago, IL. 60684 U.S.A. Printed in USA.
....... _L,_l_J̧¸ .... general I....... rr'l ......... - -II ..... i ¸ I li instructions safety • for power tools 1. KNOW YOUR POWER TOOL Read and understand the owner's manual and affixed to the tool. Learn its application and limitations as wetl as the specific potential hazards peculiar to this tool, 2. GROUND 3. KEEP GUARDS in working alignment. and in proper adjustment KEYS Cluttered areas and must not be slippery benches of Keep proper footing 15.
ADDiTiONAL SAFETY iNSTRUCTIONS FOR WOOD SHAPER CAUTION: Turn Power Cord adju st ments. motor when switch changing "OFF" Shaper and disconnect cutters or making 19, NEVER perform freehand shaping - Use either the fence, or a starting pin in the table and a collar on the spindle, or a pattern. Safety is a combination of operator common sense and alertness at all times when the Wood Shaper is being used, 20. Do not place your material being cut.
ii 'can: 'reSult: in foreign which::can result in before cornmencing Sears E LE CTRICA CONNECTING TO POWER SOURCE This machine must be grounded operator from efectr:ic shock. while OUTLET in use to protect Plug power cord into a 120V properly protected by a t5 amp dual element If the outlet the adapter as shown known ground. tt sure that your by a qualified NOT PERMIT FINGERS TO TOUCH OF PLUGS WHEN INSTALLING OR PLUG TO OR FROM THE OUTLET, cord is worn or cut, or damaged immediately.
UNPACKING AND CH ECKING CO NTENTS Model 113.239390 Wood Shaper is shipped complete one carton and includes st:eel legs and motor. .... : ................................ Instruction for Power Tools 2 2 .......... Additional Safety Instructions for Wood Shaper ...... Motor Specifications and Electrical Requirements .... UNPACKING AND CHECKING CONTENTS ....... List of Loose Parts .............................. ASSEMBLY ...................................... Tools Needed ................................
, i,," ':' _ .. " H tnclude .i ¸¸ . Item A B C D E F G H J K L M H • : ;.: PartName 0_. Leg • S++e+,"ii&+_+.+; +i+++++'_ +;+: i:i:i:i;::ii ++ eNut, Hex 1]4-20 ._+++ ..... ....:.;: ........ 2B o L0ckwasher, 114 External ................... 2B Channel, Support ....................... 2 Stiffener .............................. 2 Stiffener, Side .......................... 2 Stiffener; End .......................... 2 • Screw, Pan lid. Ty. A N8 x 1/2 ............ 4 • Nut, Flex Hd. t/2-13 .........
INSTALLING ELEVATING ROD AND TABLE SUPPORT Position table upside down on 2 x 4's on edge for support and clearance for Spindle assembly. 1. Install (3/8-24) jam nut on short elevating rod and screw the rod into side of spindle assembly. 2. Remove spindle lock knob. Insert the spindle assembly into the table support, position the long angle of the elevating rod straight down and tighten jam nut securely. The angle portion of elevating rod must be parallel with spindle assembly. 3. Install 4.
5/16 INHEXNUTS INSTALLING 1. MOTOR PULLEY Install motor pulley (flat-faced pulley) on motor shaft, with closed end of pulley facing out. Tighten pulley set screw securel y. 5132 SETSCREW f /" MOTOR IN, WRENCH PUL LEY F LUSH W{TH SHAFT _IOTOR 2. MOiNT PLATE MOTOR Using table insert as a spacer, position motor on motor mount plate to provide a distance of 1/4-inch from mounting edge of motor mount plate as shown. Tighten the four motor mount bolts securely and recheck for correct positioning.
MOUNTING MOTOR SUPPORT ASSEMBLY MOTO R TO SHAPER MOTOR 1. Place V-belt on motor pulley and attach motor mount plate to shaper base with two bolts (3/8-16 x 1-inch) and washers. Leave bolts finger tight. 2. Roll the belt onto spindle pulley, pull motor mount plate toward end of base until belt is tight enough to prevent slipping and tighten the two bolts. Each bolt should be in approximately the same position in the base slots.
Item A B C D E F G H j K L Qty, Part Name Leg .... .......... _ e Screw, TrussHd. l/4_20xS]8 .,. ..... .,... • Nut. Hex 1/4_20 , .. ..................... Lockwasher, _/4 E xternat ................ Channel. Support ........................ Stiffener ............................... Stiffener, Side ........................ Stiffener, End .......................... o Screw, Pan Hd•Ty. A N8 × t/2 ............ o Nut. Hex Hd. 1/2-13 .................... • Foot, Leveling .........................
5/16-18 X 2 IN, HEX HD. SCREWS AND WASHERS FENCE INSTALLING FOR STRAIGHT SHAPER FENCE -EDGE SHAPING ONLY Install the fence with two 5/16-18 x 2 inch hex head screws and two plain washers. These screws thread into tapped holes in the table, Adjust the fence as outlined on page 13. GUARD INSTALL! NG SHAPER CUTTER GUARD FOR CURVED OR IRREGULAR SHAPING ONLY NOTE: 1. Fence must Assemble Cutter ]/4-28 SUPPORT LOCI(NUT be removed. Guard as illustrated. L.
SHAPER 10 cwrTE_ GUARD 8 FENCE LOCK KNOB _ SP|NDLE _:6 KEYED NUT "_"_. WASHER 9¸ FENCE FACE J_ 5 SPACERS [2 EACH 7/'t6 IN,) _"-"_ 11 STArTiNG PIN TABLE 7 FENCE !__ _X'/4 _) ADJUSIING SPINDLE KNOB CONTROL LEVER ELEVATING ] SPINDLE 1 ON-OFF LOCK MOTOR (NOT \ FURNISHED) MOTOR SHAPER MOTOR MOUNT PLATE BASE ROTATION The motor equipped with, the shaper is designed to be operated in a clockwise or counterclockwise r0tation by use of a select switch tocated on the motor.
c. TO lock switchin OFFposition..,holdswitchIN withonehand.,. REMOVE key with other hand, Provides added protection for irregular shaping. is adjustable for various thickness of material. ALWAYS LOCK THE SWITCH "OFF" WHEN SHAPER IS NOT IN USE... REMOVE KEY AND KEEP IT IN A SAFE PLACE,,. ALSO... tN THE EVENT OF A POWER FAILURE (ALL OF YOUR LIGHTS GO OUT) TURN SWITCH OFF .,, LOCK IT AND REMOVE THE KEY.
ADJUSTMENTS WARNING: FOR YOUR OWN SAFETY, TURN SWITCH "OFF" AND REMOVE PLUG FROM POWER SOURCE OUTLET BEFORE MAKING ANY ADJUSTMENTS. ADJUSTABLE I, SHAPER FENCE Move both fence faces fence adjusting knobs. out 3/4" by turning the two :STRAIGHT EDGE FENCE Position fence framing square adjusting knob. 2. .
BASIC SHAPING OPERATmONS NOTE: This shaper is designed for use with maximum 2t/2 inch diameter cutters having a 1/2 inch diameter bore. 1. For those operators who prefer to use a motor that rotates clockwise (facing pulley end) which would drive the spindle in a clockwise direction the motor select switch should be in the up position. With this combination, the work would be fed into the cutter from the left-hand side of the table. In most cases, the cutter would have to be turned over. 2.
A'JX WC_KPIECE STRAIGHT 27 IN; EDGE SHAPING CAUTION: The Shaper fence must be used in all straight edge shaping operations. I; When shaping stock 3 inches wide or _ess, an auxiliary fence/work Support must be used as shown. 2. Make the push stick as shown.
IRREGULAR OR CURVED SHAPING [ A variety of shapes may be produced with the shaper by changing the the height of cutter in relation to the workpiece, by using various combinations of cutters on successive passes, and/or by inverting cutter and changing direction of spindle rotation and feed direction. The table insert must be removed if the cutter does not clear the hole in the insert when the cutter is lowered below the table surface: 1.
Workpiece MUST contact collar L_ toward the miter 5_ 4, WARNING: LUMBER. DO NOT ATTEMPT of the cutter and addition, the following operations are some which performed::or_: the shaper - shaping with a NOTE:I After a few hours of operation, tighten both t screws securely with the Hex wrenches provided. TO SHAPE WARPED PIVOT AROUND In the FRONT gauge slot. pattern, l,t0ngue and groove joints, reading and fluting, etc:. (" Power Tool Know How" Handbooks are available ).See Recommended Accessories st.
MAINTENANCE WARNING: FOR YOUR OWN SAFETY, TURN SWITCH "OFF" AND REMOVE PLUG FROM POWER SOURCE OUTLET BEFORE MAINTAINING OR LUBRICATING YOUR SAW. NOTE: After a few hours of operation, tighten both pulley set screws securely with the Hex wrenches provided. Frequently clean your cutting tools with Craftsman Gum and Pitch Remover.
TROUBLE SHOOTING WARNING_ FOR IYOUR OWN SAFETY, TURN SWITCH "OFF" AND REMOVE PLUG FROM POWER SOURCE OUTLET BEFORE TROUBLE SHOOTING YOUR SHAPER "_-17 : _TROUBLE J PROBABLE CAUSE Set screw engaging in spindle too tight, :itoo hard. Cutter comes loose :: during operation. Cutter slow down I during operation, ....Bindi.0fF "0e ...... i Boards when adjusting IN or REMEDY slot Tighten screw then back it off 1/4 turn. action is smooth without end play.
TROUBLE SHOOTING -- MOTOR NOTE: Motors used on wood-working tools are particularly susceptible to the accumulation of sawdust and wood chips and should be blown out or "vacuumed" frequently to prevent interference with normal motor ventilation. TROUBLE ....... PROBABLE REMEDY CAUSE ,,,,_ ................... Excessive 1. Motor. noise. t. Have motor checked by qualified service techniciar_. Repair service _s available at your nearest Sears store.
R:::E PAl R::iP ART S I \ \ 6 22
PARTS LIST FOR CRAFTSMAN MODEL No. 113.239201 Always Order by Part No. - Not FIGURE "°Yi No. 1 2 3 4 5 6 7 8 9 10 11 12 13 14 15 16 17 18 19 2O 21 22 23 24 25 26 Part No. 72008 60167 STD 523120 39411 39613 C39290 39512 STD 551037 STD 541137 39629 STD551031 38799 39628 38546 60382 STD 551210 STD 51 t 105 39215 72014 STD 304330 STD 53311 2 STD 551031 STD 541231 39217 453068 WOOD SHAPER & 113.239390 by Key 1 ' Key j No. Description Fence Assembly (See Figure 2) Washer, .343 x 1.
PARTS LIST FOR CRAFTSMAN WOOD SHAPER MODEL No. 113;239201 & 113.239390 ! 2 1 6 7 9 \ 11 / IOi 11 FIGURE 2 - FENCE ASSEMBLY 72008 Part i.: Description , L 72008 : Fence Assembly Complete STD 511t005 *Screw, Pan Hd., t0-24 x 1/2 2 38711 " Bracket, Retaining ••••••i•3¸ 386!2 Knob, Adjusting •: _•4 • •• : 18451 Washer; Spring 38413. Frame 38531 Knob _"i_'__i 6 "/ i 38 i10 Shoe Assy., Fence _ _9 38533 Plate, Work Face (Right) t0 STD 512507 *Screw, Pan Hd., 1/4.
PARTS LiST FOR CRAFTSMAN WOOD SHAPER MODEL No. 113.239201 & 113.239390 2 FIGURE 3 -- LEGS (Supplied with 113.239390 K 3y No. Part No. 1 62614 2 60314 3 STD541025 4 5 6 7 10 11 STD551225 68060 72030 68059 62615 STD610805 STD 541050 803835 HARDWARE w Description Leg oScrew, Truss Hd. I/4-20 x 5/8 e'Nut, Hex 1/4-20 e* Lockwasher, 1/4 External Channel, Support Stiffener Stiffener, Side Stiffener, End e'Screw, Pan Hal. Ty. A N8 x 1/2 o'Nut, Hex Hd.
PARTS LIST FOR CRAFTSMAN :_MODEL No. 1113,239201:& WOOD SHAPER 113.239390 7 8 6 / / FIGURE 4 ON/OFF POWER OUTLET 60382 AND MOUNTING BRACKET i Key No, • Part No. i JL LL L , Descriptionii "i 60382 o 0n/Off i 2 60375 60378 Cord, Molded Housing; Switch Power Outlet ..... 31 4 7 5 6 7 Screw; 448007 '; 72034 STD600803 *Standard Pan Hd. No.
PARTS LIST FOR CRAFTSMAN WOOD SHAPER MODEL No. 113.239201 & 113.239390 NOTE: ANY ATTEMPT TO REPAIR THIS MOTOR MAY CREATE A HAZARD UNLESS REPAIR IS DONE BY QUALIFIED SERVICE TECHNICIAN, REPAIR SERVICE IS AVAILABLE AT YOUR NEAREST SEARS STORE, 1 2 FIGURE 6 -- 72035 Part No. Key No. 3 MOTOR 1 60306 2 3 64088 64258 PARTS LIST Description Screw, 8-32 x 3/8, Thread Cutting, Stotted, Serrated Hd.
WOOD SERVICE Now ever [h_._[ you exist Service, Center to provide MODEL NO. 113.239201 SHAPER for SHAPER have purch_}sed repair parts m_d most aI! perti_ent ]"he model number of ptate attached to your your or Sears, facts wood service, Roebuck when Vou shaper, simply and call should contact Co, a need arW stores. Sears Be sure or visit, your wood shaper will be found on a wood shaper on the front of the tab}e, ONLY 113.