CY) owner's manual 12 GALLON MODEL NO. 113.177650 OR 16 GALLON MODEL NO. 113.177611 Serial Number Model and serial numbers may be found underneath the handle. You should record both model and serial numbers in a safe place for future use. A WARNING: FOR YOUR SAFETY, READ ALL INSTRUCTIONS CAREFULLY SAVE THIS MANUAL FOR FUTURE REFERENCE CRAFTSMAN 12 GALLON OR 16 GALLON WET/DRY VAC * safety s assembly * operation * maintenance * repair pairs * Espalier patina 15 Sears, Roebuck and Co.
Warranty Craftsman One Year Full Warranty If this Craftsman product fails due to a defect in material or workmanship within one year from the date of purchase, return it to any Sears store, Sears Service Center, or other Craftsman outlet in the United States for free repair {or replacement if repair proves impossible}.
. . Tum off Vac before unplugging. To reduce the risk of injury from accidental starting, unplug power cord before changing or cleaning filter. Do not unplug by pulling on cord. To unplug, grasp the plug, not the cord, Do not use with damaged cord, plug or other parts. If your Vac is not working as It should, has missing parts, has been dropped, damaged, left outdoors, or dropped into water, call customer service.
Introduction This Wet/Dry Vac is intended for house Read this owner's manual to familiarize hold use. it may be used for vacuuming of yourself with the product features and to wet or dry media and may be used as a understand the specific usage of your new blower. Wet/Dry Vac. Table of Contents Section Page Section Page Emptying the Drum 8 Blowing Feature Maintenance . Warranty Lo... Important Safety Instructions. Introduction Table of Contents Assembly. es Carton Contents.
Assembly (continued) Caster/Caster Foot Assembly 1. Remove the power assembly from the dust drum and set aside. 2. Turn the dust drum upside down on the floor. 3.Insert the caster fest into the bottom of drum, as shown {4 places). 4. Push on the caster foot until the foot is flush with bottom of the dust drum. 5.Insert the caster stem into the socket of the caster foot, as shown {4 places}. 8. Push on the caster until the ball on the caster stem is inserted all the way into the socket.
Assembly (continued) Insert Hose Insert the hose locking end of the Lock™ hose into the inlet of the Vac. The hose should snap into place. To remove the hose farm the Vac, press the release button in the hose assembly and pull the hose out of the Vac inlet, as shown, Pres ns Accessory Storage Your accessories may be stored in the caster feet or in the storage locations on the lid.
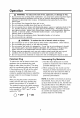
Operation » Do not leave Vac plugged-in when not in use. » Do not continue running when float has cut off suction. A. WARNING: To reduce the risk of fire, explosion, or damage to Vac: Do not leave Vac running while unattended you may fail to notice important signs indicating abnormal operation such as loss of suction, debris/liquid exiting exhaust, or abnormal motor noises. Immediately stop using Vac if you notice these signs.
Operation (continued) Vacuuming Liquids A WARNING: Do not operate without filter cage and float, as they prevent liquid from entering the impeller and damaging the motor. 1. When picking up small amounts of liquid the filter may be left in place. 2. When picking up large amounts of liquid we recommend that the filter be removed.
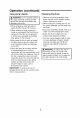
Operation (continued) Blowing Feature Your Vac features a blowing port. lt can blow sawdust and other debris. Follow the steps below to use your Vac as a Blower. A WARNING: Always wear safety eye wear complying with ANS! Z87.1 {or in Canada, CSA 794.3) before using as a blower, A WARNING: To reduce the risk of injury to bystanders, keep them clear of blowing debris. Ax CAUTION: Wear a dust mask if blowing creates dust which might be inhaled. A\ CAUTION: To reduce the risk of hearing damage, wear ear protect
Maintenance Filter A WARNING: To reduce the risk of injury from accidental starting, unplug power cord before changing or cleaning filter. NOTE: This filter is made of high quality paper designed to stop very small particles of dust, The filter can be used for wet or dry pick up, Handle the filter carefully when removing to clean or installing it. Creases in the filter pleats may occur from installation but creases will not affect the performance of the filter.
Maintenance (continued) Cleaning A Dry Filter Lama removal of dry debris can be accomplished without removing the filter from the Vac. Slap your hand on top of the power assembly while the Vac is muted off. For best cleaning results due to accumulated dust, clean the filter in an open area. Cleaning SHOULD be done outdoors and not in the living quarters. Alter filter removal from Vac, remove the dry debris by gently tapping the filter against the inside wall of your dust drum.
Repair Parts 12 Gallon Wet/Dry Vac OR 16 Gallon Wet/Dry Vac Model No. 113.177650 Model No. 113.177611 Always order by Part Number Not by Key Number A WARNING SERVICING OF DOUBLE-INSULATED WET/DRY VAC In a double-insulated Wet/Dry Vac, two systems of insulation are provided instead of grounding. No grounding means is provided on a double-insulated appliance, nor should a means for grounding be added.
CY) manual del usuario 12 GALONES NO. DE MODELAD 113.177650 0 16 GALONES NO. DE MODELO 113.177611 Hiera de serie Los animeros de modelo y de serie se pueden encontrar debajo del asa. Usted debe anotar los animeros tanto de modelo como de serie en un lugar seguro para uso futre. A\ADVERTENCIA: PARA SU SEGURIDAD LEA DETENIDAMENTE TODAS LAS INSTRUCCIONES GUARDE ESTE MANUAL PARA REFERENCIA FUTURA CRASCITARAN ASPIRADORA PARA MOJADO/SECO DE 12 GALONES 0 DE 16 GALONES s seguridad s ensamblaje + funcionamiento « ma
Mantenimiento (continuación) Limpieza de un filtro seco Se pus lograr un poco de remoción de residuos secos sin guitar ef filtro de la aspiradora. Dé una patada con fa mano sobre {a parte superior del ensamblaje del motor mientras la aspiradora esta apagada. Para obtener dolimos resultados de limpieza debido a la acumulación de prive, imple ef filtro en un área abierta, La limpieza SE DEBE realizar al aire fiebre interior de la vivienda. Después de quitar ef filtro de Ia aspiradora.
Your Home For expert troubleshooting and home solutions advice: manage Home www.managemyhome.com For repair — in your home — of all major brand appliances, lawn and garden equipment, or heating and cooling systems, no matter who made it, no matter who sold it! For the replacement parts, accessories and owner's manuals that you need to do-it-yourself. For Sears professional installation of home appliances and items like garage door openers and water heaters. 1-800-4-MY-HOME?® Cali anytime.