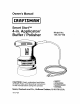
Owner's Manual Smart Start TM 4-in. Applicator/ Buffer / Polisher Model No. 146.107190 CAUTION: Read, understand and follow all Safety Rules and Operating Instructions in this manual before using this product. • • • • SAFETY OPERATION MAINTENANCE ESPANOL Sears, Roebuck and Co., Hoffman Estates, IL 60179 U.S.A.
Safety Instructions ..................................... Operation ................................................... Maintenance .............................................. Warranty. .................................................... Accessories .............................................. Repair Service, Maintenance Agreement Phone Numbers ........................................
I I Failure to follow all instructions listed below may result in electricl WARNING: BE SUREpersonal to read and understand all instructions. I| shock, fire and/or serious injury. I I WORK AREA SAFETY 1. ALWAYS keep your work area clean and well lit. Cluttered benches and dark areas invite accidents. 2. DO NOT operate power tools in explosive atmospheres, such as in the presence of flammable liquids, gases, or dust. Power toolscreate sparks which may ignite the dust or fumes. 3.
ELECTRICAL SAFETY cont. NOTE: The extension cord must have adequate wire size AWG (American Wire Gauge) for safe, efficient use. Smaller gauge wires, have greater capacity (16 gauge wire has more capacity than 18 gauge wire). Minimum Gauge for Extension Cords (AWG) - 120 VAC Tools Extension Cord length (in feet) 0 - 50 51 - 100 101 - 150 16 14 12 Required Wire Size (A.W.G.) 7. ALWAYS connect cords as shown below (See Figure 1).
TOOL USE AND CARE SAFETY 1. DO NOT force the tool. Use the correct tool for your application. The correct tool will do the job better and safer at the rate for which it is designed. 2. DO NOT use the tool if the switch does not turn it "On" or "Off". Any tool that cannot be controlled with the switch is dangerous and must be repaired. 3. ALWAYS disconnect the plug from the power source before making any adjustments, changing accessories or storing the tool.
Your CraftsmanSmartStartTM Applicator/Buffer/Polisher has many built-in features to make your job easier. The patented SmartStart TM technology means that '"[he buffer only works when you do". It is designed for safe use, high performance and dependability (See Figure 2). Fig. 2 -_-_ / 3-Position Switch _!O(%(SmartStart - I SS 4-in. Dura FoamTi with easy Velcro TM attachin_detaching USING THE APPLICATOR TM) _ __---_ _-_ _ " Pad--._ _ '_lO-ft C-orci P°wer / _ -'-'-- I L..
This buffer comes with a removable Dura Foam TM applicator / buffing pad. This pad attaches easily to tool with Velcro TM fastening system. The specially designed pad has a unique concave surface that holds in waxes and glazes for "NO SPLATTER" application onto your car, van or SUV (See Figure 4). ATTACHINGTHE I DURA FOAM TM PAD When position changingandaccessories, BE SURE that the switchWARNING: is in the "O" (OFF) the cord is unplugged.
APPLYING WAX/POLISH For Liquid Waxes, (See Figure 6) TO DURA FOAM TM PAD Polishes 1. Squeeze liquid wax/polish onto concave center of pad in a circular pattern. 2. Set the switch to the "SS" (Smart Start) position. The wax or polish will not splatter as you start to apply. This eliminates the need to continually turn the switch "On" and "Off" during use. For Paste Waxes, Polishes (See Figure 7) The patented Smart Start TM feature combined with the 4-in.
APPLYING WAX/POLISH TO SURFACE (See Figure 8) IMPORTANT: Read, understand and follow all safety and user instructions in this manual and all directions and warnings on polishes and waxes. 1. Apply paste wax / liquid polish in a straight line with either a side-to-side or back-and-forth motion. 2. Apply past¢ wax / liquid polish in a thin, even coat. Too much does not add any more protection and only makes the removal more difficult. 3.
Clean 4-in. buffer with a soft, damp cloth. NEVER use commercial solvents when cleaning the buffer because they can damage plastic parts. Z_ WARNING: NEVER allow brake fluids, gasoline, petroleum-based products, penetrating oils or any other such product to come into contact with plastic parts. They contain chemicals that can damage, weaken or destroy plastic. I foam Z_ WARNING: DO NOT immerse the buffer water. Remove the pads and terry cloth bonnets and wash them inseparately.
Look for these accessories at your local Sears store. They are specially designed to make your 4-in. Buffer more efficient to use. All items listed below "can be purchased at your local Sears store or Craftsman outlet. 4-In. Dura Foam TM Pad (One is included) Specially designed concave surface holds in paste wax and liquid polish for "no splatter" application. Sold separately for replacing the pad that comes with 4-in. Applicator / Buffer / Polisher. 6-In.
Get it fixed, at your home or ours! For repair of major brand appliances in your own home... no matter who made it, no matter who sold it! 1-800-4-MY-HOME sMAnytime, day or night (1-800-.469-4663) www.sears,com To bring in products such as vacuums, lawn equipment and electronics for repair, call for the location of your nearest Sears Parts & Repair Center. 1-800-488-1222 Aoytime, dayo_ night www.sears.
Manual de Operaci6n Smart Start tM Enceradora/Lustradora/ Pulidora de 4" • SEGURIDAD • OPERACION • MANTENIMIENTO CUIDADO: Leer, entender y seguir todas las Reglas de Seguridad e Instrucciones de Operaci6n de este Manual antes de utilizar este artefacto. Sears, Roebuck-and 4-17-01 Modelo No. 146.107190 Ce.,-_bq_[_,Slta_._O!_0L] d3 7_JeJq!qo],/_doo p,oeEI d3 , I P,OeEI/Qe]qF! 79 U.S.A.
Instrucciones de Seguridad ........................ Operaci6n ................................................... Mantenimiento ............................................ Garantfa ...................................................... Accesorios ................................................. NQmeros de Tel6fono para Servicio de Reparaciones, y Contratos de Mantenimiento ..................................
ADVERTENCIA: ASEGURARSE DE: Leer y entender todas las instrucciones. Si no se siguen todas las instrucciones indicadas a continuacien se p0dr_a producir choques eldctricos, incendios y/o lesiones personales serias. SEGURIDAD EN EL AREA DETRABAJO 1. Siempre mantener el _rea de trabajo limpia y bien iluminada. Las mesas de trabajo y las areas oscuras propician los accidentes, 2. NO operar herramientas el_ctricas en ambientes explosives, tales come en la presencia de liquidos, gases o pelves inflamables.
SEGURIDAD ELI_CTRICA (Cont.) NOTA: Por seguridad y para un uso eficiente, el cordon de extensidn debe tener atambre del calibre adecuado a AWG (American Wire Gauge). Cuanto menor el numero del calibre mayor es la capacidad del alambre un atambre de calibre 16 tiene m_.s capacidad que un alambre calibre 18). CalibresMinimosparaCordonesde Extensi6n(AWG)- Herramientasde 120 V de CA Longitud del Cordon de Extensi6n (en pies) Calibre de Alambre Requerido (AWG) 0- 50 51 - 100 101 - 150 16 14 12 7.
SEGURIDAD EN EL USOY CUIDADO DE LA HERRAMIENTA 1. NO forzar la herramienta. Use la herramienta correcta para el trabajo que realice. La herramienta adecuada hara un trabaje mejor, m&s seguro y a la velocidad para la cual fue dise_ada. 2. NO usar la herramienta si es que el interruptor no la puede encender o apagar. Toda herramienta que no pueda controlarse con su interruptor o gatillo, es peligrosa y debe repararse. 3.
La Enceradora/Lustradora/Pulidora Smart Start TM de Craftsman incluye muchos dispositivos que facilitan el trabajo. La tecnologfa f)atentada Smart Start TM significa que "la lustradora sSIo trabajara cuando usted quiera que Io haga". Esta diseSada para un uso seguro, alto rendimiento y confiabilidad (Ver figura 2). USO DE LA ENCERADORNLUSTRADORAJPULIDORA La lustradora de Craftsman con el sistema patentado Smart Start TM funciona de dos formas diferentes: 1.
Esta lustradoraviene con una almohadilla desmontable de Dura FoamTM para encerar y lustrar. La almohadilla se instala y se saca f__cilmentede la herramienta con un sistema de sujeci6n mediante Velcro TM. La almohadilla especialmente diseSada tiene una superficie c6ncava exclusiva que retiene la cera y lustra "SIN SALPICAR" su vehiculo (Ver Figura 4).
APLICACION DURA DE CERAJPULIDOR FOAM A LA ALMOHADILLA TM Para Ceras y Pulidores (Ver Figura 6) Liquidos 1. Aplique la ceraJpulidor liquido en la cavidad del centro de la almohadilla con un movimiento circular. 2. Coloque el interruptor en la posici6n "SS" (Smart StartT_). La cera o pulidor no salpicargt cuando se comience a aplicar. Esto elimina la necesidad de mover continuamente el interruptor de la posici6n de encendido a la de apagado.
APLICACION DE CERA/PULIDOR A UNA SUPERFICIE (Ver Figura 8) IMPORTANTE: Leer, entender y seguir todas las instrucciones de seguridad y de operaci6n en este manual y todas las instrucciones y advertencias en los productos pulidores o ceras. 1. Aplique la cera o pulidor en pasta o liquido en una linea recta ya sea con un movimiento de lado a lado o de adelante hacia atr_,s. 2. El pulidor o cera en pasta o liquido debe aplicarse en capas delgadas y uniformes.
Limpie la lustradora de 4" con un paso suave y ht_medo.NUNCA use solventes comercialescuando se limpie la lustradora porque pueden daSarlas piezas de plastico. /iN ADVERTENClA: NUNCA permitir que liquidos para frenos, gasolina, productos a base de petr61eo,aceites penetrantes o productos por el estilo entren en contacto con las piezas plasticas, porque contienen quimicos que pueden daSar, debilitar o destruir el pla_stico. /_ ADVERTENClA: NO sumergir la lustradora en agua.
Busque los siguientes accesorios en su tienda local de Sears. Est__n especialmente disefiados para que su lustradora de 4" funcione mas eficientemente. Todos los arficulos indicados a continuacion pueden comprarse en la tienda local de Sears o de Craftsman. Almohadilla Dura Foam TM de 4" (Se incluye una) Especialmente disefiada con una superficie concava para que retenga la cera en pasta o liquida y para que se pueda aplicar sin que salpique.
Get it fixed, at your home or ourst For repair of major brand appliances in your own home... no matter who made it, no matter who sold it! 1-800-4-MY-HOME sMAnytime, day or night (1-800-469-4663) www.sears.com To bring in products such as vacuums, lawn equipment and electronics for repair, call for the location of your nearest Sears Parts & Repair Center. 1-800-488-1222 Anytime, day or night www,sears.