Operator’s Manual 21” LAWN MOWER Model No. 154.37837 CAUTION: Before using this product, read this manual and follow all safety rules and operating instructions. Transform SR Brands Management, Hoffman Estates, IL 60179, U.S.A.
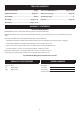
TABLE OF CONTENTS Warranty Statement..........................................Page 2 Service and Maintenance.........................Pages 14-15 Safety Instructions.......................................Pages 3-6 Off-Season Storage.........................................Page 16 Slope Guide .......................................................Page 7 Troubleshooting....................................................... 17 Assembly.....................................................
SAFETY INSTRUCTIONS WARNING DANGER This symbol points out important safety instructions which, if not followed, could endanger the personal safety and/or property of yourself and others. Read and follow all instructions in this manual before attempting to operate this machine. Failure to comply with these instructions may result in personal injury. When you see this symbol, HEED ITS WARNING! This machine was built to be operated according to the safe operation practices in this manual.
SAFETY INSTRUCTIONS SERVICE • Never attempt to make a wheel or cutting height adjustment while the engine is running. Safe Handling of Gasoline • Only use parts and accessories made for this machine by the manufacturer as listed in the Parts pages of this Operator’s Manual. Failure to do so can result in personal injury. To avoid personal injury or property damage use extreme care in handling gasoline. injury can occur when gasoline is spilled on yourself or your clothes which can ignite.
SAFETY INSTRUCTIONS GENERAL SERVICE DO NOT MODIFY ENGINE Never run an engine indoors or in a poorly ventilated area. Engine exhaust contains carbon monoxide, an odorless and deadly gas. To avoid serious injury or death, do not modify engine in any way. Tampering with the governor setting can lead to a runaway engine and cause it to operate at unsafe speeds. Never tamper with factory setting of engine governor.
SAFETY INSTRUCTIONS SAFETY SYMBOLS This page depicts and describes safety symbols that may appear on this product. Read, understand, and follow all instructions on the machine before attempting to assemble and operate. Symbols on the product WARNING: This product can be dangerous and cause serious injury or death to the operator or others. Be careful and use the product correctly. Use approved hearing protection.
SLOPE GAUGE (OK) Figure 1 15° Slope 15° ne d a s h e d li USE THIS SLOPE GAUGE TO DETERMINE IF A SLOPE IS TOO STEEP FOR SAFE OPERATION! To check the slope, proceed as follows: 1. Remove this page and fold along the dashed line. 2. Locate a vertical object on or behind the slope (e.g. a pole, building, fence, tree, etc.) 3. Align either side of the slope gauge with the object (See Figure 1 and Figure 2 ). 4. Adjust gauge up or down until the left corner touches the slope (See Figure 1 and Figure 2). 5.
ASSEMBLY IMPORTANT: This unit is shipped without gasoline or oil in the engine. Make sure to service engine with gasoline and oil as instructed in the Engine Manual before starting or running the machine. NOTE: Reference to right and left hand side of the Lawn Mower is observed from the operating position. OPENING CARTON 1. Cut each corner of the carton vertically from top to bottom. 2. Remove all loose parts. 3. Remove loose packing material. REMOVING UNIT FROM CARTON 1.
ASSEMBLY Attaching Grass Catcher Follow steps below to attach the grass catcher: a a. Lift rear discharge door (Figure 5). b. Remove the mulch plug (Figure 5). c. Place grass catcher into the slots in the handle brackets (Figure 5). Let go of discharge door so that it rests on the grass catcher. To remove grass catcher, lift rear discharge door on the mower. Lift grass catcher up and off the slots in the handle brackets. Release rear discharge door to allow it to close rear opening of mower.
ASSEMBLY ADJUSTMENTS Handle Pitch For convenience of operation, you can adjust the pitch of the handle as follows: 1. Remove star knobs and carriage bolts from the lower handle (Figure 8). 2. Position the handle in one of the two positions that is most comfortable. 3. Secure into position with star knobs and carriage bolts removed earlier. Cutting Height There is a cutting height adjustment lever located above the rear left wheel. 1.
OPERATION Blade Control Speed Control Lever Drive Control Recoil Starter Deck Wash Side Discharge Cover Cutting Height Adjustment Lever Mulching Cover Figure 10 BLADE CONTROL The blade control is attached to the upper handle of the mower. Depress and hold it against the drive control to operate the unit. Release it to stop the engine and blade. WARNING This blade control is a safety device. Never attempt to bypass its operation.
OPERATION WARNING Make sure no one other than the operator is standing near the lawn mower while starting engine or operating mower. Never run engine indoors or in enclosed, poorly ventilated areas. Engine exhaust contains carbon monoxide, an odorless and deadly gas. Keep hands, feet, hair and loose clothing away from any moving parts on engine and lawn mower. 1 2 3 FUEL and OIL See the engine Operator's Manual for fuel and oil instructions. TO START ENGINE 1.
OPERATION Variable Drive Control Ground speed varies with terrain, slope, grass height, etc. Increasing or decreasing the mower speed allows you to maintain the desired speed under changing mowing conditions. Four speeds are available, position 1 is slowest speed, position 4 is the fastest speed. With the engine running and the blades rotating, set the drive control lever to position 1. Push the drive control handle forward to propel the mower.
• SERVICE AND MAINTENANCE • WARNING Before performing any type of maintenance/service, disengage all controls and stop the engine. Wait until all moving parts have come to a complete stop. Disconnect spark plug wire and ground it against the engine to prevent unintended starting. Follow the maintenance schedule given below. This chart describes service guidelines only. Use the Service Log column to keep track of completed maintenance tasks.
SERVICE AND MAINTENANCE DECK WASH Your mower’s deck is equipped with a water port on its surface as part of its deck wash system. 6. Place blade bell support on the blade. Align notches on the blade bell support with small holes in blade. 7. Replace hex bolt and tighten hex bolt to torque: 29.5-33.2 ft-lb (40-45 Nm) max. Use the deck wash to rinse grass clippings from the deck’s underside and prevent the buildup of corrosive chemicals.
OFF-SEASON STORAGE WARNING Never store lawn mower with fuel in tank indoors or in poorly ventilated areas where fuel fumes may reach an open flame, spark, or pilot light as on a furnace, water heater, clothes dryer, or gas appliance. Preparing The Engine For engines stored over 30 days: • While engine is still warm, change the oil. • Clean engine of surface debris. Preparing The Lawn Mower • Clean and lubricate mower thoroughly as described in the lubrication instructions.
TROUBLESHOOTING WARNING Disconnect the spark plug wire and ground it against the engine to prevent unintended starting. Before performing any type of maintenance/service, disengage all controls and stop the engine. Wait until all moving parts have come to a complete stop. Always wear safety glasses during operation or while performing any adjustments or repairs. This section addresses minor service issues.
(This page applicable in the U.S.A. and Canada only.) Transform SR Brands Management LLC (Sears), the California Air Resources Board (CARB) and the United States Environmental Protection Agency (U.S.
To order replacement parts or schedule repair service Para ordenar piezas o pedir servicio de reparación 1-888-331-4569