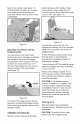
Operator's Manual Convertible Cordless 18V Hedge Trimmer Attachment Model No. 71.74290 BEFORE first call: returning this product, (800) 539-6455 IMPORTANT OPERATING HINT: When starting unit, first push the thumb switch forward and then squeeze the control trigger. It is NOT necessary to keep the thumb switch pushed forward during use. CAUTION: Before using this product, read this manual and follow its Safety Rules and Operating Instructions. . Safety all . Assembly . Operation .
Warranty ..................................................................................................... Safety Instructions ..................................................................................... Operation ................................................................................................... Maintenance ............................................................................................... Storage .....................................................................
basicsafetyprecautions should always proper footing and balance at all times. befollowed toreduce theriskoffire, Use both hands to operate unit safely. electric shock,andpersonal injury, USE SAFETY GLASSES - Always including thefollowing: wear proper eye protection, and use a face or dust mask if operation is dusty. Toreduceriskof injury: Before anyuse,besureeveryone usingthiselectric product readsand understands allsafetyandoperation instructions contained inthismanual.
SAVE THESE INSTRUCTIONS e_ = A • CONNECTING TOOL ATTACHMENT TO THE POWER HANDLE Be sure to follow the following safety precautions when attaching and detaching tools from the power handle. Remove the battery from the handle before attaching or detaching tools. Never touch the control switches on the power handle when attaching and detaching tools. Please refer to the instruction manual for the Power Handle for proper operation of the Power Handle, battery and charger. To attach Figure 2 3.
Figure 4 2.Pullthepowerhandle andtool attachment apart.Thepowerhandle andtoolattachment should separate easily. Iftheydonot,checktobe surethatthelockringisinthefully unlocked position. Attaching theBattery 1.Aligntheribonthebattery packwith thecorresponding slotintheendofthe powerhandle. (seefigure5) I Figure 5 2. Insert the battery fully into the handle making sure that the springloaded buttons on each side of the battery pack snap into place in the handle. Removing the Battery 1.
circuit breaker Figure 9 Figure 8 To turn the tool off: 1. Release the control trigger and the tool wilt turn off. The thumb switch will return to the rearward position to prevent accidental re-starting of the tool. CAUTION - Blades coast after turn-off. OVERLOAD PROTECTION The hedge trimmer attachment incorporates a circuit breaker which will protect the hedge trimmer in the event of a prolonged stall. This device will cause the tool to stop operating if an overload condition exists.
faceofthebushes. (seefigure11) Thistechnique willallowyoutokeep fromtwisting andcontorting your bodyandmakes trimming muchmore comfortable. Figure 11 Extending Your Reach with the Rotating Handle You can extend your reach when trimming the tops of bushes by rotating the handle to one of the 90 degree lock positions. Now instead of having to reach one hand all the way over the top of the hedge trimmer, you are simply holding it at a side position. (see figure 12) Keephandawayfromblades.
clearing ofjams.Toprevent injury, do notusethehedge trimmer withany damaged parts.Iftheunitcontinues tojam,calltheservice number listed below. WALL BRACKET Mount the wall bracket securely to the wall; attach with screws to a wall stud. The use of wall board anchors is NOT recommended. Place the tool attachment in the walt bracket as shown for convenient storage. (see figure 14) CLEANING OF PLASTIC PARTS - Use only a dry brush or a cloth with warm water and mild soap to clean plastic parts.
hazardous. Call1-800-366-PART. BATTERY RECYCLING =Topreserve natural resources, please recycle or dispose ofthisproduct's NICKELCADMIUM (NiCd} BATTERY properly. Local, state and federal laws prohibit disposal of NiCd batteries in ordinary trash. The manufacturer is a participant in the Rechargeable Battery Recycling Corporation (RBRC) recycling program. We have paid a fee to allow for these batteries to be properly disposed of via a RBRC collection site (various retailers are also RBRC participants).
Garantia ................................................................................................. 10 Instrucciones deseguridad ...................................................................... 10 Operaci6n ................................................................................................ 12 Mantenimiento .......................................................................................... 16 Atmacenamiento .....................................................................
accesorios de las herramientas con ningOn otto sistema ni fuente de alimentaci6n ni los utitice en un mango de potencia que no este dise_ado para et uso con este sistema. para otras tareas que no sean aquettas para las que fue dise_ada. ADVERTENClA: MANTENGA LAS MANOS Y EL RESTO DEL CUERPO ALEJADOS de las hojas. Los bordes de las hojas son filosos y pueden provocar lesiones aun cuando la herramienta este APAGADA.
dobtadas, quenosehayan quebrado control en et mango de potencia piezas y quenoexistaningOn otro cuando conecte y desconecte herramientas. problema quepueda afectar et funcionamiento detproducto. Toda Consulte el manual de instrucciones piezada_ada debesetreparada o det Mango de potencia para conocer reemptazada debidamente potun operaci6n correcta det Mango de centro deservicio tecnico autorizado. la potencia, de la bateria y det cargador. EST¢: ALERTA: Presteatenci6n a 1oqueestahaciendo.
Figura 2 Figura 4 3. Agarre et accesorio de ta herramienta firmemente con una mano (no 1oagarre de una parte giratoria como et mango auxitiar) y gire et aro de seguridad que esta en et mango de potencia hasta ta posici6n de btoqueo con la otra mano. (vet figura 3) 2. Desconecte et mango de potencia y et accesorio de ta herramienta. Et mango de potencia y el accesorio de la herramienta se deben separar facitmente.
simultaneamente. (vet figura 6) Tenga en cuenta que la herramienta no arrancara si el aro de seguridad no esta completamente en la posici6n de bloqueo. Figura 6 2. Retire et paquete de la bateria directamente det mango. Figura 8 Para encender la herrarnJenta: Para apagar la herramienta: 1. Agarre ta empufiadura de control firmemente con una mano y agarre et mango auxitiar det accesorio de la herramienta (si viene incluido) con la otra mano. 1.
Podar el frente de los arbustos Para cortar et frente de los arbustos, presione et bot6n disparador del mango y deje que ta cortadora gire a traves det mango mientras pasa la hoja por ta parte detantera de los arbustos. (vet figura 11). Esta tecnica le evitara tenet que girar y torcer el cuerpo y permite una poda mucho mas c6moda.
convencional simplemente dejando et mango bloqueado en la posici6n vertical. se atascan, provocara un drenaje excesivo de la bateria, acortara ta vida Qtit det motor y disparara et disyuntor. TI_CNICAS DE PODA RetJrar los elementos atascados Mantenga et equilibrio apropiado en todo momento. Mantenga tas manos atejadas de las hojas. Use protecci6n para los ojos cuando use la unidad. Sostenga la cortadora firmemente con ambas manos y ENCI¢:NDALA.
PREVENIR ADVERTENClA: Mantenga siempre las manos alejadas de los gatillos cuando realice el mantenimiento del mango de potencia. LUBRICACION: No se requiere la lubricaci6n periSdica del mango de potencia, del mango accesorio ni de la caja de velocidades. Despues de cada uso, retire los residuos de las hojas con un cepillo y limpie las hojas en seco con un patio.
Si observa alguna condici6n que pueda afectar el uso seguro o si tiene alguna duda, comuniquese con el nQmero de servicio al cliente al: 1-800-539-6455 NEED MORE P._ ° Find this and a[[ your other product i_ manuals online. • Get answers from our team of home experts. • Geta personalizedmaintenanceplan for your home. • Findinformationand tools to help with homeprojects.
Garantie .................................................................................................... Instructions de securit6 ............................................................................ Mode d'emploi .......................................................................................... Entretien ................................................................................................... Rangement ...........................................................................
LES MAINS ET AUTRES PARTIES DU CORPS A L'#:CART des lames. Le tranchant des lames est coupant et peut causer une btessure, m6me lorsque l'outit est arr6t6. Ce produit ne dolt 6tre utilise qu'avec le systeme d'outits 18 volts Craftsman Convertible Cordless. Ne pas utitiser les accessoires avec un autre systeme ou une autre source d'alimentation electrique. Ne pas utitiser sur ta poignee d'alimentation un accessoire non congu pour fonctionner avec ce systeme.
mauvais alignement ou ta deformation d'un organe mobile, ou ta rupture d'une piece. Une piece endommagee dolt 6tre repar6e correctement ou remplacee par un site de reparation agr6e. Enlever ta batterie de la poignee avant de monter ou de retirer t'accessoire. Ne jamais toucher tes interrupteurs de commande sur la poignee d'alimentation etectrique pendant ta fixation ou te retrait de t'accessoire. RESTER VIGILANT- Faire attention ce que l'on est en train de faire. Faire preuve de bons sens.
Figure 2 Figure 4 3. Tenir l'accessoire fermement d'une main (ne pas le tenir par une des pieces tournantes tette que ta poignee auxitiaire) et, de t'autre main, faire pivoter la bague de verrouitlage de la poignee d'alimentation electrique dans la position verrouitlee. (Voir figure 3.) 2. Separer la poignee d'alimentation electrique et t'accessoire en tirant. La separation devrait se produire facitement.
0 Figure 6 Figure 8 2. Sortir te bloc batterie de la poignee par une traction exercee dans l'axe de la poignee. Pour mettre I'appareil en marche I1convient de noter que l'accessoire ne demarre pas si la bague de verrouitlage n'est pas dans la position completement verrouitlee. : 1. Tenir fermement la poignee de commande d'une main et, de t'autre, la poignee auxitiaire de l'accessoire (si l'accessoire en est dote). Pour arreter I'appareil : 1.
normalement. Taille de la face avant d'une haie Pour taitler ta face avant d'une hale, appuyer sur te bouton de deverrouitlage de la poignee et taisser le taitte-haie pivoter autour de la poignee pendant le deplacement de ta lame sur la face avant de ta hale. (Voir figure 11.) Cette technique permet d'eviter d'avoir a se contorsionner et rend le travail beaucoup plus facile.
taitle-haie de la maniere normale en taissant simptement la poignee verrouitlee en position verticale. TECHNIQUES ou se coincent darts une branche, un b&ton ou autre objet, ret_cher immediatement t'interrupteur de commande. La continuation du fonctionnement de t'appareit torsque les lames sont bloquees provoque une decharge excessive de la batterie, reduit la duree de vie utile du moteur et declenche le disjoncteur. DE COUPE Maintenir un bon equitibre en toute circonstance.
TEMPF2RATURE - Les temperatures extr6mes reduisent ta duree de vie utile de la batterie. Le meitleur endroit pour ranger t'appareit est un lieu frais et sec. Ranger l'appareit a t'ecart de la tumiere directe du soleit, d'un tuyau de chauffage, d'une chaudiere, etc. Ne paste ranger dans un endroit oQ ta temperature descend au-dessous de +5 °C (+40 °F) ou monte au-dessus de +50 °C (+120 °F).
batteries d'etre correctement mises au rebut dans un des sites de collecte de la societ6 RBRC (de nombreux detaillants participent egalement ce programme). Appeler le numero sans frais de la societ6 RBRC en composant le (800) 822-8837 ou visiter son site Web en frangais & radresse h..h_p:llwww.rbrc.orqlcellarecvcled pour Iocaliser un site de collecte proximite.
Your Home For expert troubleshooting and home solutions advice: manage home www.managemyhome.com For repair - in your home - of all major brand appliances, lawn and garden equipment, or heating and cooling systems, no matter who made it, no matter who sold it ! For the replacement parts, accessories and owner's manuals that you need to do-it-yourself. For Sears professional installation of home appliances and items like garage door openers and water heaters. 1-800-4-MY-HOME (1-800-469-4663) www.sears.