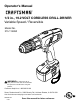
Operator's Manual 1/2 in., 19.2 VOLT CORDLESS DRILL-DRIVER Variable Speed / Reversible Model No. 315.114850 WARNING: To reduce the risk of injury, the user must read and understand the operator’s manual before using this product. Customer Help Line: 1-800-932-3188 Sears, Roebuck and Co., 3333 Beverly Rd., Hoffman Estates, IL 60179 USA Visit the Craftsman web page: www.sears.
TABLE OF CONTENTS n Warranty ........................................................................................................................................................................... 2 n Introduction ...................................................................................................................................................................... 2 n General Safety Rules ......................................................................................................
GENERAL SAFETY RULES WARNING: READ AND UNDERSTAND ALL n INSTRUCTIONS. Failure to follow all instructions listed below, may result in electric shock, fire and/or serious personal injury. n SAVE THESE INSTRUCTIONS WORK AREA n Keep your work area clean and well lit. Cluttered benches and dark areas invite accidents. n n Do not operate power tools in explosive atmospheres, such as in the presence of flammable liquids, gases, or dust. Power tools create sparks which may ignite the dust or fumes.
GENERAL SAFETY RULES SERVICE n When servicing a tool, use only identical replacement parts. Follow instructions in the Maintenance section of this manual. Use of unauthorized parts or failure to follow Maintenance Instructions may create a risk of shock or injury. n Tool service must be performed only by qualified repair personnel. Service or maintenance performed by unqualified personnel may result in a risk of injury.
SAFETY INSTRUCTIONS FOR CHARGER WARNING! Read and understand all instructions. Failure to follow all instructions listed below, may result in electric shock, fire and/or serious peronal injury. n Do not let gasoline, oils, petroleum-based products, etc. come in contact with plastic parts. They contain chemicals that can damage, weaken, or destroy plastic. n An extension cord should not be used unless absolutely necessary. Use of improper extension cord could result in a risk of fire and electric shock.
SYMBOLS Some of the following symbols may be used on this tool. Please study them and learn their meaning. Proper interpretation of these symbols will allow you to operate the tool better and safer.
SYMBOLS The following signal words and meanings are intended to explain the levels of risk associated with this product. SYMBOL SIGNAL MEANING DANGER: Indicates an imminently hazardous situation, which, if not avoided, will result in death or serious injury. WARNING: Indicates a potentially hazardous situation, which, if not avoided, could result in death or serious injury. CAUTION: Indicates a potentially hazardous situation, which, if not avoided, may result in minor or moderate injury.
FEATURES SPECIFICATIONS Chuck ...............................................................................................................................................................1/2 in. Keyless Motor ................................................................................................................................................................... 19.2 Volt DC Switch......................................................................................................................
FEATURES TWO-SPEED GEAR TRAIN (HI-LO) LEVEL TORQUE ADJUSTMENT RING KEYLESS CHUCK ® LEVEL REAR VIEW DIRECTION OF ROTATION SELECTOR (FORWARD/REVERSE) SWITCH TRIGGER BIT STORAGE SCREWDRIVER BITS BATTERY PACK BATTERY PACK SHOWN IN CHARGER 4-1/2 IN. WRIST STRAP CHARGER RED LED ON INDICATES FAST CHARGING MODE ® GREEN LED ON AFTER FAST CHARGING CYCLE, INDICATES FULLY CHARGED BATTERYPACK AND IN TRICKLE CHARGE MODE. YELLOW AND GREEN LEDS ON INDICATES DEEPLY DISCHARGED OR DEFECTIVE BATTERY PACK. Fig.
UNPACKING INSTRUCTIONS PACKING LIST When unpacking the tool: n Carefully remove the tool and accessories from the box. n Make sure that all items listed in the packing list are included. n Inspect the tool carefully to make sure no breakage or damage occurred during shipping. n Do not discard the packing material until you have carefully inspected and satisfactorily operated the tool. n If any parts are damaged or missing, please call 1-800-932-3188 for assistance. 1/2 in.
OPERATION WARNING: Do not allow familiarity with tools make LED FUNCTIONS OF CHARGER LED WILL BE ON TO INDICATE STATUS OF CHARGER AND BATTERY PACK: you careless. Remember that a careless fraction of a second is sufficient to inflict severe injury. n n BATTERY PACK The battery pack for your tool has been shipped in a low charge condition to prevent possible problems. Therefore, you should charge it until light on front of charger changes from red to green.
OPERATION TO INSTALL BATTERY PACK See Figure 2. To turn your drill ON, depress the switch trigger. To turn it OFF, release the switch trigger. n Lock switch trigger on your drill by placing the direction of rotation selector in center position. See Figure 5. n Place battery pack in your drill. Align raised rib on battery pack with groove inside drill. See Figure 4. 14 8 10 12 SWITCH 6 FORWARD/REVERSE SELECTOR ® VARIABLE SPEED SWITCH TRIGGER BATTERY PACK Fig.
OPERATION SWITCH LOCK KEYLESS CHUCK See Figure 5. The switch trigger can be locked in the OFF position. This feature can be used to prevent the possibility of accidental starting when not in use. To lock switch trigger, place the direction of rotation selector (Forward/Reverse Selector) in center position. See Figure 6. Your drill has a keyless chuck. As the name implies, you can hand tighten or release drill bits in the chuck jaws. Grasp and hold the collar of the chuck with one hand.
OPERATION INSTALLING BITS REMOVING BITS See Figure 7. n Lock the switch trigger by placing the direction of rotation selector in center position. See Figure 5. n Open or close chuck jaws to a point where the opening is slightly larger than the bit size you intend to use. Also, raise the front of your drill slightly to keep the bit from falling out of the chuck jaws. n Insert drill bit straight into chuck the full length of the jaws as shown in figure 7. n Tighten the chuck jaws on drill bit.
12 10 14 BIT STORAGE OPERATION LEVEL 6 8 See Figure 10. When not in use, bits provided with your drill can be placed in the storage area located on the bottom of your drill as shown in figure 10. ® ® SCREWDRIVER BIT BIT STORAGE AREA Fig. 10 WARNING: Always wear safety goggles or safety glasses with side shields when operating tools. Failure to do so could result in objects being thrown into your eyes, resulting in possible serious injury. Fig. 12 LEVEL DRILLING See Figure 11.
OPERATION CHUCK REMOVAL n Insert hex key in chuck and tighten chuck jaws securely. Tap sharply with a mallet in a counterclockwise direction. This will loosen chuck on the spindle. It can now be unscrewed by hand. See Figure 15. See Figures 13, 14, and 15. n Lock the switch trigger by placing the direction of rotation selector in center position. See Figure 5. n Insert a 5/16 in. or larger hex key into the chuck of your drill and tighten the chuck jaws securely.
MAINTENANCE Do not abuse power tools. Abusive practices can damage tool as well as workpiece. Only the parts shown on parts list, page 19, are intended to be repaired or replaced by the customer. All other parts should be replaced at a Sears Service Center. WARNING: When servicing, use only identical Craftsman replacement parts. Use of any other part may create a hazard or cause product damage. Avoid using solvents when cleaning plastic parts.
NOTES 18
CRAFTSMAN 1/2 in., 19.2 VOLT CORDLESS DRILL-DRIVER – MODEL NO. 315.114850 The model number will be found on a plate attached to the motor housing. Always mention the model number in all correspondence regarding your 1/2 in., 19.2 VOLT CORDLESS DRILL-DRIVER or when ordering repair parts. SEE BACK PAGE FOR PARTS ORDERING INSTRUCTIONS ® PARTS LIST Key No. Part Number Description 1 6613402 Screw (Special)....................................................................................
Get it fixed, at your home or ours! Your Home For repair – in your home – of all major brand appliances, lawn and garden equipment, or heating and cooling systems, no matter who made it, no matter who sold it! For the replacement parts, accessories and owner’s manuals that you need to do-it-yourself. For Sears professional installation of home appliances and items like garage door openers and water heaters. 1-800-4-MY-HOME® (1-800-469-4663) Call anytime, day or night (U.S.A. and Canada) www.sears.
OPERATOR'S MANUAL 5-1/2 in., 19.2 VOLT CORDLESS LASER TRIM SAW Model No. 315.115160 505 4 3 2 0 2 5 4 3 2 1 0 WARNING: To reduce the risk of injury, the user must read and understand the operator’s manual before using this product. Customer Help Line: 1-800-932-3188 Sears, Roebuck and Co., 3333 Beverly Rd., Hoffman Estates, IL 60179 USA Visit the Craftsman web page: www.sears.
TABLE OF CONTENTS n Warranty ........................................................................................................................................................................... 2 n Introduction ...................................................................................................................................................................... 2 n General Safety Rules ......................................................................................................
GENERAL SAFETY RULES n Do not overreach. Keep proper footing and balance at all times. Proper footing and balance enable better control of the tool in unexpected situations. n Use safety equipment. Always wear eye protection. Dust mask, non-skid safety shoes, hard hat, or hearing protection must be used for appropriate conditions. n Do not wear loose clothing or jewelry. Contain long hair. Loose clothes, jewelry, or long hair can be drawn into air vents. n Do not use on a ladder or unstable support.
GENERAL SAFETY RULES SERVICE n When servicing a tool, use only identical replacement parts. Follow instructions in the Maintenance section of this manual. Use of unauthorized parts or failure to follow Maintenance Instructions may create a risk of shock or injury. n Tool service must be performed only by qualified repair personnel. Service or maintenance performed by unqualified personnel may result in a risk of injury. SPECIFIC SAFETY RULES �n DANGER! Keep hands away from cutting area and blade.
SPECIFIC SAFETY RULES n Do not charge battery tool in a damp or wet location. Following this rule will reduce the risk of electric shock. n For best results, your battery tool should be charged in a location where the temperature is more than 50°F but less than 100°F. Do not store outside or in vehicles. n Under extreme usage or temperature conditions, battery leakage may occur. If liquid comes in contact with your skin, wash immediately with soap and water, then neutralize with lemon juice or vinegar.
SAFETY RULES FOR CHARGER WARNING! READ AND UNDERSTAND ALL INSTRUCTIONS. Failure to follow all instructions listed below, may result in electric shock, fire and/or serious personal injury. n Before using battery charger, read all instructions and cautionary markings in this manual, on battery charger, battery, and product using battery to prevent misuse of the products and possible injury or damage.
SYMBOLS Some of the following symbols may be used on this tool. Please study them and learn their meaning. Proper interpretation of these symbols will allow you to operate the tool better and safer.
SYMBOLS The following signal words and meanings are intended to explain the levels of risk associated with this product. SYMBOL SIGNAL MEANING DANGER: Indicates an imminently hazardous situation, which, if not avoided, will result in death or serious injury. WARNING: Indicates a potentially hazardous situation, which, if not avoided, could result in death or serious injury. CAUTION: Indicates a potentially hazardous situation, which, if not avoided, may result in minor or moderate injury.
FEATURES PRODUCT SPECIFICATIONS Motor ................................................................................................................................................................... 19.2 Volt DC Blade diameter ........................................................................................................................................... 5-1/2 in. (140 mm) Blade Arbor ...............................................................................................................
FEATURES KNOW YOUR LASER TRIM SAW SPINDLE LOCK See Figure 1. The spindle lock allows you to secure the blade when turning the blade screw. Before attempting to use this product, familiarize yourself with all operating Features and Safety Rules NOTE: Do not run trim saw with spindle lock engaged. EDGE GUIDE DUST CHUTE Edge guide is used when making long or wide rip cuts with the saw. To direct saw dust and chips away from the operator, a dust chute is located on the side of the upper blade guard.
ASSEMBLY INSTALLING BATTERY PACK n Depress spindle lock button and remove blade screw and outer blade washer. NOTE: Turn blade screw clockwise to remove. n Wipe a drop of oil onto inner blade washer and outer blade washer where they contact blade. See Figure 3. NOTE: Battery pack is shipped in a low charge condition. Therefore, it must be charged prior to use. Refer to page 13, “CHARGING BATTERY PACK” for charging instructions.
ASSEMBLY REMOVING BLADE SPINDLE LOCK See Figure 5. n Remove battery pack from saw. n Remove blade wrench from storage area. n Position saw as shown in figure 5, depress spindle lock button, and remove blade screw. NOTE: Turn blade screw clockwise to remove. n Remove outer blade washer. NOTE: Blade can be removed at this point. SPINDLE LOCK SCREW 505 4 3 2 0 2 WARNING: Current attachments and accessories TO LOOSEN 3 available for use with this tool are listed above.
OPERATION CHARGING A COOL BATTERY PACK WARNING: Do not allow familiarity with tools to make you careless. Remember that a careless fraction of a second is sufficient to inflict serious injury. If battery pack is below normal temperature range, the green LED on charger will come on. Allow battery pack to reach normal temperature, then the red LED will come on.
OPERATION CHARGING A HOT BATTERY PACK NOTE: This situation only occurs when continuous use of the tool causes the batteries to become hot. It does not occur under normal circumstances. Refer to “CHARGING A COOL BATTERY PACK” for normal recharging of batteries. If the charger does not charge your battery pack under normal circumstances, return both the battery pack and charger to your nearest Sears Repair Center for electrical check.
OPERATION KICKBACK See Figures 8 - 11. Kickback occurs when the blade stalls rapidly and the saw is driven back towards you. Blade stalling is caused by any action which pinches the blade in the wood. DANGER: Release switch immediately if blade 50 5 4 binds or saw stalls. Kickback could cause you to lose control of the saw. Loss of control can lead to serious injury. 30 22.5 15 0 To guard against kickback, avoid dangerous practices such as the following. n Setting blade depth incorrectly.
OPERATION SAW BLADES STARTING/STOPPING THE SAW The best of saw blades will not cut efficiently if they are not kept clean, sharp, and properly set. Using a dull blade will place a heavy load on the saw and increase the danger of kickback. Keep extra blades on hand, so that sharp blades are always available. Gum and wood pitch hardened on blades will slow the saw down. Remove saw blade from the saw and use gum and pitch remover, hot water, or kerosene to remove these accumulations. DO NOT USE GASOLINE.
OPERATION ADJUSTING BLADE DEPTH TO RAISE SAW See Figure 14. Always keep correct blade depth setting. The correct blade depth setting for all cuts should not exceed 1/4 in. (6.35 mm) below the material being cut. More blade depth will increase the chance of kickback and cause the cut to be rough. For more depth of cut accuracy, a scale is located on the upper blade guard. Follow these directions to adjust the blade depth. n Remove battery pack from saw.
OPERATION OPERATING THE SAW See Figures 16 - 18. It is important to understand the correct method for operating the saw. Refer to the figures in this section to learn the correct and incorrect ways for handling the saw. WARNING: To make sawing easier and safer, always maintain proper control of the saw. Loss of control could cause an accident resulting in possible serious injury.
OPERATION CROSS CUTTING/RIP CUTTING WORKPIECE 30 45 See Figure 19. When making a cross cut or rip cut, align the line of cut with the outer blade guide notch on the base as shown in the figure. Since blade thicknesses vary, always make a trial cut in scrap material along a guideline to determine how much, if any, you must offset the guideline to produce an accurate cut. 2 3 4 3 2 0 2 0 5 4 1 NOTE: The distance from the line of cut to the guideline is the amount you should offset the guide.
OPERATION BEVEL CUTTING See Figures 22 - 24. To make the best possible cut, follow these helpful hints: n Align the line of cut with the inner blade guide notch on the base when making 45° bevel cuts. BEVEL SCALE n Make a trial cut in scrap material along a guideline to determine how much you should offset the guideline on the cutting material. BEVEL ADJUSTMENT KNOB n Adjust the angle of the cut to any desired setting between zero and 51.5°. Refer to “To Adjust Bevel Setting” next.
OPERATION POSITIVE 0° BEVEL STOP See Figure 25. The saw has a positive 0° bevel stop that has been factory adjusted to assure 0° angle of the saw blade when making 90° cuts. TO CHECK POSITIVE 0° BEVEL STOP Follow these directions to check the positive 0° bevel stop: n Remove battery pack from your trim saw. ADJUSTMENT SCREW WARNING: Failure to remove battery pack from BEVEL ADJUSTMENT KNOB HEX NUT the tool could result in accidental starting causing serious injury.
OPERATION POCKET CUTTING n Release the trigger and allow the blade to come to a complete stop. n Lift the saw from the workpiece. n Clear corners out with a hand saw or sabre saw. See Figure 26. WARNING: Always adjust bevel setting to zero before making a pocket cut. Attempting a pocket cut at any other setting can result in loss of control of the saw possibly causing serious injury. WARNING: Never tie the lower blade guard in a raised position. Leaving the blade exposed could lead to serious injury.
MAINTENANCE REPLACING LASER GUIDE BATTERIES WARNING: When servicing use only identical See Figure 28. �n Remove battery pack from saw. �n Make sure laser is turned off. n Remove the laser cover by lifting it off its base. �n Remove both AAA batteries. �n Install the two AAA batteries aligning the positives (+) with positives (+) and the negatives (-) with negatives (-) as shown on the inside base of laser. �n Replace the laser cover. n Turn on laser. Craftsman replacement parts.
MAINTENANCE BATTERIES BATTERY PACK REMOVAL AND The battery pack for this tool is equipped with nickel-cadmium rechargeable batteries. Length of service from each charging will depend on the type of work you are doing. PREPARATION FOR RECYCLING To preserve natural resources, please recycle or dispose of batteries properly. The batteries in this tool have been designed to provide maximum trouble-free life. However, like all batteries, they will eventually wear out.
5 30 7 4 5 0 3 22 0 1 .5 1 8 4 3 9 5 4 6 3 4 10 0 34 1 11 3 30 2 15 16 37 1 12 33 17 14 13 35 29 32 36 18 19 28 20 ® 27 21 22 1 3 5 2 CRAFTSMAN 19.2 VOLT CORDLESS TRIM SAW – MODEL NUMBER 315.
26 1 2 3 4 5 6 7 8 9 10 11 12 13 14 15 16 17 18 19 KEY NO. 660143001 3025516 670974001 5224502 680001001 520177002 660145001 680022001 660212004 660142001 9427205 940298017 640556011 6620803 5217802 6619302 6867201 550994005 6807001 PART NUMBER QTY. 20 21 22 23 24 25 26 27 28 29 30 31 32 33 34 35 36 37 KEY NO. DESCRIPTION QTY. 6850303 Bearing Retainer..........................................1 6620104 * Screw (M2.6 X 10 mm Pan Hd.) ..................4 6112004 Inner Blade Washer .....................
Operator's Manual 19.2 Volt Reciprocating Saw Variable Speed Model No. 315.114270 WARNING: To reduce the risk of injury, the user must read and understand the operator’s manual before using this product. Customer Help Line: 1-800-932-3188 Sears, Roebuck and Co., 3333 Beverly Rd., Hoffman Estates, IL 60179 USA Visit the Craftsman web page: www.sears.
TABLE OF CONTENTS n Warranty...........................................................................................................................................................................2 n Introduction......................................................................................................................................................................2 n General Safety Rules .....................................................................................................
GENERAL SAFETY RULES WARNING! READ AND UNDERSTAND ALL n Do not overreach. Keep proper footing and balance at all times. Proper footing and balance enable better control of the tool in unexpected situations. n Use safety equipment. Always wear eye protection. Dust mask, non-skid safety shoes, hard hat, or hearing protection must be used for appropriate conditions. n Do not wear loose clothing or jewelry. Contain long hair. Loose clothes, jewelry, or long hair can be drawn into air vents.
GENERAL SAFETY RULES SERVICE n When servicing a tool, use only identical replacement parts. Follow instructions in the Maintenance section of this manual. Use of unauthorized parts or failure to follow Maintenance Instructions may create a risk of shock or injury. n Tool service must be performed only by qualified repair personnel. Service or maintenance performed by unqualified personnel may result in a risk of injury.
SAFETY RULES FOR CHARGER WARNING! READ AND UNDERSTAND ALL INSTRUCTIONS. Failure to follow all instructions listed below, may result in electric shock, fire and/or serious personal injury. n Before using battery charger, read all instructions and cautionary markings in this manual, on battery charger, battery, and product using battery to prevent misuse of the products and possible injury or damage.
SYMBOLS Some of the following symbols may be used on this tool. Please study them and learn their meaning. Proper interpretation of these symbols will allow you to operate the tool better and safer.
SYMBOLS The following signal words and meanings are intended to explain the levels of risk associated with this product. SYMBOL SIGNAL MEANING DANGER: Indicates an imminently hazardous situation, which, if not avoided, will result in death or serious injury. WARNING: Indicates a potentially hazardous situation, which, if not avoided, could result in death or serious injury. CAUTION: Indicates a potentially hazardous situation, which, if not avoided, may result in minor or moderate injury.
FEATURES PRODUCT SPECIFICATIONS Motor .................................................................................................................................................................19.2 Volts DC Switch..............................................................................................................................................................Variable Speed No Load Speed ..........................................................................................................
FEATURES KNOW YOUR RECIPROCATING SAW SWITCH See Figure 1. Before attempting to use this product, familiarize yourself with all operating Features and Safety Rules. To turn your saw ON, depress the lock-off button and pull switch trigger. Release switch trigger to turn your saw OFF. TOOLLESS BLADE CLAMP VARIABLE SPEED Your saw has a blade clamp design that does not require the use of a tool (blade wrench) when installing or removing the blade.
ASSEMBLY UNPACKING WARNING: If any parts are missing do not operate this tool until the missing parts are replaced. Failure to do so could result in possible serious personal injury. This product has been shipped completely assembled. n Carefully remove the tool and any accessories from the box. Make sure that all items listed in the packing list are included. n Inspect the tool carefully to make sure no breakage or damage occurred during shipping.
OPERATION CHARGING A COOL BATTERY PACK n After normal usage, a minimum of 1 hour of charging time is required to fully recharge battery pack. n The battery pack will become slightly warm to the touch while charging. This is normal and does not indicate a problem. n Do not place the charger and battery pack in an area of extreme heat or cold. They will work best at normal room temperature.
OPERATION TO REMOVE / ATTACH BATTERY PACK TO INSTALL SAW BLADE See Figure 4. n Remove battery pack. See Figure 3. TO REMOVE: n Locate latches on side of battery pack and depress both sides to release battery pack from your saw. n Remove battery pack from your saw. WARNING: Failure to remove battery pack from saw could result in accidental starting causing possible serious personal injury.
OPERATION BASE (SHOE) ASSEMBLY GENERAL CUTTING See Figure 5. The base assembly of your reciprocating saw pivots up and down in both directions. It also is adjustable, allowing the use of the blade teeth at different positions on the blade. See Figure 6. Hold your saw firmly in front of and clearly away from you. Make sure saw blade is clear of any foreign material. Be sure material to be cut is held firmly. Small work pieces should be securely clamped in a vise or with clamps to the work bench or table.
OPERATION PLUNGE CUTTING METAL CUTTING See Figure 7. Mark the line of cut clearly. Choose a convenient starting point inside the area to be cut out and place the tip of the blade over that point. Rest front edge of base (shoe) assembly on work and hold firmly in position. Depress the lock-off button, then pull switch trigger to start the cutting action. See Figure 8. Metals such as sheet steel, pipe, steel rods, aluminum, brass, and copper may be cut with your saw.
MAINTENANCE WARNING: When servicing, use only identical WARNING: Do not at any time let brake fluids, Craftsman replacement parts. Use of any other part may create a hazard or cause product damage. gasoline, petroleum-based products, penetrating oils, etc. come in contact with plastic parts. Chemicals can damage, weaken or destroy plastic which may result in serious personal injury. WARNING: Always wear safety goggles or safety glasses with side shields when using compressed air to clean tools.
ACCESSORIES The following recommended accessories are currently available at Sears retail stores: BLADE TYPES LENGTH IN. TEETH PER IN. For fast smooth cuts in woods, masonite, plastics, hard composition board and all plunge cutting. Keyhole blade shape permits cutting in hard to reach areas...................................... 6 .................... 6 For fast, smooth, deep cuts through thick wood, plastic, composition board, and hardboard........... 12 ................... 6 For rough cuts in wood. ....
CRAFTSMAN 19.2 VOLT RECIPROCATING SAW – MODEL NO. 315.114270 The model number will be found on a plate attached to the motor housing. Always mention the model number in all correspondence regarding your 19.2 VOLT RECIPROCATING SAW or when ordering repair parts. SEE BACK PAGE FOR PARTS ORDERING INSTRUCTIONS 3 1 2 5 ® 4 6 PARTS LIST Key No. Part Number Description 1 3021608 Base (Shoe) Assembly ........................................................................................
Get it fixed, at your home or ours! Your Home For repair – in your home – of all major brand appliances, lawn and garden equipment, or heating and cooling systems, no matter who made it, no matter who sold it! For the replacement parts, accessories and owner’s manuals that you need to do-it-yourself. For Sears professional installation of home appliances and items like garage door openers and water heaters. 1-800-4-MY-HOME® (1-800-469-4663) Call anytime, day or night (U.S.A. and Canada) www.sears.
Operator's Manual 19.2 VOLT FLUORESCENT LIGHT Model No. 315.114071 Save this manual for future reference • Safety • Operation • Maintenance CAUTION: Read and follow all Safety Rules and Operating Instructions before first use of this product. Customer Help Line: 1-800-932-3188 Sears, Roebuck and Co., 3333 Beverly Rd., Hoffman Estates, IL 60179 USA Visit the Craftsman web page: www.sears.
TABLE OF CONTENTS ■ Warranty ..................................................................................................................................................................... 2 ■ Introduction ................................................................................................................................................................. 2 ■ General Safety Rules ............................................................................................................
GENERAL SAFETY RULES ■ WARNING: Read and understand all instructions. Failure to follow all instructions listed below, can result in electric shock, fire and/or serious personal injury. Do not overreach. Keep proper footing and balance at all times. Proper footing and balance enable better control of the tool in unexpected situations. Do not use on a ladder or unstable support. TOOL USE AND CARE SAVE THESE INSTRUCTIONS WORK AREA ■ ■ Keep your work area clean and well lit.
SPECIFIC SAFETY RULES Hold tool by insulated gripping surfaces when performing an operation where the cutting tool may contact hidden wiring. Contact with a "live" wire will make exposed metal parts of the tool "live" and shock the operator. ■ ADDITIONAL RULES FOR SAFE OPERATION ■ Know your power tool. Read operator's manual carefully. Learn its applications and limitations, as well as the specific potential hazards related to this tool.
SPECIFIC SAFETY RULES IMPORTANT SAFETY INSTRUCTIONS FOR CHARGER ■ ■ ■ ■ ■ ■ ■ ■ Save these instructions. This manual contains important safety and operating instructions for charger. Following this rule will reduce the risk of electric shock, fire, or serious personal injury. Before using battery charger, read all instructions and cautionary markings in this manual, on battery charger, and product using battery charger.
SYMBOLS Important: Some of the following symbols may be used on your tool. Please study them and learn their meaning. Proper interpretation of these symbols will allow you to operate the tool better and safer.
OPERATION BATTERY PACK/CHARGER If not purchased as a kit, the battery pack and charger are not included with your light. They are both sold separately. If you need to purchase the battery pack and charger, use the following information: MODEL NO. BATTERY PACK CHARGER 315.114071 Item No. 9 11375 Item No. 9 11041 (1323517 or 1323903) (1425301 ) ■ ■ BATTERY PACK The battery pack for this light has been shipped in a low charge condition to prevent possible problems.
OPERATION LED FUNCTIONS OF CHARGER LED WILL BE ON TO INDICATE STATUS OF CHARGER AND BATTERY PACK: ■ Orient battery pack so that raised rib on battery pack aligns with groove inside light. Battery pack is designed to fit only one way into light handle. ■ ■ ■ Insert battery pack, making sure latches on each side of battery pack snap into place and battery pack is secure in light before use. ■ ■ ■ Red LED on = Fast charging mode. Green LED on = Fully charged and in trickle charge mode.
MAINTENANCE Do not abuse power tools. Abusive practices can damage tool as well as workpiece. WARNING: When servicing, use only identical Craftsman replacement parts. Use of any other part may create a hazard or cause product damage. WARNING: Do not attempt to modify this worklight or create accessories not recommended for use with this worklight. Any such alteration or modification is misuse and could result in a hazardous condition leading to possible serious personal injury.
MAINTENANCE BATTERIES To preserve natural resources, please recycle or dispose of batteries properly. This product contains nickel-cadmium batteries. Local, state or federal laws may prohibit disposal of nickel-cadmium batteries in ordinary trash. Consult your local waste authority for information regarding available recycling and/or disposal options. The battery pack for this light is equipped with nickelcadmium rechargeable batteries.
NOTES 11
Get it fixed, at your home or ours! Your Home For repair – in your home – of all major brand appliances, lawn and garden equipment, or heating and cooling systems, no matter who made it, no matter who sold it! For the replacement parts, accessories and owner’s manuals that you need to do-it-yourself. For Sears professional installation of home appliances and items like garage door openers and water heaters. 1-800-4-MY-HOME® (1-800-469-4663) Call anytime, day or night (U.S.A. and Canada) www.sears.