OPERATOR'S MANUAL II:RRFTSMRN I BELT SANDER VARIABLE SPEED DOUBLE INSULATED Model No. 315.11 7280 ,_ WARNING: To reduce the risk of injury, the user must read and understand the operator's manual before using this product. Customer Help Line: t-800-932-3188 Sears, Roebuck and Co., 3333 Beverly Rd., Hoffman Estates, IL 60179 USA Visit the Craftsman web page: www.sears.
• Warranty .......................................................................................................................................................................... 2 • Introduction ..................................................................................................................................................................... 2 • General Safety Rules ...................................................................................................................
_i, WARNING: Read and understand all instruc- tions. Failure to follow all instructions listed below, may result in electric shock, fire and/or serious personal injury. • Avoid accidental starting. Be sure switch is off before plugging in. Carrying tools with your finger on the switch or plugging in tools that have the switch on invites accidents. • Remove adjusting keys or wrenches before turning the tool on.
SERVICE • • Tool service must be performed only by qualified repair personnel. Service or maintenance performed by unqualified personnel may result in a risk of injury. • Hold tool by insulated gripping surfaces when performing an operation where the cutting tool may contact hidden wiring or its own cord. Contact with a "live" wire will make exposed metal parts of the cutting tool "live" and shock the operator. • Know your power tool. Read operator's manual carefully.
Someofthefollowingsymbolsmaybeusedonthistool.Pleasestudythemandlearntheirmeaning.Properinterpretationof thesesymbolswillallowyoutooperatethetoolbetterandsafer.
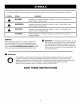
Thefollowingsignalwordsandmeanings areintendedto explainthe levelsofriskassociated withthisproduct. SYMBOL ,_ ,_ SIGNAL MEANING DANGER: Indicates an imminently hazardous situation, which, if not avoided, will result in death or serious injury. WARNING: Indicates a potentially hazardous situation, which, if not avoided, could result in death or serious injury. CAUTION: Indicates a potentially hazardous situation, which, if not avoided, may result in minor or moderate injury.
DOUBLE INSULATION Double insulation is a concept in safety in electric power tools, which eliminates the need for the usual three-wire grounded power cord. All exposed metal parts are isolated from the internal metal motor components with protecting insulation. Double insulated tools do not need to be grounded. ,_ WARNING: The double insulated system is intended to protect the user from shock resulting from a break in the tool's internal insulation.
PRODUCT SPECIFICATIONS Belt Size .......................................................... 3 in. x 21 in. Sanding Surface ......................................... 16.5 square in. No Load Speed ........................................... 800-1300/min. Input ................................ 120 V, 60 Hz, AC only, 8.0 Amps Net Weight ........................................................... 10.56 Ibs.
KNOW YOUR SANDER See Figure 1. Before attempting to use this product, familiarize yourself with all operating features and safety rules. LOCK-ON The lock-on feature allows you to lock the trigger switch in the ON position. Locking the trigger switch on allows you to operate the sander for extended periods of time. TENSION RELEASE LEVER The tension release lever aids in quick and easy belt changes.
• _Ib WARNING:Donotallowfamiliaritywithtools to makeyoucareless. Remember thata careless fractionofa secondissufficientto inflictserious injury. NOTE: If you are changing sanding belts, remove the old sanding belt at this time. • _Ib WARNING:Alwayswearsafetygogglesor safety glasseswithsideshieldswhenoperatingpower tools.Failureto do socouldresultinobjectsbeing thrownintoyoureyesresultingin possibleserious injury.
TO ADJUST SANDING BELT TRACKING See Figures 5 - 6. Belt life sanding edge of edge of is greatly increased if you regularly adjust the belt tracking. When correctly adjusted, the outer the sanding belt should be even with the outer the base of the sander. • Choose one of these options: • Sanding belt runs inward: Turn the tracking knob slowly clockwise. • Sanding belt runs outward: slowly counterclockwise. NOTE: Turn the tracking knob until you are sure the sanding belt is secure, i.e.
USING THE DUST COLLECTION BAG The dust collection bag provides a dust collection system for the sander. ,_k WARNING: Do not use the dust collection bag when sanding metal. Using the dust collection bag when sanding metal creates a fire hazard, which could damage the tool and lead to serious personal injury. TO ATTACH THE DUST COLLECTION • Unplug the sander. • Remove the dust collection bag from the sander. • Unzip the dust bag. • Shake out the dust. • Zip up the dust bag.
Followthesestepsto lockonthesander. • Depressthetriggerswitch. • Pushinthe lock-onbutton. • Release thetriggerswitch. • Release thelock-onbutton. NOTE:Toreleasethelock,depressthetriggerswitch. Yoursanderhasa variablespeedcontroldial,A to F, designedto allowoperatorcontrolof beltspeed.Toincrease beltspeed,turnthevariablespeedcontroldialto a higher setting.Turnto a lowersettingto decreasebeltspeed. Referto thecharton page14for properspeedselections. OPERATING THE SANDER See Figure 9.
HELPFUL • TIPS If the sanding belt slips or does not track while sanding, you may be applying too much pressure. When this occurs, remove the sander from the workpiece. If you properly adjust the belt tracking, the sanding belt will return to its normal and correct position on the drive roller and front roller. SETTING THE BELT SANDER • Use a coarser sanding belt for heavy sanding, not heavy pressure. The weight of the tool is sufficient to provide adequate pressure at the correct location.
CRAFTSMAN I BELT SANDER - MODEL NUMBER 315.117280 The model number will be found on a plate attached to the motor housing. Always mention the model number in all correspondence regarding your TOOL or when ordering repair parts. SEE BACK PAGE FOR PARTS ORDERING I INSTRUCTIONS 8 \ 10 14 PARTS LIST Key No.