Instruction Manual 25cc/1.5 cu.in. 2-Cycle 17 Inch Cutting Path / 0.080 In. Line GASOLINE WEEDWACKER ® Model No. 358.745191 • Safety • Assembly • Operation • Maintenance • Parts List • Espa_ol For Occasional Use Only WARNING: Read and follow all Safety Rules and Operating Instructions before first use of this product. For answers to your questions about this product: Call 7 am-7 pm, Mon.-Sat., or 10 am-7 pm, Sun. 1-800-235-5878 Sears, Roebuck 530163730 11/11/02 and Co., Hoffman _.o.
Warranty Statement Safety Rules Assembly Operation Maintenance Service & Adjustments 2 3 9 10 14 15 Storage Troubleshooting Table Emissions Statement Parts List Spanish Parts and Ordering 16 17 18 20 22 Back Cover FULL ONE YEAR WARRANTY ON CRAFTSMAN ® GASOLINE POWERED WEEDWACKER ® LINE TRIMMER.
OPERATOR SAFETY • Dress properly. Always wear safety glasses or similar eye protection when operating, or performing maintenance, on your unit (safety glasses are available). Eye protection should be marked Z87. • Always wear face or dust mask if operation is dusty. • Always wear heavy, long pants, long sleeves, boots, and gloves. Wearing safety leg guards is recommended. • Always wear foot protection. Do not go barefoot or wear sandals. Stay clear of spinning line. • Secure hair above shoulder length.
UNIT / MAINTENANCE SAFETY • Disconnect the spark plug before performing maintenance except carburetor adjustments. • Look for and replace damaged or loose parts before each use. Look for and repair fuel leaks before use. Keep in good working condition. • Replace trimmer head parts that are chipped, cracked, broken, or damaged in any other way before using the unit. • Maintain unit according to recommended procedures. Keep cutting line at proper length. • Use only 0.080 in.
ADDITIONAL SAFETY RULES FOR OPTIONAL ATTACHMENTS • Always push the unit slowly over the ground. Stay alert for uneven sidewalks, holes in the terrain, large roots, etc. • Always use the handlebar when using edger attachment. BLOWER/VACUUM SAFETY _ WARNING: For each optional attachment used, read entire operators manual before use and follow all warnings and instructions in manual and on attachment. _WARNING: Inspect area before starting unit.
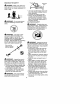
BRUSHCUTTER DANGER: SAFETY Blade can thrust viose lently away from material it does not cut. Blade thrust can cause amputation of arms or legs. • Use only specified blade and make sure it is properly installed and securely fastened. • Cut from your right to your left. • Always use the handlebar and a properly adjusted shoulder strap with blade (see ASSEMBLY instructions in brushcutter attachment instruction manual).
HEDGE TRIMMER SAFETY unit until the blade/chain has completely stopped moving. Keep hands, face and feet at a distance from all moving parts. Do not attempt to touch or stop the blade or chain when it is moving. DANGER: RISK OF CUT; KEEP HANDS AWAY FROM BLADE - Blade moves momentarily after the trigger is released. Do not attempt to clear away cut material when the blade is in motion.
SNOW THROWER SAFETY • Make sure the rotor will spin freely before attaching the snowthrower to the powerhead. • If the rotor will not rotate freely due to frozen ice, thaw the unit before thoroughly before attempting to operate under powen • Keep the rotor clear of debris. • Do not throw snow near other people. The snow thrower could propel small objects at high speed causing injury.
CARTON CONTENTS Check carton contents against the following list. Model 358.745191 • Powerhead • Trimmer Attachment • Shield • Wing Nut (screwed onto shield) • Container of Oil Examine parts for damage. Do not use damaged parts. NOTE: If you need assistance or find parts missing or damaged, call 1-800-235-5878. It is normal for the fuel filter to rattle in the empty fuel tank. Finding fuel or oil residue on muffler is normal due to carburetor adjustments and testing done by the manufacturer.
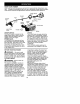
KNOW YOUR TRIMMER READ THIS INSTRUCTIONMANUALAND SAFETY RULES BEFOREOPERATINGYOUR UNIT. Compare the illustrations with your unit to familiarize yourself with the location of the various controls and adjustments. Save this manual for future reference.
and carburetor are empty. Use fresh fuel next season. Never use engine or carburetor cleaner products in the fuel tank or permanent damage may occur. See the STORAGE section for additional information. HOW TO STOP YOUR UNIT • To stop the engine, move the ON/OFF switch to the OFF position. • If engine does not stop, move choke lever to FULL CHOKE position. ON/OFF Throttle Trigger _ \ HOW TO START YOUR UNIT _ WARNING: The trimmer head will turn while starting the engine. Avoid any contact with the muffler.
OPERATING THE COUPLER Coupler Primary Hole This model is equipped with a coupler which enables optional attachments to be installed. The optional attachments are: Edger ................. 358.792400 Cultivator .............. 358.792410 Blower ................ 358.792421 Brushcutter ............ 358.
Always release the throttle trigger and allow the engine to return to idle speed when not cutting. To stop engine: * Release the throttle trigger. * Move the ON/OFF switch to the OFF position, TRIMMER LINE ADVANCE The cutting head advances line automatically. Do not tap head on the ground to advance line. This may break parts and cause cutting head to malfunction, Upon unit start up, the line will advance automatically to the correct cutting path length.
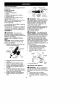
SWEEPING - The fanning action of the rotating line can be used to blow away loose debris from an area, Keep the line parallel to and above the area surface and swing the tool from side to side. MAINTENANCE Sweeping \_ IIIt SCHEDULE WARNING: Disconnect the spark plug before performing maintenance except for carburetor adjustments.
As your unit is used, carbon deposits build up on the muffler and spark arresting screen. For normal homeowner use, however, the muffler and spark arresting screen will not require any service. After 50 hours of use, we recommend that your muffler be serviced or replaced by your Sears Service Center. REPLACE SPARK PLUG Replace the spark plug each year to ensure the engine starts easier and runs better. Set spark plug gap at 0.025 inch. Ignition timing is fixed and nonad ustable. 1.
CARBURETOR ADJUSTMENT _ WARNING: Keep others away when making idle speed adjustments. The trimmer head or any optional attachment will be spinning during most of this procedure. Wear your protective equipment and observe all safety precautions. After making adjustments, the trimmer head or any optional attachment must not move/spin at idle speed. The carburetor has been carefully set at the factory.
• Check entire unit for loose screws, nuts, and bolts. Replace any damaged, broken, or worn parts. • At the beginning of the next season, use only fresh fuel having the proper gasoline to oil ratio. TROUBLESHOOTING OTHER • Do not store gasoline from one season to another. • Replace your gasoline can if it starts to rust. TABLE WARNING: Always stop unit and disconnect spark plug before performing all of the recommended remedies below except remedies that require operation of the unit.
YOUR WARRANTY RIGHTS AND OBLIGATIONS: The U.S. Environmental Protection Agency/California Air Resources Board and Sears, Roebuck and Co., U.S.A., are pleased to explain the emissions control system warranty on your year 2002-2004 small off-road engine. In California, all new small off-road engines must be designed, built, and equipped to meet the State's stringent anti-smog standards.
nearest authorized service centeror callSearsat1-800-4694663, WHERE TO GET WARRANTY SER_ VICE: Warranty services or repairs shall be provided at all Sears Service Centers, Call 1-8004694663. MAINTENANCE, REPLACEMENT AND REPAIR OF EMISSION RELATED PARTS: Any Sears approved replacement part used in the performance of any warranty maintenance or repair on emission related parts will be provided without charge to the owner if the part is under warranty.