Instruction Manual I CRRFTSMRN°I 25cc/1.5 cu.in. 2-Cycle 17 Inch Cutting Path / 0.080 In. Line GASOLINE WEEDWAOKER ® Model No. 358.795591 • Safety • • • • Assembly Operation Maintenance Parts List • Espa_ol For Occasional Use Only WARNING: Read and follow all Safety Rules and Operating Instructions before first use of this product. For answers Call 7 am-7 to your questions about this product: pm, Mon.-Sat., or 10 am-7 pm, Sun. 1-800-235-5878 Sears, 530163196 Roebuck 8/14/02 and Co.
Warranty Statement Safety Rules Assembly Operation Maintenance Service & Adjustments 2 3 9 10 14 15 Storage Troubleshooting Table Emissions Statement Parts List Spanish Parts and Ordering FULL ONE YEAR WARRANTY ON CRAFTSMAN WEEDWACKER ® LINE TRIMMER.
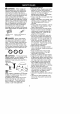
OPERATOR SAFETY _WARNIN_I:When using gar• Dress properly. Always wear safety dening appliances, basic safety preglasses or similar eye protection cautions must always befollowed to when operating, or performing mainreduce theriskoffireandserious tenance, on your unit (safety injury. Read andfollow allinstructions. glasses are available). Eye protecThis power unit can be dangerous! Operator is responsible for following instructions and warnings on unit and in manual.
UNIT / MAINTENANCE SAFETY • Disconnect the spark plug before performing maintenance except carburetor adjustments. • Look for and replace damaged or loose parts before each use. Look for and repair fuel leaks before use. Keep in good working condition. • Replace trimmer head parts that are chipped, cracked, broken, or damaged in any other way before using the unit. • Maintain unit according to recommended procedures. Keep cutting line at proper length. • Use only 0.
ADDITIONAL SAFETY RULES FOR OPTIONAL ATTACHMENTS ,_WARNING: For each optional attachment used, read entire operators manual before use and follow all warnings and instructions in manual and on attachment. ,_WARNING: Ensure handlebar is installed when using edger or brushcutter attachments. Attach handlebar above arrow on safety label on the upper tube (engine end of unit).
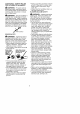
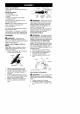
BRUSHCUTTER SAFETY Proboscis DANGER: Blade can thrust vio- lently away from material it does not cut. Blade thrust can cause amputation of arms or legs. .,& _ _WARNIN_I: Do not use trimmer head as a fastening device for the blade. • Use only specified blade and make sure it is properly installed and securely fastened. • Cut from your right to your left.
HEDGE TRIMMER SAFETY '_ DANGER: RISK OF CUT; KEEP HANDS AWAY FROM BLADE - Blade moves momentarily after the trigger is released. Do not attempt to clear away cut material when the blade is in motion. Make sure the switch is in the OFF position, the spark plug wire is disconnected, and the blade has stopped moving before removing jammed material from the cutting blade. Do not grab or hold the unit by the cutting blade. Blades move Allow blades to stop momentarily before removing after the them from the cut.
SNOW THROWER SAFETY '_WARNING: Keep hands and feet away from the rotor when starting or running the engine. Never attempt to clear the rotor with the engine/motor running. Stop engine and disconnect spark plug before unclogging snow or debris from discharge chute or when adjusting vanes. _WARNING: Never lean over discharge chute. Rocks or debris could be thrown into the eyes and face and cause serious injury or blindness. ,_WARNING: Inspect the area where the unit is to be used.
CARTON CONTENTS Check carton contents against thefollowing list. Coupler 1_1 Model 358,795591 • Powerhead • Trimmer Attachment • Shield • Wing Nut (screwed onto shield) • Container of Oil Examine parts for damage. Do not use damaged parts. NOTE: If you need assistance or find parts missing or damaged, call 1-800-235-5878. It is normal for the fuel filter to rattle in the empty fuel tank. Finding fuel or oil residue on muffler is normal due to carburetor adjustments and testing done by the manufacturer.
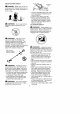
KNOW YOUR TRIMMER READ THIS INSTRUCTION MANUAL AND SAFETY RULES BEFORE OPERATING YOUR UNIT. Compare theillustrations withyourunittofamiliarize yourself withthelocation ofthevarious controls andadjustments. Save thismanual forfuture reference.
andcarburetor areempty. Usefresh fuelnextseason. Never useengine orcarburetor cleanerproducts inthefueltankorpermanentdamage mayoccur. SeetheSTORAGE section foradditionalinformation. 7. 8. HOW TOSTOP YOUR UNIT • Tostoptheengine, move the ON/OFF switch totheOFF position. • Ifengine doesnotstop,move choke lever toFULL CHOKE position. "__ ON/OFF itch Throttle Tr--_ig_r_" 9. HOW TO START YOUR UNIT ,_/kWARNING: The trimmer head will turn while starting the engine. Avoid any contact with the muffler.
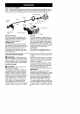
OPERATING THE COUPLER This model is equipped with a coupler which enables optional attachments to be installed. The optional attachments are: Edger ................. 358.792400 Cultivator .............. 358.792410 Blower ................ 358.792421 Brushcutter ............ 358.792430 ,_WARNING: Always stop unit and disconnect spark plug before removing or installing attachments.
TRIMMER LINE ADVANCE The cutting head advances line automatically. Do not tap head on the ground to advance line. This may break parts and cause cutting head to malfunction. the ground and at an angle. Allow only the tip of the line to make contact. Do not force trimmer line into work area. Trimming Upon unit start up, the line will advance automatically to the correct cutting path length. Always keep the shield in place when the tool is being operated. _WARNING: Use only 0.
MAINTENANCE SCHEDULE WARNING: Disconnect the spark plug before performing except for carburetor adjustments.
LINE REPLACEMENT Pre-wound spools offer the most convenient method for replacing line and ensuring optimum performance. • Replacement spools are colorcoded to ensure use of the correct spool with your unit. Be sure to use the same color spool as the existing spool. NOTE: Always clear dirt and debris from cutting head components when performing any type of maintenance. • Hold spool and unscrew cap by turning in the direction shown on top of the cap. • Remove line guide ring and spool.
Oldfuel,adirtyairfilter, adirtyfuelfil- Idle Speed-T ter,orflooding maygivetheimpres- Allow engine to idle. If the trimmer sionofanimproperly adjusted carbu- head moves, idle speed is too fast. If retor. Check these conditions before the engine stalls, idle speed is too adjusting thecarburetor. slow. Thecarburetor hasbeencarefully set • Turn IDLE SPEED screw (T) clockatthefactory. Adjustments maybe wise to increase engine speed.
_WARNIN_I: Perform the following steps after each use: • Allow engine to cool before storing or transporting. • Store unit and fuel in a well ventilated area where fuel vapors cannot reach sparks or open flames from water heaters, electric motors or switches, furnaces, etc. • Store unit with all guards in place. Position unit so that any sharp object cannot accidentally cause injury. • Store unit and fuel well out of the reach of children.
TROUBLESHOOTING ,_ TABLE WARNING: Always stop unit and disconnect spark plug before performing all of the recommended remedies below except remedies that require operation TROUBLE Engine will not start. of the unit. REMEDY CAUSE 1. ON/OFF switch OFF position. 2. Engine flooded. in 1. Move ON/OFF switch to ON. 6. Carburetor requires adjustment. 2. See "Starting a Flooded Engine" in Operation Section. 3. Fill tank with correct fuel mixture. 4. Install new spark plug. 5.
responsible fortheperformance ofthe Any warranted part which is scheduled required maintenance listed inyourinfor replacement as required maintestruction manual. Sears recommends nance shall be warranted for the period thatyouretain allreceipts covering of time up to the first scheduled replacemaintenance onyour small off-road en- ment point for that part.