
Owners manual


6
24-inch LEVEL
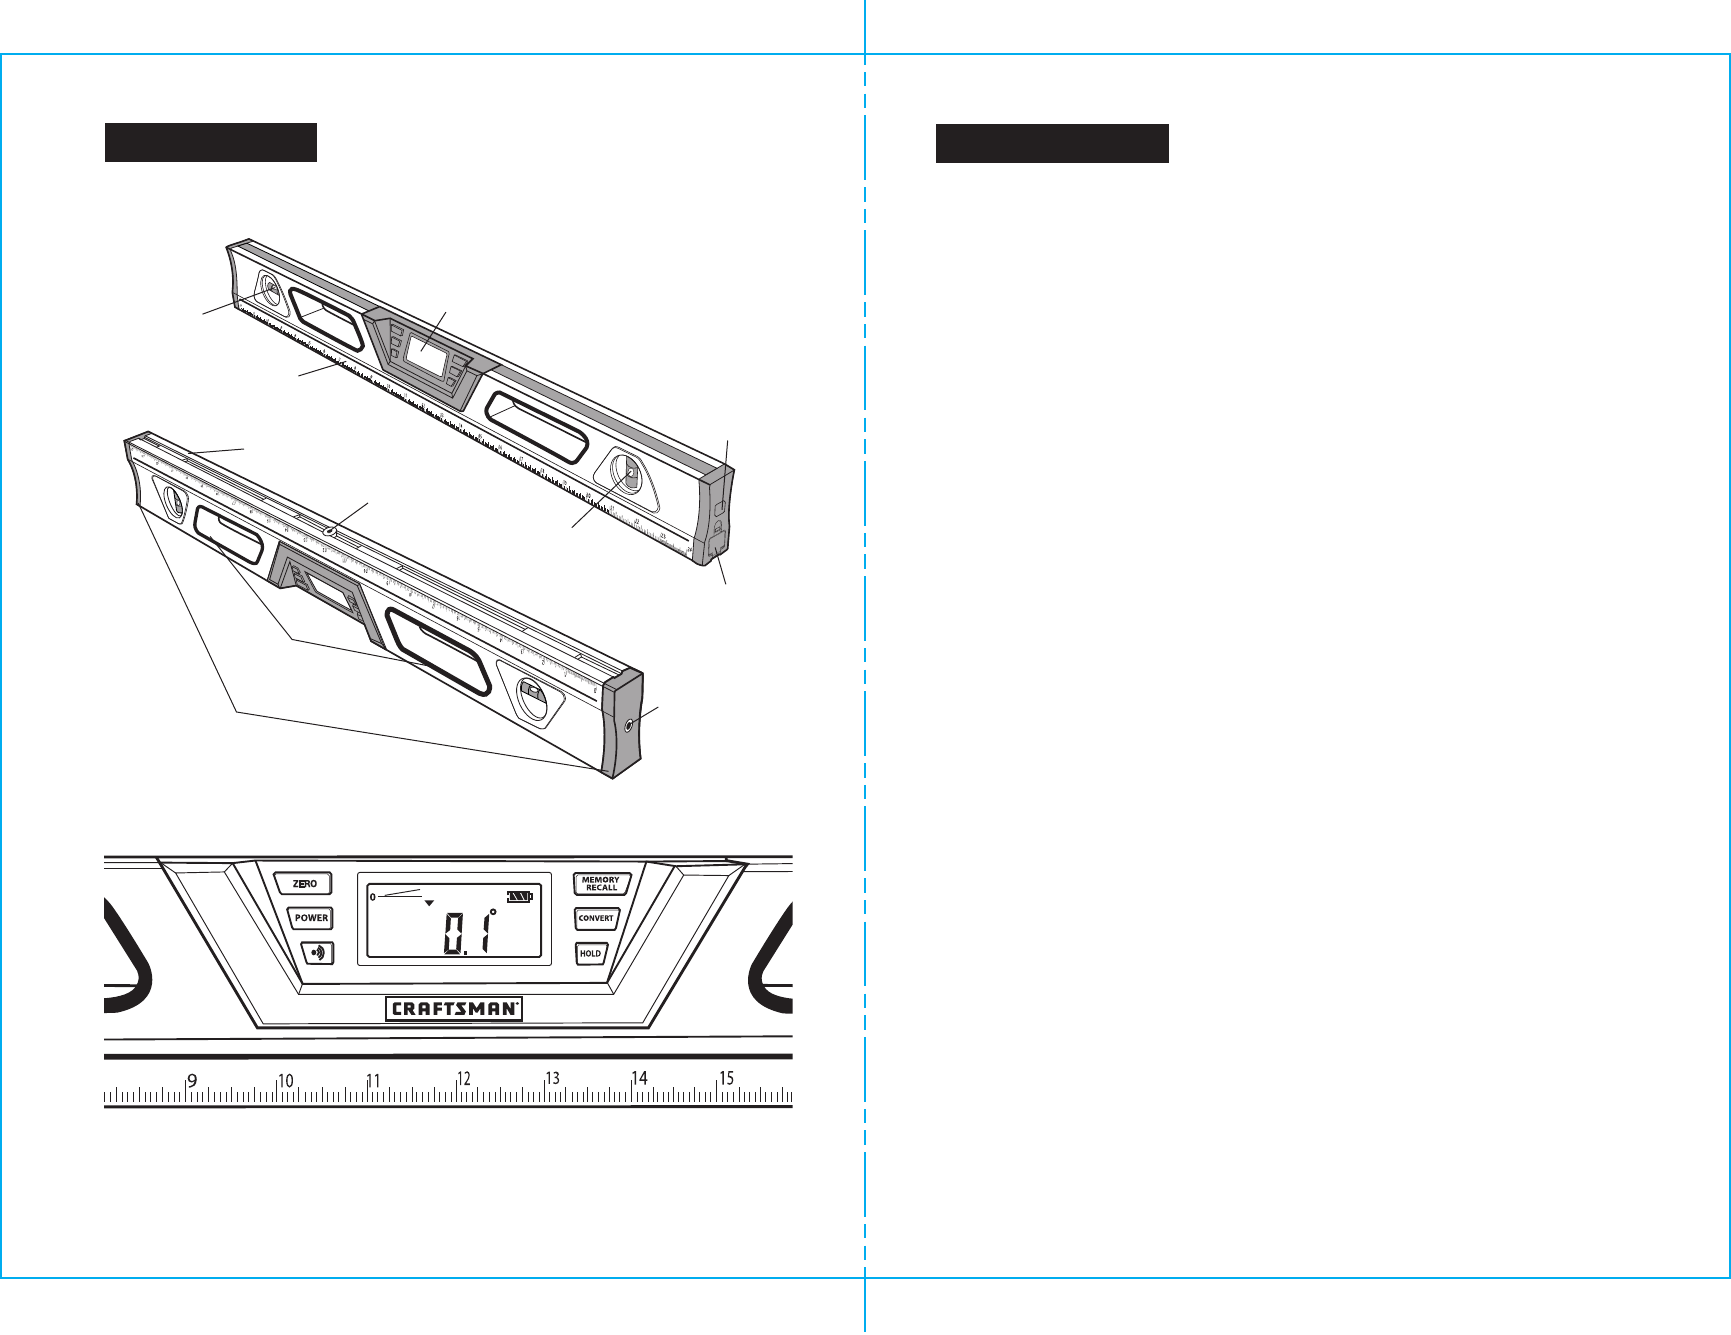
DESCRIPTION
KNOW YOUR LEVEL
Fig. 1
Battery
Compartment
Laser On
Demand Button
Encased
Bubble Vial
LCD Display Screen
Fig. 1a
Endcaps
Laser
Light Aperture
1/4-in.
Threaded
Tripod Hole
Working Base
Soft Grip
Handles
Fig. 1a
Encased
Bubble Vial
Integrated 24-in. ruler
15
CURRENT READING HOLD BUTTON AND MEMORY RECALL
To hold the information of the current reading, press the Hold button. The level can
hold nine different readings in its memory. To read out the measurements, press the
Memory Recall button. The last nine measurements can be read out, beginning with
the most recently saved.To make a new measurement, press the hold button to
return to measuring mode.
USING CONVERSION BUTTON TO CHANGE DISPLAY UNITS
The conversion button changes the measurement units from degrees (
o
) to pitch
(in/ft) to slope percent (%). Pitch readings are in 1/8-in. per foot increments. Plus
and minus signs indicate when the pitch is slightly more (+) or less (-) than true
level shown on the display. The conversion button can be used even when the
display is in the HOLD mode. This feature is a convenient way to convert angles
from one unit to another, For example, a 5-in/ft. roof pitch measurement can
be converted to 22.6
o
for setting up cuts on a chop saw.
ABSOLUTE ANGLE AND RELATIVE ANGLE MEASUREMENTS
ABSOLUTE ANGLE MEASUREMENT
1. Lay the digital laser level on a working surface with the base flat against the surface.
2. When level power is turned on, the display indicates the absolute angle between
“level” and working surface. The zero line indicates the level position, and the arrow
indicates the direction of the working surface either above or below level.
3. To activate the beeper, push the beeper button. The beeper will sound when the
level is at 0
o
(level), 45
o
, and 90
o
(plumb). To deactivate beeper, push button
a second time.
4. To save the measured angle in memory, press the hold button. This level can
remember the last nine measurements. To display the data in memory, press the
memory recall button to recall recorded angles. The level will read out the data
starting with the most recent measurements and going backwards to the earliest
in its memory.
5. To take a new measurement, press the hold button to return to measurement mode.
RELATIVE ANGLE MEASUREMENT
1. Lay the digital laser level on the First working surface.
2. Turn on the level. The LCD screen indicates the absolute angle between true level
and the working surface.
3. Press the ZERO button to enter relative angle measurement mode. The current
angle will be considered to be 0.0
o
and the display will read 0.0
o
.
4. Place the digital level on the Second working surface and the relative angle between
the First working surface and the Second working surface will be displayed. The
zero line indicates the First working surface position, and the arrow indicates
the direction of the Second working surface either above or below the First
working surface level.
5. At this point you can change the display units for the measured angle from degrees
(
o
) to pitch (inch/foot) or slope (%) by pressing the conversion button.
OPERATION cont.