49.2cc 2-cycle 2.0HP 10 Inch Tines CULTIVATOR MODEL NO. 536.292521 Caution: Read and follow all Safety Rules and Operating Instructions before first use of this product. SEARS, F-001300M ROEBUCK AND CO., Hoffman Estates, IL 60179 U.S.A.
TABLE OF CONTENTS WARRANTY STATEMENT ..... SAFETY RULES .............. INTERNATIONAL SYMBOLS,,. ASSEMBLY .................. OPERATION ................. MAINTENANCE .............. 2 3 5 6 8 13 WARRANTY LIMITED ONE-YEAR WARRANTY SERVICE AND ADJUSTMENT .. 16 TROUBLE SHOOTING CHART., 19 REPAIR PARTS ............... 20 ENGINE REPAIR PARTS ....... 25 SPANISH (ESPAI_IOL) .......... 31 PARTS ORDERING/SERVICE ..
IMPORTANT Safe Operation Practices for Cultivator WARNING: It means'. "Attention! Look for this Become symbol Alert. to point Your out Safety important |s Involved. safety precautions. _IL ARNING: To prevent accidental starting when setting-up, transporting, adjusting or making repairs, always disconnect spark plug wire and put wire where it cannot contact the spark plug. IMPORTANT: Safety standards require operator presence contro% to minimize the risk of injury.
IMPORTANT • Take all possible precautions when leaving the cultivator unattended. Stop the engine, and keep the wire away from the plug to prevent accidental starting. Thoroughly in- , spect the cultivator for any damage, and repair the damage before restarting and operating it. Do not overload the cultivator capacity by attempting to till too deep at too fast a rate. If cultivator should start to vibrate abnormally, stop engine and check immediately for the cause.
IMPORTANT INTERNATIONAL SYMBOLS IMPORTANT: Many of the following symbols are located on your unit or on literature supplied with the product. Before you operate the unit, learn and understand the purpose for each symbol. Control And Operating Symbols Slow Fast Fuel Oil Half Choke Choke OFF A Full Choke Safety Warning Symbols WARNING Thrown Objects. Keep Bystanders Away. IMPORTANT Read Owner's Manual Before Operating This Machine. F-OO1300M WARNING Rotating Parts. Stop Engine.
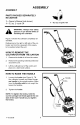
ASSEMBLY ASSEMBLY PARTS PACKED SEPARATELY IN CARTON 1 - Owner's Manual (not shown) 1 - 5.2 oz. 2-cycle Oil f - 5.2 oz. 2-cycle Oil glasses or eye shields while asWARNING: Always wear safety sembling the cultivator. Figure 1 shows the cultivator completely assembled. References to the right or left side of the cultivator are from the viewpoint of the operatot's position behind the unit. HOW TO REMOVE THE CULTIVATOR FROM THE CARTON 1. Removethe bottle of oil from the carton. 2.
ASSEMBLY _." CHECKLIST For the best performance and satisfaction from this quality product, please review the following checklist before you operate the cultivator: v" All assembly instructions completed. have been v" Check carton. Make sure no loose parts remain in the carton. v" All fasteners have been properly tightened. As you learn how to use the cultivator', pay extra attention to the following important items: v'_" Fuel tank is filled with a fresh, clean, fuel mixture.
OPERATION KNOW YOUR CULTIVATOR READ THE OWNER'S MANUAL AND ALL SAFETY RULES BEFORE YOU OPERATE the cultivator. To familiarize yourself with the Iocation of the controls, compare the illustrations with our cultivator'. Save this manual for future reference. ON / OFF Switch Recoil Starter Handle / Throttle Control Lever Upper Handle Lower Handle Choke Control Fuel Cap Tine Shield Assembly_ Tines Figure 3 Throttle Control i Controls the engine speed and the tine rotation.
OPERATION HOW TO USE THE CULTIVATOR How To Stop The Cultivator 1. 2. Release the throttle control to stop the tines. Depth Stake Move the ON/OFF switch, on the engine, to the OFF position. Clevis Pin How To Set The Depth Use the depth stake to control the tilling depth and the forward speed. Set the depth stake to the desired tilling position as follows: 1. Remove the hairpin and the clevis pin from the depth stake (see Figure 4). 2.
OPERATION BEFORE STARTING THE ENGINE How To Prepare A _when The IMPORTANT: Do not use outboard mo- Engine tor oil or multi-viscosity 10W-30 or 10W-40. WARNING: Always use a safety fuel container. Do not smoke adding the fuel mixture to the engine. When inside an enclosure, do not fill the fuel tank. Before you add the fuel mixture, stop the engine. Let the engine cool for several minutes. 3. install the fuel cap onto the gasoline container.
OPERATION HOW TO START THE ENGINE Before you start the engine, make sure that you have read and understand all the instructions on the preceding pages. 1. 7. Pull the starter handle with rapid, full arm strokes until the engine starts. 8. When the engine starts, move the choke Iever to the HALF CHOKE position. When the engine runs smoothly, move the choke lever to the NO CHOKE position. Fill the fuel tank to 1/2 inch below the bottom of the fill neck. Reinstall the fuel tank cap securely.
OPERATION CULTIVATING TIPS Tilling is digging in, turning over and breaking up packed soil before planting. Loose unpacked soil helps root growth. Best tilling depth is 4 to 6 inches. A tiller wiII also clear the soil of unwanted vegetation. The decomposition of this vegetation matter enriches the soil.
MAINTENANCE CUSTOMER RESPONSIBILITIES SERVICE RECORDS Fill in dates as you complete regular service. After Before First Every Each 2 25 Use Hours Hours Tighten AI] Screws and Nuts I I N/ Every Before 75 Before Each SERVICE Hours Storage Season DATES I .... N/ I I I Lubricate Tine Shaft Check Spark Plug Clean and Oil Air Cleaner Filter I ' • ' N I i _] • i • Clean Cylinder Exhaust Ports Drain Fuel " " " " PRODUCT SPECIFICATIONS Model No.: 536.292521 2 Displacement: 3.0 cu. in.
MAINTENANCE LUBRICATION Every 25 hours and/or at the beginning of each season, make sure the gear box is filled with lubricant (see Figure 6). Tubes of gear lubricant are available from most automotive supply stores. Use portable tool grease such as Lubriplate 630AA (Product No. 06787, 1-3/4 oz. tube) or Lubdplate GR-132 (Product No. 15892, 10 oz. tube). if it is damaged (see the Repair Parts section in this manual). 6. Clean and lubricate the tine shaft with a few drops of oil. 7.
MAINTENANCE SPARK PLUG 3. Check the spark plug every 25 hours. Replace the spark plug if the electrodes are pitted or burned or if the porcelain is cracked. 1. Make sure the spark plug is clean. Clean the spark plug by carefully scraping the electrodes (do not sand blast or use a wire brush). 2. Check the spark plug gap with a feeler gauge. See "Product Specifications" for the correct spark plug gap and replacement spark plug. Feeler Gauge 0.035" Spark Plug Figure 8 HOW TO CLEAN THE AIR FILTER 6.
SERVICE AND ADJUSTMENT HOW TO REMOVE AND INSTALL THE TINES Tine Installation References to the right or left side of the cultivator are from the viewpoint of the operator's position behind the unit. 1. Clean and lubricate the tine shaft with a few drops of oil. All four tines are different and cannot be in2. terchanged. The tines must be correctly installed or the cultivator will not function propedy. Place the inside tine on the tine shaft and reinstall the clevis 3.
SERVICE AND ADJUSTMENT HOW TO ADJUST THE CARBURETOR A dirty air cleaner will cause the engine to run improperly or to smoke excessively. Before adjusting the carburetor, make sure the air cleaner is dean. Never make unnecessary adjustments to the carburetor'. The carburetor was set at the factory to operate efficiently under most applications. However, if adjustments are required, we recommend you contact your nearest Sears Service Center.
SERVICE AND ADJUSTMENT STORAGE Cover the cultivator with a suitable protective cover that does not retain mois- tivator indoors with fuel in the ARNING: Never store the culfuel tank. Never store in an en- _lb ture. Do not use plastic. closed, poorly ventilated area where fumes could reach an open flame, a spark or a pilot light as on a furnace, water heater or clothes dryer. IMPORTANT: Never cover the cultivator while the engine and exhaust areas are still warm.
TROUBLE SHOOTING CHART TROUBLE CAUSE CORRECTION Engine difficult to start Stale fuel mixture Drain fuel tank. FilI with fi'esh fuel mixture. Too much oil in fuel mixture Check fuel mixture chart and mix fresh fuel. Dirt in fuel tank or out of fuel Clean fuel tank. Carburetor out of adjustment See Carburetor Adjustment section. Fouled spark plug Clean and set spark plug gap. Engine will not run at full speed Dirty air filter Clean and oil air filter.
CRAFTSMAN 536.292521 REPAIR PARTS 10 323392C KEY NO. DESCRIPTION KEY NO. DESCRIPTION PARTNO. PARTNO. 10 Engine 143.002072 2.
CRAFTSMAN 536.292521 REPAIR PARTS 310 300 318848C F-OO1300M KEY NO. DESCRIPTION PARTNO. 300 Transmission 740061 310 Bracket, Depth Rod 340550 311 Screw, 1/4-20xl.
CRAFTSMAN 536.292521 REPAIR PARTS 482 4814_ 496 496 318849c KEY NO. DESCRIPTION PARTNO. 309073-848 493 Tine Assy. Inner RH 56156_53 273869 494 Tine Assy. Outer RH 56154-853 Flat washer 120392 495 Clevis Pin 56123 483 Nut, 46931 496 Hair Pin 56180 490 Washer, 56158 -- Decal, Caution 320711 491 Tine Assy. Inner LH 56157-853 -- Decal, Tine Shield 712457 492 Tine Assy. Outer LH 56155_53 KEY NO. DESCRIPTION 480 Shield, Tine 481 Screw, 1/4-20x5.
CRAFTSMAN 536.292521 REPAIR PARTS 66O J 662 661 663 318852G F=OO1300M KEY NO. DESCRIPTION PARTNO. 650 Wheel Support Assy.
CRAFTSMAN 536.292521 REPAIR PARTS 947 930 [5 944 932 941 934 319375C F=001300M KEY NO. DESCRIPTION PARTNO. 930 Upper Handle 56237-853 932 Lower Handle LH 339398-853 934 Lower Handle RH 339399-853 941 Bolt 5/16-18xl 56199 942 Formed Washer 943 Flat washer 120393 944 T Knob 57171 945 Nut, 5116-18 120376 946 Hand Grip 56778 947 Screw, 10-16xl.50 426635 948 Cable Tie 712267 -- Decal, Caution (Starting) 24 305828 .
CRAFTSMAN 143.
CRAFTSMAN KEY NO. 1 PART NO, 143.002072 REPAIR PARTS DESCRIPTION KEY NO. PART NO. 0 RPM High 5000 to 5400 93 650849 Flywheel Nut 0 RPM Low 1700 to 3000 100 611056 Solid State Ignition (Incl. 101) 250303 Cylinder(Incl. 187 & 187A) 101 610118 Spark Plug Cover DESCRIPTION 119, 184, 3 650888 Screw, T-30 103 651007 Screw, T-15 13 270288A Crankcase Ass'y. (incl.
CRAFTSMAN 143.002072 REPAIR PARTS 250 450253 Air Cleaner Cover 301 410280 Fuei Cap 257 650867 Screw, 10-24 x 1/2" 326 570659 Blower Housing Plug 258 350435 Blower Housing Base 331 610650B Toggle Switch 261 650850 Screw, 8-32 x 1-9/16" 370C 550239 Choke Decal 262 650939 Stud 370D 35977 Caution Decal 274 510347 Exhaust Gasket 370G 550228 Instruction Decai 275 390322 Muffler (incl. 274 & 277) 370Q 550247 Emissions 277 650938 Screw, 1/4-20 x 2.
CRAFTSMAN 143.002072 60 REPAIR PARTS _-'_.
CRAFTSMAN KEY NO. F-OO1300M 143.002072 REPAIR PARTS PART NO. DESCRIPTION o 640231 Carburetor" (Incl. 184 of Engine Parts List) 1 640232 Throttle Shaft & Lever Ass'y.
CRAFTSMAN 143.002072 13 F-001300M REPAIR PARTS 12 KEY NO. 0 PART NO. 590690 Rewind Starter & Housing Ass'y.
For the repair or replacement parts you need delivered directly to your home Call 7am-7pm, 7days a week 1-800-366-PART (1-800-366-7278) Para ordenar piezas con entrega a domicilio - 1-800-659-7084 For in-house major brand repair service Call 24 hours a day, 7days a week 1-800-4-REPAIR (1-800-473-7247) Para pedir servicio de reparacibn domicilio1-800-676-5811 a For the location of a Sears Parts and Repair Center in your area Call 24 hours a day, 7days a week gggggg 1-800-488-1222 For information on pu