Owner's Manual ICRRFTSMAN+I 6.75 HORSEPOWER 2500 PSI 2.5 GPM PRESSURE WASHER CLEANING SYSTEM Model No. 580.767451 HOURS: • • • • • • Mon. - FrL 8 a.m. to 5 p.m. (CT) CAUTION: Before using this product, read this manual and follow all Safety Rules and Operating Instructions, SEARS, ROEBUCK and CO,, Hoffman Estates, Visit our Craftsman website: www.sears.com/craftsman Past No. 193946GS Dral) 0 (10/17/2003) IL 60179 U.S.A.
WARRANTY .................................... SAFETY RULES ............................... KNOW YOUR PRESSURE WASHER ASSEMBLY OPERATION 2 2-4 ................ 5 ................................... 6-8 ................................. 9-11 MAINTENANCE .............................. SPECIFICATIONS 12-16 ............................... LIMITED 12 WARRANTY STORAGE .................................. TROUBLESHOOTING REPLACEMENT 17-18 ............................ 19 PARTS ................
In the State of California a spark arrester is required _y law (Section 4442 of the California Public Resources Code). Other states may have similar laws. Federal laws apply on federal lands. If you equip the "nuffler with a spark arrester, it must be maintained in _=ffectiveworking order.You can order a spark arrester _hrough your authorized Sears service dealer.
WARNING CAUTION • DO NOT secure spray gun in Open position. • Tie up iong hair a_ remove jewelry. WARNING • DO NOT leave spray gun unattended while machine is running. , NEVER use a spray gun which does not have a trigger !ock or trigger guard in Place and in working order. Always be Certain Spray gun, nozzles and accessories are correctly attached. CAUTION • NEVER aim spray gun at plants. CAUTION wire where it cannot contact spark plug.
KNOW YOUR PRESSURE WASHER Read this owner's manual and safety rules before operating your cleaning system. Compare the illustrations with your cleaning system to familiarize yourself with the locations of various controls and adjustments. Save this manual for future reference. Dial-A-Cleaner Selector Knob TM System Rinse, Detergent and i ChemiCal Reservoirs with Internal Filter and Baffle \\ \ \ } \ \ Recoil Starter Spray Gun \ \ High Pressure Hose Air Filter Hose Reel Choke Lever Throttle C
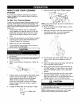
Yourcleaningsystemrequiressomeassembly and is ready for use only after it has been properly serviced with the recommended oil and fuel. If you have any problems with the assembly of your pressure washer, please call the pressure washer helpline at 1-800-222-3136. IMPORTANT: Any attempt to run the engine before it has been serviced with the recommended oil will result in an engine failure. REMOVE PRESSURE FROM CARTON WASHER Become familiar with each piece before assembling the pressure washer.
NOTE: There may be small tube adapters included with the hose reel kit that are not used on this model. IMPORTANT: You must take the hose off the reel when operating your cleaning system. The reel is for storage purposes only. Add Engine Add Fuel _k ARNINGt fill fuel tank is indoors. NEVER fill fuelNEVER tank when engine running or hot. Allow unit to cool for two minutes before refueling. DO NOT light a cigarette or smoke when filling the fuel tank. _k NEVER tank completely full.
2. Removeanddiscardshippingcapsfrompumpinlet andoutlet. 3. Attachother end of high pressure hose to high 7. Turn ON water and squeeze trigger on spray gun to purge pump system of air and impurities. WARNING pressure outlet on pump. Tighten by hand. nspe t screen DO NOT use if damaged; clean if dirty. wearing adequate eye protection. CHECKLIST ENGINE BEFORE STARTING Review the unit to ensure you have performed all of the following: 1. Check that hose reel fasteners are tight.
HOW TO USE YOUR CLEANING SYSTEM 9, Move the choke lever to the =Choke" position, If you have any problems operating your pressure washer, please call the pressure washer helpline at 1-800-222-3136. To Start Your Cleaning System To start your engine-powered cleaning system for the first time, follow these instructions step-by-step. This information also applies whenever you start the engine after you have let the pressure washer sit idle for at least a day. 1.
How to Stop Your Cleaning System . Move throttle lever to =Stop" position. Squeeze trigger on the spray gun to relieve pressure in the hose. Twisting nozzle adjusts spray pattern from a narrow pattern to a fan pattern. \ NOTE: A small amount of water will squirt out when you release the pressure. • Rotate the Dial-A-Cleaner TM selector knob to the OFF position to prevent chemical leakage.
2. If usinganotherchemicaldesignedforusewith pressurewashers,preparechemicalsolutionas requiredbychemicalmanufacturer. Fillchemical reservoir(s) withpreparedsolutionas needed. 3. Rotatethe Dial-A-Cleaner TM selector knob to letter 4. Rotate the Dial-A-Cleaner TM selector knob to letter corresponding to System Rinse tank. As clean rinse water is drawn through the system, continue the flow until no detergent foam is observed. 5.
OWNER'S RESPONSIBILITIES Follow the hourly or calendar intervals, whichever occurs first. More frequent service is required when operating in adverse conditions noted below. MA,NTEt._NCE SCHEouLE FILl_ IN DATES AS YOU COMPLETE REGULAR SERVICE .... HA.....j.. UU"LY BefOre E_h MAINTENANCE PRESSURE WASHER Check/clean water inlet screen Every 25 HPurs or Yeady Use TASK _.--'. U_"_'_AH '_N... _ '" I..T'_.... _'KVAL_ Every 50 HpUr_ or Yeady SERVICE DATES Every 100 HOUrs Or Yearly xt on pump.
BEFORE EACH USE Check engine oil level, Check water inlet screen for damage. Check high pressure hose for leaks. Check chemical tanks and filters for damage. Check spray gun and nozzle extension assembly for leaks. Purge pump of air and contaminants. 1. Detach spray gun and nozzle extension from high pressure hose. Detach nozzle extension from spray gun and remove o-ring and screen from nozzle extension. Flush screen, spray gun, and nozzle extension with clean water to clear debris. 2.
3. Removein-linefilterfromotherendof nozzle extension. 4. Usewireincludedinkit(or a smallpaperclip)to freeanyforeignmaterialcloggingor restricting orifice. 1 o-ring, yellow, (pin B2264) for end of high pressure hose. NOTE: The previous two o-rings are close in size. Please match carefully to assure proper o-ring usage. . 1 water inlet screen (pin B2384.) for garden hose connector. Using a garden hose, remove additional debris by back flushing water through nozzle extension.
4. Tilt pressure washer in opposite direction and empty premeasured pump oil bottle into same opening (a small funnel may be helpful). 5. Install black pump oil cap and tighten firmly. 6. Set pressure washer in upright position. Add fuel and engine oil, . ENGINE MAINTENANCE Checking Oil 4. When engine crankcase is filled to proper level, install and tighten oil cap/dipstick. 5. Wipe up any remaining oil.
Service Spark Carburetor Plug Service the spark plug every 100 hours of operation or yearly, whichever occurs first. If you think your carburetor needs adjusting, see your nearest Sears service center. Engine performance may be affected at altitudes above 3000 to 5000 feet. For operation at higher elevations, contact your nearest Sears service center. WARNING Spark Arrester Your engine is not factory-equipped with a spark attester.
AFTER EACH USE WINTER Water should not remain in the unit for long periods of time. Sediments or minerals can deposit on pump parts and "freeze" pump action. Follow these procedures after every use: 1. Flush chemical system by selecting system rinse tank and run pressure washer with nozzle in low pressure mode. Flush for one minute or until chemical is cleared from system. 2. CAUTION • Freeze damage is not covered under warranty. To protect the unit from freezing temperatures: 1.
LONG TERM STORAGE Protect If you do not plan to use the pressure washer for more than 30 days, you must prepare the engine for long term storage.
Pump has following problems: failure to produce pressure, erratic pressure, chattering, loss of pressure, low water volume. Detergent fails to mix with spray. 1 Pull nozzle backward for high pressure mode. Water inlet is blocked. 2. Clear inlet. 3. Inadequate water supply 3. Provide adeauate water flow 4. Inlet hose is kinked or leaking 4. Straighten =nlet hose, patch leak. 5. Clogged inlet hose stra=ner 5. Check and clean inlet hose strainer. 6. Water supply is over 100"F 6.
CRAFTSMAN 2500 PSI Cleaning Main Unit -- Exploded View System 580,767451 8 \ s4 2O
CRAFTSMAN 2500 PSI Cleaning Main Unit -- Parts List Item 1 2 3 4 5 6 7 B 9 10 11 12 13 14 15 16 17 18 19 20 21 22 23 24 25 26 27 28 29 30 900 Part # MB5691GS M191774GS B4992GS 194061GS 192133GS 192140GS 192131GS 192t26GS 192127GS 30809GS 194062GS 194066GS B3454GS 192149GS 194063GS 194064GS 194065GS 194074GS 194075GS 192553GS 21783GS 194076GS 186317GS 190937AGS B3263GS 190246GS 94804GS 23139DGS 194059GS 192526GS NSP System 580.
CRAFTSMAN 2500 PSI Cleaning Pump -- Exploded View System 580.
CRAFTSMAN Pump --and Item 19 28 45 62 76 77 A B C D E F G H J K L Part # 190571GS 190574GS 190578GS 190581GS 21783GS 190585GS 190594GS 190588GS 190589GS 193808GS 193806GS 190592GS 190593GS 193807GS 189971GS 193971GS 193972GS 2500 PSI Cleaning Parts List System 580.
ENGINE, 6.
ENGINE, 6.
ENGINE, 6.
ENGINE, item 1 2 3 4 5 7 8 9 10 11 12 13 15 16 20 22 23 24 25 26 27 26 29 32 32A 33 34 35 36 37 40 43 45 46 51 51A 55 58 60 65 78 95 97 104 108 109 117 118 12I 125 127 130 133 134 137 146 163 167 168 190 192 202 209 222 227 238 259 276 267 300 304 6.
Sears, Roebuck and Co. U.S.A. (Sears), the California Air Resources Board (GARB) the United States Environmental Protection Agency (U.S.EPA) Emission Control System (Owner's Defect Warranty EMISSION CONTROL WARRANTY COVERAGE iS Warranty Statement Rights and Obligations) a.
GARANTIA .................................... INSTRUCClONES DE SEGURIDAD .............. CONOZCA SU MAQUINA LAVADORA DE PRESION MONTAJE .................................. OPERACION ................................ MANTENIMIENTO ............................ GARANTIA LIMITADA 30 30-32 . . .33 34-36 37-39 40-43 DE LA MAQUINA ESPECIFICACIONES ............................ 40 ALMACENAMIENTO .......................... 4445 REPARAClON DE DAt_OS ........................ 46 GARANTIA DEL CONTROL DE EMISIONES .....
:_n el estado de California es obligatorio, seg0n la lay, el usa _e apagachispas (Secci6n 4442 del C6digo de Recurses _0blicos de California). Otros estades pueden tenet leyes _imiJares. Las leyes federales se aplican en tierras 'ederales. Si equipa el silenciador con un apagachispas, _ste deber_ set mantenido en buenas condiciones de :rabajo. Usted puede ordenar el apagachispas a tray,s de _u distribuidor de servicio autorizado Sears.
ADVERTENCIA PRECAUCION * NO asegure ia pistoia de rociado en la pos_ci6n (open = abierto) ,, NO abandone Ja pistols de ramada cuando la m_quina est_ en funcianamiento. • Ate para arnba el pololargo y quite la joyeria. NUNCA utilice Una pisto{a de rociado que no tenga Un seguro para gati!lo o proteccibn para gatiuo en Su lugar Yen buenas condiciones * siempre aseg_3rese de qae Is pistols de r_ciado, boqui{las y acoesonos esten conectados correctamente. ADVERTENCIA PRECAUCION roods de rosiad0 a chsrro.
CONOZCA SU MAQUINA LAVADORA DE PRESION Lea el manual del propietario y las reglas de seguridad antes de porter en marcha su sistema de limpieza. Compare {as ilustraciones con su sistema de limpieza para familiarizarse con Jas ubicaciones de los difarentes controles y ajustes. Guarde este manual para referencias futuras.
Su sistema de limpieza requiere de ciedo ensemble y estar,_ lista para ser usado Onicamente despues de haber depositado el combustible y el aceite recomendado. Femiliericese con cede parte antes de ensambler {a m,_quina lavadora a presi6n. Compare el contenido con la ilustraci6n de la pagina 33. Si alguna de la pades no est,_ presente o se encuentra daCtada, Ilame ala Iinea de ayuda de la maquina lavadora a presibn el 1-800-222-3136.
NOTA:Puede haberalguna ferreterfa incluida coneljuego decarrete demanga quenoseusaenestemodelo. IMPORTANTE: NOuselam,_.quina lavadora a presi6n teniendo lamanguera enrellada enel carrete. Elcarrete es Onicamente parasualmacenamiento. Agregue NOTA: Revise el aeeite frecuentemente durante el despegue del motor. Agregue ,_ Aceite de Motor IMPORTANTE: Cualquier intento de hacer girar o arrancar el motor antes de que se haya depositado el aceite recomendado puede resultar en falla del motor.
Conecte la Manguera Agua a la Bomba y el Suministro 5. de IMPORTANTE: Usted deber_ armar la extensi6n para boquil{as y conectar todas las mangueras antes de darle arranque al motor. La bomba resultar_ daflada si arranca el motor sin tener todas las mangueras conectadas y el suministro agua abierto. 1. Desenrrolle la manguera de alta prasiSn y conecte un extremo de la manguera a la base de la pistola de rociado. Apriete con la mano.
COMO USAR SU SISTEMA LIMPIEZA DE 9. Mueva la perilla del cebador a la posici6n "Choke". Si tiene problemas sen el funoionamiente de su m&quina lavadera a presi6n, per favor Ilame a la Iinea de ayuda de la m_quina lavadera a presi6n al 1-800-222-3136. Para Poner en Marcha Limpieza el Sistema de Para darle arranque a su sistema de limpieza mevido a motor per primera vez, siga estas instrucciones paso a paso.
Cemo Detener su Sistema 3. de Limpieza Mueva la palanca de la v_lvula de regulacien a la posicien "Stop s ('ParadeS). El patron de rociado se ajusta de un patron angosto a un patron en abanico girando la boc uilla. Apriete el gatillo de la pistota de rociado pare eliminar la presibn de la manguera, NOTA: Observera una pequefia car_idad de ague cuande elimine la presien. Mueva la perilla selectora Dial-A-Cleaner TM a la posicibn OFF pare evitar la fuga del quimico.
siguiendo los instrucdones del fabdcante del quimico. Llene el recJpiente(s) del quTmico con la soiuci6n preparada. 3. Gire la perilla selectora Dial-A-Cleaner TM y col6quela an la letra que corresponda al recipiente que desea usar. 4. Mueva la boquilla ajustable hacia adelar_e para obtener el modo de baja presi6n. El detergente no puede set aplicado si tiene la boquilla en Ia posici6n de alto presi6n, 5. sistema, permita qua dicha circulaci6n continue hasta que deje de observar espuma de detergente.
RESPONSABILIDADES DEL PROPIETARIO Siga el programa de mantenimiento seg_n el nOmere de horas a segOn el calendario, Io qua suceda primere.
ANTES DE CADA USO 1. Revise el hive{ de ese{te de{ motor. Revise sf exdsten de_os en el coledor de la entrade de egua. Revise si existen fugas en le manguepa de elta presi6n. Retire le pistole y la extensi6n pare boquillas de le manguepa de alta presi6n. Retire la extensf6n pare boquillas de la pistola y retire el anillo 'o' y el colador de la extensi6n pare boquillas. Lave el colador, pfstole y extensi6n pare boquillas con ague Iimpie papa eliminer tode erase de residuos.
3. Quiteel en el filtre de la Iinea del otro fin de la extensi6n NOTA: Los dos anillos 'o' antedores tienen un tamafio similar. Pot favor comp_relos y aseg_rese de usarlos an el lugar correcto. de boquilla. 4. Usa el alambre incluido en el juego (o un pequefio sujeta papeles) para liberar cualquier matedal extrafie que este tapande la bequilla. t celader para la entrada de agua (pin B2384) para el conecter de la manguera de jardin. 5.
Cambio de Aceite Cambie el aceite del motor despues de los primeres 5 horas y coda 50 horas, o anualmente, a partir de ese momento. Si esta utilizando su maquina lavadora a presi6n bajo condiciones de extrema suciedad o polvo, o en un clima demasiado caliente, haga el cambio de acoite coda 25 horas. PRECAUCION 3. Para limpiar cartucho, utiliza suavemente el lado plisado de papel en una superficie plan& 4. Instale limpie (o nuevo) limpiador de aire en la base.
DESPUES DE CADA use ALMACENAMIENTO INVIERNO NO deber,_ haber ague en le unidad per la_os periodos de tiempo. Los sedimentos de minerales se pueden depositer en partes de le bombe y "congelar" su funcienamiento. Lleve a cabo estes procadimientos despues de cada use: 1. Lave el sistema de quimicos selecoionande el tanque de enjuague del sistema y haciende funcienar {a m,_quina lavedere a presi6n con le boquille en el mode de beja presi6n.
ALMACENAMIENTO PROLONGADO Protecci6n A protege al salvador de bemba de use de bomba Sears a previene congelar el daf_o y lubrica _mbelos y selles. Si usted no planee usar la m,_quina lavadera a presi6n per m,_s de 30 dias, deber_ preparar el motor para un almacenamiento prolongado. NOTA: EI protector de la bemba, n_mere de item Sears nQmero 7174403, estAn disponible s61o come un acceserio opcionaL No es incluido con la arandela de la presi6n.
Soluci6n I 2_ boquilla est& en e{ modo de baia l. Mueva ]a boquiJla haoia atr_s para el modo de alto presi6n. La entrada de agua est& bloqueada. 2. Cimpie !a entrada: 3. Proporcione flujode 4. Es[im la mangqera de entrada, c01oque Un parohe en ]a fuga. 3:Suministr0 La bomba presenta los siguientes problemas: no produce presibn, prodUCe una presi6n errada, traqueteo_ p6rdida de presibn_ bajo volumen de agua.
Sears, Roebuck and Co., U.S.A. (Sears), California Air Resources Board (Consejo de Recursos sobre el Airs de California, CARB, pot sus siglas en ingles) y United States Environmental Protection Agency (Agencia de Protecci6n Ambiental de EE.UU., EPA, pot sus siglas en ingles).
Your Home For repair - in your home - of all major brand appliances, lawn and garden equipment, or heating and cooling systems, no matter who made it, no matter who sold itt For the replacement parts, accessories and owner's manuals that you need to do-it-yourself. For Sears professional installation of home appliances and items like garage door openers and water heaters. 1-800-4-MY-HOME (%800-469-4663) www.sears.com ® Anytime, day or night (U.S.A. and Canada) www.sears.