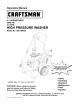
Operators Manual CRRFTSMRN° 4.5 HORSEPOWER 2000 PSI 2.0 GPM HIGH PRESSURE WASHER Model No. 580.768322 PRESSURE WASHER CUSTOMER 1-800-222-3136 HOURS: • • • • • Mon.- Fri. 8 a.m. to 5 p.m. (CT) CAUTION" Before using this product, read this manual and follow all Safety Rules and Operating Instructions. SEARS, ROEBUCK and CO., • Espafiol Hoffman Estates, IL 60179 Visit our Craftsman website: www.sears.com/craftsman Part No.
WARRANTY ................................... 2 SAFETY RULES .............................. STORAGE ................................... 2-3 TROUBLESHOOTING ASSEMBLY .................................. 4-6 REPLACEMENT OPERATION ................................ 7-10 MAINTENANCE ............................ SPECIFICATIONS 11-14 ............................. LIMITED 11 WARRANTY 15 .......................... 16 PARTS ...................... 18-27 EMISSION CONTROL WARRANTY ................
• Somechemicals or detergents maybeharmfulif inhaledor ingested,causingseverenausea,fainting or poisoning. Theharmfulelementsmaycause propertydamageor severeinjury. • DoNotallowCHILDREN tooperatethepressure washeratanytime. • Operateengineonlyatgovernedspeed.Runningthe engineatexcessivespeedsincreases thehazardof personalinjury.DoNottamperwithpartswhichmay increaseordecreasethegovernedspeed. • DoNotwearlooseclothing,jewelryoranythingthat maybecaughtinthestarterorotherrotatingparts.
Your pressure washer requires some assembly and is ready for use only after it has been properly serviced with the recommended oil and fuel. If you have any problems with the assembly of your pressure washer, please call the pressure washer helpline at 1-800-222-3136. IMPORTANT: Any attempt to run the engine before it has been serviced with the recommended oil will result in an engine failure.
Add Engine Add Gasoline Oil IMPORTANT: Any attempt to crank or start the engine before it has been properly serviced with the recommended oil may result in an engine failure. NOTE: When adding oil to the engine crankcase, use only high quality detergent oil rated with API service classification SF, or SG rated SAE 10W-30 weight. A ANGER! Never fill fuel tank indoors. fuel tank when engine is running or hot. Never Do Notfill smoke when filling fuel tank. A ARNING! fill expansion.
Connect Hose and Water Supply to Pump IMPORTANT: You must assemble nozzle extension and attach all hoses before you start engine. Starting engine without all hoses connected and water supplied will damage pump. • • Uncoil high pressure hose and attach one end of hose to the base of the spray gun. Tighten by hand. • Turn ON the water (open supply valve completely). • Squeeze trigger on gun to purge pump system of air and impurities.
KNOW YOUR PRESSURE WASHER Read the owner's manual and safety rules before operating your pressure washer. Compare the illustrations with your pressure washer to familiarize yourself with the locations of various controls and adjustments. Save this manual for future reference.
HOW TO USE YOUR PRESSURE WASHER If you have any problems operating your pressure washer, please call the pressure washer helpline at 1-800-222-3136. To Start Your Pressure Washer To start your engine-powered pressure washer for the first time, follow these instructions step-by-step. This starting information also applies whenever you start the engine after you have let the pressure washer sit idle for at least a day.
How To Use the Adjustable Nozzle You now should know how to START your pressure washer and how to STOP it. The information in this section will tell you how to adjust the spray pattern and apply detergent or other cleaning chemicals. _ DANGER! Never Neverput adjust spray pattern when to spraying. hands in front of nozzle adjust spray pattern. On the end of your spray gun is a nozzle handle that you can slide forward and backward to adjust the spray pattern to be either high or low pressure.
ForRinsing: • Slidethe nozzlebackward to highpressure,press thetriggerandwaitforthedetergentto clear. NOTE:Youcanalsostopdetergentflowbyremoving detergentsiphoning tubefromcontainer. • Keepthe sprayguna safedistancefromthearea youplanto spray. • Applya highpressuresprayto a smallarea,then checkthe surfacefordamage.If nodamageis found,it isokayto continuecleaning. • Startat thetopoftheareato berinsed,working downwithsameoverlapping strokesasyouused forwashingandapplyingdetergent.
OWNER'S RESPONSIBILITIES Follow the hourly or calendar intervals, whichever occurs first. More frequent service is required when operating in adverse conditions noted below. MAINTENANCE SCHEDULE FILL IN DATES AS YOU COMPLETE REGULAR SERVICE HOURLY OPERATING Before Each Use MAINTENANCE Every 50 Hours or Yearly INTERVAL Every 100 Hours or Yearly WASHER Check/clean water inlet screen on quick-connect. xt Check high pressure hose. X Check detergent hose.
BEFORE EACH USE . • Check engine oil level. • Check water inlet screen for damage. • Check high pressure hose for leaks. • Check chemical filters for damage. • Check gun and nozzle extension assembly for leaks. • Purge pump of air and contaminants. . PRESSURE WASHER MAINTENANCE Check and Clean Inlet Screen Place the in-line filter screen into the threaded end of the nozzle extension. Direction does not matter.
• Usethewireincludedinthe kitor a smallpaper cliptofreetheforeignmaterialscloggingor restricting the nozzle. NOTE: The above two o-rings are close in size. Please match carefully to assure proper o-ring usage. Insertwireintonozzleandturnbackandforthto clearobstruction. Removeadditionaldebrisby backflushingwater supplythroughnozzleextension.Backflush between30to 60seconds. Turnnozzleextension to streamsprayandmovenozzlefromlowto high pressurewhileflushing.
• Tip your pressure washer to drain oil from the oil dipstick into a suitable container. When crankcase is empty, return the pressure washer to upright position. Wipe up spilled oil. • Slowly pour oil into oil fill opening until oil reaches "UPPER LIMIT" mark on the dipstick. Stop occasionally to check oil level. If the oil level is near or below the lower limit mark on the dipstick, fill with the recommended oil to the upper limit mark. DO NOT OVERFILL.
AFTER LONG TERM STORAGE EACH USE Water should not remain in the unit for long periods of time. Sediments or minerals can deposit on pump parts and "freeze" pump action. Follow these procedures after every use: If you do not plan to use the pressure washer for more than 30 days, you must prepare the engine for long term storage. It is important to prevent gum deposits from forming in essential fuel system parts such as the carburetor, fuel filter, fuel hose or tank during storage.
Problem Cause Pump has following problems: failure to produce pressure, erratic pressure, chattering, loss of pressure, low water volume. Correction 1. Nozzle in low pressure mode. 1. 2. 3. 4. 5. Water inlet is blocked. Inadequate water supply. Inlet hose is kinked or leaking. Clogged inlet hose strainer. 2. 3. 4. 5. Water supply is over 140°F. High pressure hose is blocked or leaks. 8. Gun leaks. 9. Nozzle is obstructed. 10. Pump is faulty. 6. 7. 1. 1. 6. 7.
CRAFTSMAN 2000PSI Main Unit m Exploded Pressure Washer 580.768322 View _25 / 31 --\ \\\ 26_ 19_ / \ 27 / / 19 _1o / 42 / 41 744 900_ \ \ \ \ /_16 \ \ 717 55_ @. s4 _i 56 _._.
CRAFTSMAN 2000 PSI Pressure Main Unit m Parts List Item 2 3 4 5 6 7 8 9 10 11 12 13 14 15 16 17 18 19 20 21 22 23 24 25 26 27 28 29 30 31 32 33 34 35 36 37 38 39 40 41 42 43 44 900 PaN # Qty.
CRAFTSMAN 2000 PSI Pressure PumpExploded View jl 7 1 Washer 580.768322 L o) _16 27 2 30_ /o o / 34 23 o 0 $1 / 15 o_47 $2 27 / 29 28 26 L 25 / $7 $6 / 2S 22... 35 34 44 45 OJ_ L o/ 12 \ / 4O 38 34 35 13 _z_ 47 2O 3S
CRAFTSMAN 2000PSI Pump m Parts List Item 1 2 3 4 5 6 7 8 9 10 11 12 13 14 PaN # B2218 97962 96795 21429 97835 21783 93680 97831 B2702 B5003 B5710 97841 40946 185710 ...... ...... 5 15 16 17 18 19 20 21 22 23 24 25 23 26 27 28 29 31 32 ...... ...... ...... ...... ...... B3829 ...... ...... ...... ...... ...... 185711 ...... ...... ...... ...... ...... ...... ...... Qty. 1 3 3 6 1 1 3 3 1 1 1 3 4 0 1 3 1 1 2 3 1 0 1 1 1 1 1 0 1 1 1 1 1 1 1 Pressure Washer 580.
ENGINE, Honda - Exploded Item Part# 1 12000-ZL8-405 2 12216-ZE5-300 3 12311-ZL8-000 4 12355-ZL8-000 Qty. 1 1 1 1 View and Parts List - Cylinder Description CYLINDER ASSY. CLIP, VALVE GUIDE COVER, HEAD COVER COMP., BREATHER Barrel and Oil Pan Item 5 6 7 8 Part# 90013-883-000 90014-952-000 91201-ZL8-003 98079-56846 Qty. Description 4 BOLT, FLANGE (6X12) 1 BOLT, FLANGE (6X14) 1 OIL SEAL (25.
ENGINE, Honda - Exploded and Recoil View and Parts List - Crankshaft, Item Part# 2 13310-ZM0-600 5 90402-ZL8-000 Item Part# 1 13101-ZL8-000 2 13111-ZE0-000 3 13200-ZL8-000 Item 1 2 3 4 Rod, Qty. Description 1 CRANKSHAFT COMP. 1 WASHER, THRUST Qty. 1 1 1 4 90001-ZE1-000 2 5 6 90551-ZE0-000 13010-ZL8-003 2 1 Part # 28400-ZM0-632ZA 28461-ZL8-003 28462-ZL8-631 90303-MR1-000 23 Piston-Connecting Description PISTON PIN, PISTON ROD ASSY.
ENGINE, Honda - Exploded Item Part # 1 16854-ZH8-000 2 3 4 5 6 8 16950-ZG9-M02 16956-ZM0-000 17620-ZL8-003 17702-ZM0-000 19610-ZM0-010ZA 33609-GK4-620 View and Parts List - Air Cleaner Qty. Description 1 RUBBER, SUPPORTER (107MM) 1 PETCOCK ASSY. (MAN) 1 BRACKET, PETCOCK 1 CAP ASSY., FUEL TANK 1 TUBE, FUEL 1 COVER COMP., FAN *NHI* 1 COLLAR, FR.
ENGINE, Honda - Exploded View and Parts List - Carburetor ........................ 7 Q Item Part# 1 16010-883-015 2 16013-ZL1-003 3 16015-892-505 4 16016-ZG0-W00 5 16028-ZE0-005 6 16029-ZG0-901 7 16100-ZM0-802 8 9 10 16155-ZM0-003 16166-ZM0-003 16211-ZL8-000 Qty. 1 1 1 1 1 1 1 1 1 1 Description GASKET SET FLOAT SET CHAMBER SET, FLOAT SCREW SET SCREW SET B SCREW SET CARBURETOR ASSY.
ENGINE, Honda - Exploded View and Parts List - Flywheel and Camshaft Pulley _5 ,2¸ Item Part# 1 13331-357-000 2 3 4 5 30500-ZL8-004 31105-ZM0-000 32195-ZM0-000 35120-ZM0-003 6 75100-ZM0-000 Item Part # 1 14320-ZL8-000 2 3 14324-ZL8-000 14400-ZL8-003 4 5 6 14431-ZL8-000 14441-ZL8-000 14461-ZL8-000 Qty. Description 1 KEY, SPECIAL WOODRUFF (25X18) 1 COIL ASSY., IGNITION 1 FLYWHEEL ASSY 1 WIRE, STOP SWITCH 1 SWITCH ASSY., ENGINE STOP (N.C) 1 BRAKE ASSY.
ENGINE, Honda - Exploded View and Parts List - Muffler and Control .... Item Part# 1 18310-ZM0-000 2 18321-ZL8-000 3 90004-ZL8-000 i Item Part # 1 16551-ZM0-000 2 16555-ZM0-000 3 16561-ZM0-000 4 16562-ZM0-000 5 6 16576-ZE7-300 16576-891-000 Qty. 1 1 1 1 1 1 Description ARM, GOVERNOR ROD, GOVERNOR SPRING, GOVERNOR SPRING, THROTTLE RETURN SPRING, LEVER HOLDER, CABLE 27 Qty.
Your Warranty If you have any questions regarding your warranty rights and responsibilities, your should contact your nearest authorized service center or call Sears at 1-800-473-7247. Rights and Obligations The California Air Resources Board ("CARB") and Sears Roebuck and Co., USA, are pleased to explain the Emission Control System Warranty on your model year 2000 and later small off-road engine (engine).
GARANTIA ................................... INSTRUCCIONES DE SEGURIDAD MONTAJE ................................. OPERACION ............................... MANTENIMIENTO ........................... GARANTIA LIMITADA ............. 29 29-30 31-33 34-37 39-42 DE LA MAQUINA ESPECIFICACIONES ........................... 39 ALMACENAMIENTO ......................... 43-44 REPARACION DE DANOS ....................... 45 GARANTIA DEL CONTROL DE EMISIONES ......... 47 COMO ORDENAR PARTES .......
Algunos quimicos o detergentes pueden ser nocivos si se inhalan o ingieren, causando nausea severa, desmayos o envenenamiento. Los elementos nocivos pueden ocasionar daSo a la propiedad o lesiones severas. • Nunca mueva la maquina halando la manguera de alta presi6n. Utilice la manija que viene con la unidad. • Siempre asegQrese de que la pistola de rociado, boquillas y accesorios est6n conectados correctamente. No permita en ningen momento que NINOS operen la maquina lavadora a presi6n.
Su maquina lavadora a presi6n requiere de cierto ensamble y estara lista para ser usada Qnicamente despu6s de haber depositado el combustible y el aceite recomendado. Familiaricese con cada parte antes de ensamblar la maquina lavadora a presi6n. Compare el contenido con la ilustraci6n de la pagina 34. Si alguna de la partes no esta presente o se encuentra daSada, Ilame a la linea de ayuda de la maquina lavadora a presi6n al 1-800-222-3136.
Agregue Aceite de Motor Agregue IMPORTANTE: Cualquier intento de hacer girar o arrancar el motor antes de que se haya depositado el aceite recomendado puede resultar en falla del motor. _ PELIGRO! Nunca Nunca Ilene elIlene tanque de combustible en recintos cerrados. el tanque de combustible cuando el motor est6 funcionando o est6 caliente. No fume cuando est6 Ilenando el tanque de combustible. _ ADVERTENClA! NuncaDeje Ileneespacio por completo tanque de combustible.
Conecte la Manguera Agua a la Bomba y el Suministro de IMPORTANTE: Usted debera armar la extensi6n para boquillas y conectar todas las mangueras antes de darle arranque al motor. La bomba resultara daSada si arranca el motor sin tener todas las mangueras conectadas y el suministro agua abierto. • Desenrrolle la manguera de alta presi6n y conecte un extremo de la manguera a la base de la pistola de rociado. Apriete con la mano. • Abra el suministro del agua (abra la vMvula de suministro completamente).
CONOZCA SU MAQUINA LAVADORA DE ALTA PRESION Lea el manual del propietario y las reglas de seguridad antes de poner en marcha su maquina lavadora a presibn. Compare las ilustraciones con su maquina lavadora a presi0n para familiarizarse con las ubicaciones de los diferentes controles y ajustes. Guarde este manual para referencias futuras.
COMO USAR SU MAQUINA LAVADORA A PRESION Si tiene problemas con el funcionamiento de su maquina lavadora a presi6n, por favor Ilame a la linea de ayuda de la maquina lavadora a presi6n al 1-81)0-222-3136. Estr_ngulese Estrangule palanca en la palanca en la posici6n posici6n Abierta R_pida Para Poner en Marcha la M_quina Lavadora a Presion Para darle arranque a su maquina lavadora a presi6n movida a motor por primera vez, siga estas instrucciones paso a paso.
Como Usar la Boquilla Ajustable Usted ya debe saber como darle ARRANQUE a su maquina lavadora a presi6n y como DETENERLA. La informaci6n de esta secci6n le dira como ajustar el patr6n de rociado y como aplicar detergente u otros quimicos de limpieza. _ iPELIGRO! ajuste el patr6n de las rociado cuando est6 Nunca rociando. Nunca coloque manos en frente de la boquilla para ajustar el patr6n de rociado.
Enjuage de la M_quina Lavadora a Como Presion ADVERTENCIA: Sea extremadamente cuidadoso si debe usar el sistema de limpieza desde una escalera, andamio o cualquier superficie relativamente inestable. La presi6n de una maquina lavadora en funcionamiento se acumula a medida que usted sube. Cuando oprima el gatillo, la fuerza de reacci6n del rociado inicial podria hacerlo caer.
RESPONSABILIDADES DEL PROPIETARIO Siga el programa de mantenimiento segt_n el nt_mero de horas o segt_n el calendario, Io que suceda primero. Se requiere de servicio con mayor frecuencia cuando opere la unidad en las condiciones adversas descritas a continuaci6n.
ANTES DE CADA USO 3. • Revise el nivel de aceite del motor. • Revise si existen daSos en el colador de la entrada de agua. • Revise si existen fugas en la manguera de alta presi6n. • Revise si existen daSos en los filtros de quimicos. • Revise si existen fugas en el conjunto de la extensi6n para boquillas y pistola. • Elimine el aire y los contaminantes 4. Coloque el anillo 'O' en la ranura respectiva. Empuje el Anillo 'O' hasta que quede ajustado contra el colador del filtro en linea. 5.
• Use el alambre incluido en el juego o un clip de papel pequeSo para liberar los materiales extraSos que estan tapando u obstruyendo la boquilla. NOTA: Los dos anillos 'o' anteriores tienen un tamaSo similar. Por favor comparelos y aseg6rese de usarlos en el lugar correcto. Introduzca el alambre dentro de la boquilla y girelo hacia los lados, hacia adelante y atras hasta despejar la obstrucci6n.
• Incline su maquina lavadora a presi6n para drenar el aceite a trav6s del tubo de la varilla de medici6n/tapa del aceite a un recipiente adecuado. Cuando la caja del cigeeSal est6 vacia, vuelva a colocar la maquina lavadora a presi6n en posici6n vertical. Limpie el aceite que haya derramado. • Llene lentamente la caja del cigeeSal del motor con el aceite recomendado hasta que el nivel del aceite est6 en la marca "UPPER LIMIT" ("LIMITE SUPERIOR") de la varilla de medici6n.
DESPUES DE CADA ALMACENAMIENTO INVIERNO USO No debera haber agua en la unidad por largos periodos de tiempo. Los sedimentos de minerales se pueden depositar en pares de la bomba y "congelar" su funcionamiento. Lleve a cabo estos procedimientos despu6s de cada uso: • • Lave el tubo en un balde funcionar la baja presi6n Lave por un Desconecte el alambre de la bujia. • Saque todos los liquidos de la bomba halando la manija de retroceso aproximadamente 6 veces.
ALMACENAMIENTO PROLONGADO Aceite el Di_metro Si usted no planea usar la maquina lavadora a presi6n por mas de 30 dias, debera preparar el motor para un almacenamiento prolongado. Es importante evitar la formaci6n de dep6sitos de goma en las partes esenciales del sistema del combustible tales como carburador, filtro del combustible, manguera o tanque del combustible durante el almacenamiento.
Problema Causa Solucion 1. 1. 2. 3. La boquilla esta en el modo de baja presi6n. La entrada de agua esta bloqueada. Suministro de agua inadecuado. 4. La manguera de entrada esta doblada o presenta fugas. 5. El colador de la manguera de la entrada de agua esta tapado. 6. El suministro de agua esta por encima de los 140°F. 7. La manguera de alta presi6n esta bloqueada o presenta fugas. 8. La pistola presenta fugas. 9. La boquilla esta obstruida. 10. Bomba defectuosa.
Sus Obligaciones y Derechos de Garantia Si tiene preguntas acerca de sus responsabilidades y derechos de garantia, deber& ponerse en contacto con su centro de servicio autorizado mas cercano o Ilamar a Sears al 1-800-473-7247. La Junta Directiva de Recursos Ambientales de California ("CARB') y Sears Roebuck and Co. USA, tienen el gusto de explicar la Garantia del Sistema de Control de Emisiones de su motor (motor) pequeSo aSo 2000 y modelos posteriores.
For in-home major brand repair service: Call 24 hours a day, 7 days a week 1-800-4-MY-HOME Para pedir servicio de reparacibn sM (1-800-469-4663) a domicilio - 1-800-676-5811 In Canada for all your service and parts needs call - 1-800-665-4455 Au Canada pour tout le service ou les pi_ces For the repair or replacement parts you need: Call 7 am - 7 pm, 7 days a week 1-800-366-PART Para ordenar piezas con entrega (1-800-366-7278) a domicilio - 1-800-659-7084 For the location of a Sears Parts and Re