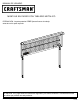
OPERATOR’S MANUAL BACKWALL WITH METAL PEGBOARD CAUTION: Backwall MUST be attached to the Workbench before the top is attached. CAUTION: Read and follow all Safety Rules and Operating Instructions before first use of this product. Distributed by Sears Brands Managem ent Corporation.
SAFETY SAFETY WARNINGS AND CAUTIONS: • • • • • • • • • • • • • Use appropriate safety equipment when using power and hand tools. Failure to do so may cause personal injury or product damage. Use adequate manpower when assembling and moving this unit. Failure to do so may cause personal injury or product damage. DO NOT stand on this product. You may fall which may cause personal injury. DO NOT mount this product on a truck bed or any other moving object. This may cause personal injury or product damage.
ASSEMBLY CC AA W ARNING: Backwall with Metal Pegboard is only to be attached to one of the following W orkbenches: 14929, 14928, 14925 and 14940. D TOP REMOVAL: • Remove and reuse fasteners from wood top. • Remove top from workbench base. BB STEP 1: E • Remove and reuse the top and bottom fasteners from the top back of the workbench. • Attach (2) A to workbench, as shown, using existing hardware (8) AA, (8) BB and (8) CC. • Finger tighten.
STEP 4: STEP 5: (8' ON LY) AA(4) DD(6) BB(4) EE(6) RR(2) CC(4) • • • • Assemble (2) LL and (2) JJ loosely together. Place hardware assembly into top slots in light housing F. Tighten so each JJ locks LL into place. Attach light assembly into B and secure with (2) KK. • Attach light assembly B to Backwall using (4) AA, (4) BB, (4) CC, (6) DD, and (6) EE as shown. • On the 8' Workbench insert (1) HH into hole of B to protect light cord.
STEP 7: STEP 6: GG(2) FF(6) NOTE: To reattach the top, new pilot holes may need to be marked and drilled. • Place top on the bench in the desired location. • Mark centers of mounting holes to be drilled. (If needed) • Drill 1/8" pilot holes in top. (If needed) • Reattach top using existing hardware. • Wrench tighten all fasteners. EE(2) NN(2) Note: Outlet strip may be mounted on left or right side. Right side mounting shown. • Place G in opening in C. • Attach G using (2) GG, (2) NN and (2) EE.
MAINTENANCE STEP 9: C Periodically the surfaces should be cleaned with a mild detergent and water. C Auto wax will preserve the unit's luster finish. Apply the wax as to a car. The wax will also help protect the unit against scratches. C Grease and oil can be removed with most standard cleaning fluids. For safety, use a nonflammable cleaning fluid. HH(4) • Install grommets (4) HH in holes in E.
MANUAL DE USUARIO MONTAJE EN PARED CON TABLERO METÁLICO PRECAUCIÓN: La parte posterior DEBE fijarse al banco de trabajo antes de unir la parte superior. ATENCIÓN: Lea y siga todas las Normas de Seguridad y las Instrucciones de Funcionamiento antes de utilizar por primera vez este producto.
SEGURIDAD ADVERTENCIAS Y PRECAUCIONES DE SEGURIDAD: • Utilice el equipo de seguridad adecuado cuando emplee herramientas eléctricas. De lo contrario, podría causarle lesiones personales u ocasionar daños al producto. • Utilice el personal adecuado para el montaje y el traslado de esta unidad. De lo contrario podría ocasionarse lesiones personales o dañar el producto. • NO se ponga de pie sobre la unidad. Podría caerse y lesionarse.
3
ENSAMBLAJE CC AA ADVERTENCIA: El Panel Posterior con Tablero de Metal Backwall 14943/14944 sólo debe ser colocado en los siguientes Bancos de Trabajo: 14929, 14928, 14925 and 14940. D REMOCIÓN DE LA PARTE SUPERIOR: • Retire y vuelva a utilizar los sujetadores del tope de madera. • Retire la parte superior de la base del banco de trabajo. BB PASO 1: • Quite y reutilice la tapa y los sujetadores inferiores de la tapa detrás del banco de trabajo.
PASO 4: PASO 5: (8' S O LA ME N TE ) AA(4) DD(6) BB(4) EE(6) RR(2) CC(4) • Monte (2) LL y (2) JJ libremente junto. • Ponga el montaje del hardware en ranuras superiores en la cubierta ligera F. • Apriete tan cada uno las cerraduras JJ LL en lugar. • Ate a la asamblea ligera en B y asegúrela con (2) KK. • En el 8' Parte movible del banco de trabajo (1) HH en el agujero de B para proteger la cuerda ligera. light cord.
PASO 7: PASO 6: GG(2) FF(6) NOTA: Para reatar la tapa, los nuevos agujeros experimentales pueden necesitar ser marcado y ser perforado. • Coloque la parte superior del banco en el lugar de su elección. • Marque los centros de los agujeros de montaje que deben ser taladrados. (Si está necesitado) • Haga agujeros piloto de 1/8 pulgada en la parte superior. (Si está necesitad) • Vuelva a colocar la parte superior utilizando el hardware existente. • Apriete con llave todos los sujetadores.
MANTENIMIENTO PASO 9: • Periódicamente las superficies deberán limpiarse con un detergente suave y agua. • La cera para automóviles preservará el acabado brilloso de la unidad. Aplique la cera como lo haría al carro. La cera también ayudará a proteger la unidad contra raspones. • La grasa y el aceite pueden retirarse con la mayoría de los líquidos estándar para limpieza. Por razones de seguridad, utilice un líquido incombustible para limpieza. HH(4) • Instale los ojales (4) HH en agujeros en E.
8