Operator's Manual ICR.FT. M.N ° IIIII IIIIII I II]]ll GARDEN TRACTOR 26.0 HR* 54" Mower ElectricStart 6 Speed Transaxle Model No. 917.25024 • EspaSol, p. 36 4 I _ l This product has a low emission engine which operates differently from previously built engines. Before you start the engine, read and understand this Operator's Manual. IMPORTANT: For answers to your questions Read and follow all Safety Rules and Instructions before operating this equipment.
Warranty .................................................. 2 Safety Rules ............................................ 3 Product Specifications ............................. 6 Assembly/Pre-Operation ......................... 8 Operation ............................................... 13 Maintenance Schedule .......................... 20 Maintenance .......................................... 20 Service and Adjustments ....................... 25 Storage ..................................................
_DANGER: This cutting machine is capable of amputating hands and feet and throwing objects. Failure to observe the following safety instructions could result in serious injury or death. ,_ILWARNING: In orderto prevent accidental starting when setting up, transporting, adjusting or making repairs, always disconnect spark plug wire and place wire where it cannot contact spark plug. o _LWARNING: Do not coast down a hill in neutral, you may lose control of the tractor.
II. SLOPE OPERATION Slopes are a major factor related to loss of control and tip-over accidents, which can result in severe injury or death, Operation on all slopes requires extra caution. If you cannot back upthe slope or ifyou feel uneasy on it, do not mow it. • Mow up and down slopes, not across. • Watch for holes, ruts, bumps, rocks, or other hidden objects. Uneven terrain could overturn the machine.
• Remove gas-powered equipment from • thetruckortrailerandrefuel itonthe ground. Ifthisisnotpossible, thenrefuel • such equipmentwith aportable container, ratherthanfroma gasoline dispenser nozzle. , Keep thenozzle incontact withtherim • ofthefueltankorcontainer opening at alltimesuntilfueling iscomplete. Donot useanozzle lock-open device. • • Iffuelisspilled onctothing, changeclothingimmediately. • • Neveroverfilifueltank. Replace gascap andtighten securely.
PRODUCT SPECIFICATIO NS In the state of California the above is req u ired by law (Section 4442 of the California Public Resources Code). Other states may have similar laws. Federal laws apply on federal lands, A spark arrestor for the muffler is available through your nearest Sears service center (See REPAIR PARTS manual). Gasoline Capacity 4.0 Gallons/t 5,14 L and type: Regular Unleaded Oil Type: (AP]: SG-SL) Oil Capacity: SAE 10W30 (above32°F/0°C SAE 5W30 (below 32°F/0"C 64 Oz.
© Mower Mower Front Wheel (2) Rear _'_'_ Lift Link (5) 1.3/16 O.D. Washers (1) Shoulder Bolt (1) 1-1/40.D. Washer Assemblies (1) Small Retainer Springs @ (1) Front _, Lift Link Assembly "%, (1) Wheel % (1)3/8-16 Locknut Retainer Springs (1) Oil Drain Tube If Equipped Keys (1) Anti-Sway Bar (1) 3/40,D.
Your new tractor has been assembled at the factory with exception of those parts left unassembled for shipping purposes. To ensure safe and proper operation of your tractor all parts and hardware you assemble must be tightened securely. Use the correct tools as necessary to insure proper tightness. ADJUST SEAT t. Sit in seat. TOOLS REQUIRED FOR ASSEMBLY 2.
_JlkCAUTION: Lift lever is spring loaded. Have a tight grip on lift lever, lower it slowly and engage in lowest position. Lift lever is located on ]eft side of fender. 3. TURN STEERING WHEEL LEFT AND POSITION MOWER • Turn steering wheel to the leTtas far as it will go and position mower on right side of tractor with deflectorshield (Q)tothe right. Lift Lever 2. ASSEMBLE Front FRONT GAUGE WHEEL (W) TO FRONT OF MOWER _"_Transaxle Q. Deflector Shield [ H. W. X. Y. Z.
Pivot the integrated washer end of antisway bar (S)towards mower deck bracket on right side of mower. Insert integrated washer end of bar into hole i nrear mower bracket (D). Move mower as needed to insert integrated washer end of bar into rear mower bracket (D). Secure with small washer and small retainer spring as shown. A, Mower Side Suspension Arms Q.Deflector Shield 5. INSTALL ANTI-SWAY BAR (S) (IF EQUIPPED) _ ANTI-SWAY Towards Transaxle 90° End BAR (S) Towards Mower Deck D.
9 • • INSTALL BELT ON ENGINE CLUTCH PULLEY (M) Disengage belt tension rod (K) from locking bracket (L). Install belt onto engine clutch pulley (M), C, Rear Lift Link(s) D. Right Side Rear Mower Bracket U. Hole 8 • A-I-I-ACHFRONT LINK (E) Turn steering wheel to position wheels straight forward.
CHECK TIRE PRESSURE The tires on your tractor were over-inflated atthe factory for shipping purposes. Correct tire pressure is important for best cutting performance. - Reducetire pressure to PSI shown on tires. t_CHECKLIST Before you operate your new tractor, we wish to assure that you receive the best performance and satisfaction from this Quality Product. CHECK DECK LEVELNESS For best cutting results, mower housing should be properly leveled.
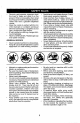
These symbols mayappear onyourtractor orinliterature supplied withtheproduct. Learn andunderstand theirmeaning.
KNOW YOUR TRACTOR READ THIS MANUAL AND SAFETY RULES BEFORE OPERATING YOUR TRACTOR Compare the illustrations with your tractor to familiarize yourself with the locations of various controls and adjustments, Save this manual for future reference. Our tractors conform to the applicable safety standards of the American National Standards Institute, (G) (A) ATTACHMENT LIFT LEVER - Used to raise and lower the mower or other attachments mounted to your tractor.
Theoperation ofanytractor canresult inforeign objects thrown intothe eyes, which canresult insevere eyedamage. Always wearsafety glasses oreyeshields whileoperating yourtractor orperforming anyadjustments orrepairs. Werecommend standard safety glasses orawidevisionsafety mask wornoverspectacles. HOW TO USE YOUR TRACTOR TO SET PARKING BRAKE Your tractor is equipped with an operator presence sensing switch.
TO MOVE FORWARD AND BACKWARD The direction and speed of movement is controlled by the gearshift lever (J). 1, Start tractor with clutch/brake pedal depressed and gearshift lever in neutral position. 2. Move gearshift lever to desired position. 3. Slowly release clutch/brake pedal to star_ movement. TO ADJUST GAUGE WHEELS Gauge wheels are properly adjusted when they are slightly off the ground when mower is at the desired cutting height in operating position.
REVERSE OPERATION SYSTEM (ROS) Your tractor is equipped with a Reverse Operation System (ROS). Any attempt by the operator to travel inthe reverse direction with the attachment clutch engaged will shut off the engine unless ignition key is placed in the ROS "ON" position. Ai)AWARNING: Backing up with the attachment clutch engaged while mowing is strongly discouraged.
ADD GASOLINE • Fill fuel tank to bottom of filler neck. Do not overfill. Use fresh, clean, regular unleaded gasoline with a minimum of 87 octane. (Use of leaded gasoline will increase carbon and lead oxide deposits and reduce valve life). Do not mix oil with gasoline. Purchase fuel in quantities that can be used within 30 days to assure fuel freshness. _,CAUTION: Wipe offany spilled oil or fuel. Do not store, spill or use gasoline near an open flame.
NOTE: If at a high altitude (above 3000 feet) or in cold temperatures (below 32°F/0°C) the carburetor fuel mixture may need to be adjusted for best engine performance. See "TO ADJUST CARBURETOR" inthe Service and Adjustments section of this manual. MOWING TIPS • Tire chains cannot be used when the mower housing is attached to tractor. • Mower should be properly leveled for best mowing performance.
MA'I"NTENANCE SCHEDULE Cheek T R Brake CheckTire Operation Pressure Cheek,Operator Presence A Check Fasteners C Cheek!Replace iT for Loos_ Lubrication Mower R Clean Battery and Glean Debris 0f!, Steering Check Transa×_e Check Mower Check V_BeltS Check Enqine Air G Cleat_ Air N_ Ir, s_eet Replace E clean v" ,I v, v' ..... ...... v' EVERY 100 HOURa EVERY SEASON BEFORe STORAGE ...... v' J_ v' _" .... ' v' v" Terminals CeoI!ng Plale ,, V_s v" .....
i TRACTOR Always observe safety rules when performing any maintenance. BRAKE OPERATION If tractor requires more than five (5) feet to stop at highest speed in highest gear on a level, dry concrete or paved surface, then brake must be serviced. (See "TO CHECK BRAKE" in the Service and Adjustments section of this manual). TIRES • Maintain proper air pressure in all tires (See PSI on tires). , Keep tires free of gasoline, oil, or insect control chemicals which can harm rubber.
TOCLEAN BATTERY ANDTERMINALSTO CHANGE ENGINE OIL Corrosion anddirtonthebattery andtermi- Determine temperature range expected before oil change, All oil must meet API nalscancause thebattery to"leak" power.service classification SG-SL 1. Remove terminal guard. 2. Disconnect BLACK battery cablefirst • Be sure tractor is on level surface. will drain more freely when warm, thenREDbatterycableandremove•• Oil Catch oil in a suitable container. battery fromtractor. 3, Rinsethe battery withplain water anddry, t.
CLEAN AIR INTAKE/COOLING AREAS Toensure proper cooling, make surethe grass screen, cooling fins, and other external surfaces ofthe engine are kept cleanat alltimes. Every 100 hours of operation (more often under extremely dusty, dirty conditions), removethe blower housing and othercooting shrouds. Clean the cooling fins and external surfaces as necessary. Makesurethe cooling shrouds are reinstalled. AIR FILTER Your engine will not run properly using a dirty air filter.
CLEANING • Clean engine, battery, seat, finish, etc. of all foreign matter. • Clean debris from steering plate. Debris can restrict clutch/brake pedal shaft movement, causing belt slip and loss of drive. 4, Pull back the lock collar of the nozzle adapter and push the adapter onto the deck washout port at the leftend of the mower deck. Release the lock co]Iar to lock the adapter on the nozzle.
WARNING: TO AVOID SERIOUS INJURY, BEFORE PERFORMING ANY SERVICE OR ADJUSTMENTS: 1. Depress clutch!brake pedal fully and set parking brake. 2. Place gearshift lever in neutral position. 3. Place attachment clutch in "DISENGAGED" position. 4. Turn ignition key to "STOP" and remove key, 5. Make sure the blades and all moving parts have completely stopped. 6. Disconnect spark plug wire from spark plug and place wire where it cannot come in contact with plug. TO REMOVE MOWER 1.
TO LEVEL MOWER Make sure tires are properly inflated to the PSI shown on tires, lftires are overor under inflated, it may affect the appearance ofyour lawn and lead you to think the mower is not adjusted properly. VISUAL SIDE-TO-SIDE ADJUSTMENT 1. With all tires properly inflated and if your lawn appears unevenly cut, determine which side of mower is cutting lower, NOTE: As desired, you can raise the low side of mower or lower the high side. 2. Go to side of mower you wish to adjust. 3.
TO REPLACE MOWER DRIVE BELT MOWER DRIVE BELT REMOVAL 1. Park tractor on a level surface. Engage parking brake. 2. Lower attachment lift ]ever to its lowest position. 3. Disengage belttension rod (K)from lock bCAracket (L). UTION: Belttension rod isspring loaded. Have afirm grip on rod and release slowly. 4. Remove screws (P) from R.H. and L.H. mandrel covers and remove covers (Q). Remove any dirt or grass clippings which may have accumulated around mandrels and entire upper deck surface.
TRANSAXLE GEAR SHIFT LEVER NEUTRAL ADJUSTMENT The transaxle should be in neutral when the gear shift lever is in neutral (N) (lock gate) position. The adjustment is preset at the factory; however, if adjustment is needed, proceed as follows: 1. Make sure transaxle is in neutral (N). NOTE: When the tractor rear wheels move freely, the transax[e is in neutral, 2. Loosen adjustment bolt in front of the right rear wheel. 3. Position the gearshift lever inthe neutral (N) position. 4.
REPLACING BATTERY TO REPLACE HEADLIGHT BULB 1. Raise hood. 2. Remove bulb holder fromthe hole in the backside of the grill. 3. Replace bulb in holder and install bulb holder securely back into the hole in the backside of the grill, 4, Close hood. n_as_ARNING: Do not short battery termly allowing awrench or any other object to contact both terminals at the same time. Before connecting battery, remove metal bracelets, wristwatch bands, rings, etc.
Immediately prepare your tractor for storage at the end of the season or if the tractor will not be used for 30 days or more. _JL,WARNING: Never store the tractor with gasoline in the tank inside a building where fumes may reach an open flame or spark. Allow the engine to cool before storing in any enclosure. TRACTOR Remove mower from tractor for winter storage. When mower is to be stored fora period of time, clean it thoroughly, remove all dirt, grease, leaves, etc. Store inaclean, dry area, t.
TROUBLESHOOTING CHART: See appropriate section in manual unless directed to Sears service center PROBLEM CAUSE Will not start CORRECTION iI Filifueltankl ,2 See "TO START ENGINE" in Operation section, Engine flooded. I3 Wait several minutes before attempting to start. 1 OutoffueL 2 Engine not "CHOKED" 4 properly. Bad spark plug. 4 Replace spark plug. 5 Dirty air filter. 5 Clean!replace 6 Dirty fuel filter. 6 Replace fuel filter.
TROUBLESHOOTING CHART: See appropriate section in manual unless directed to Sears service center PROBLEM CAUSE Cutting too much grass/too 2 Throttle in "CHOKE" 3 4 Dirty air filter, 5 Low oil level/dirty oil. 6 Faulty spark plug, 6 Clean and regap or change spark plug. 7 Dirty fuel filter. 7 Replace fuel filter, 8 Stale or dirty fuel. 8 Empty fuel tank and refill tank wit;" fresh, clean gasoline. 9 Water in fuel.
ii TROUBLESHOOTING CHART: See appropriate section in manual unless directed to Sears service center CORRECTION CAUSE Mower blades will not rotate Poor grass discharge Headlight(s) not 1 Remove obstruction, 2 Replace mower drive belt. 3 Replace idler pulley, Frozen blade mandrel. 4 Contact a Sears or other qualified service center, Engine speed too slow, 1 Place throttle control in "FAST" position, 2 Travel speed too fast. 2 Shift to slower speed. 3 Wet grass.
TROUBLESHOOTING CHART: See appropriate section in manual unless directed to Sears service center PROBLEM !CAUS E when turning engine "OFF" Engine dies when tractor is shifted into reverse 1 CORRECTION Engine throttte control not se! 1 between half and full speed (fast) position before stopping engine, Move throttle control between half and full speed (fast) position before stopping engine. Reverse operation system (ROS) is not "ON" while mower or other attachment is engaged.
SUGGESTED GUIDE FOR SIGHTING SLOPES FOR SAFE OPERATION ONLY RIDE UP AND DOWN HILL, NOT ACROSS HILL 15 DEGREES MAX. down the face of slopes, never across the face. Do not mow WARNING: To avoid serious injury, operate your tractor up and slopes greater than 15 degrees. Make turns gradually to prevent tipping or loss of control. Exercise extreme caution when changing direction on slopes. 1. Fold this page along dotted line indicated above. 2.
Garant_a .......................................................... Rag[as de Seguridad ...................................... Especificaciones deI Producto ........................ MontajeiPre Operacibn ................................... Operacibn ....................................................... Mantenimiento ................................................ 36 37 40 41 47 54 Prograrna de Mantenimiento .......................... 54 Servicio y Ajustes ...........................................
_PELIGRO: Esta Maquina cortadora es capaz de amputar las manosy los pies y de lanzar objetos, s| no se observan las instrueciones de seguridad siguientes se pueden producir lesienes graves o la muerte. • No maneje la m6quina si no tiene la trampa _b.ADVERTENC1A: Siempre desconecta etalampare c6sped complete, la canaleta de descarga bre de ta bujia y p6ngalo donde no pueda entrar u otros dispositivos de seguridad en su tugar en contacto con la bujia, pare evitar el arranque y en funcionarniento.
• Escoger una vetocidad de marcha baia de mode que no sea necesario pararse o cambiar estando en une pendiente. • No cortar Ia h[erbe mojada. Las ruedas pueden perder tracci6n, Porter siempre une marche cuendo se est& en pendientes. No poner en punto muerto e ir cuesta ebajo, • Evitar errancar, pararse o girar en una pendiento. Si tas ruedas pierden tracci6n, desconectar Ias cuchillas y preceder despacio cuesta abajo en Ia pendiente.
OPERACIONES DE SERVICIO GENERALES • Nunca hater funcionar la m_quina en un &rea cerrada. • Mantener todas lastuercas y pernos apretados para asegurarse de que trabaja en condiciones seguras. • Nunca modificar los dispositivos de seguddad. Controlar su correcto funcionamiento regularmente. • Mantener la m_quina libre de hierba, hojas u otros residues acumulados.
ESPEC|FICACIONES DELPRODUCTO En el estado de California, la ley exige Io anterior (Secci6n 4442 del "California Public Resources Code"). Otros estados pueden contar con otras leyes parecidas, Las leyes federa]es se aplican en la tierras federales. Su centre de Servicio m_.s cercano tiene disponible amortiguadores de chispas para el silenciador. (Vea la secci6n de Partes de Repuesto en el manual Ingles del duefio.
Segadora Rueda Delantera De La Segadora de es|abones de ievant_miento traseros (5) 1-3/16" Arandela % (1) Abrazadera pequefio _-_ © (I) Perno (1) 1-1t4" Arandela _., de retenci6n "_ (1) Eslabone _-_---___ s _ de levantamiento delanteros _% (5) Abrazadera ,, grands - \\ _p_.. _ de retencibn (1) Rueda (1) 3/8-16" Tuerca _ .......................
Su tractor nuevo ha side montado en la f&brica con ia excepci6n de aque]las partes que no se han montado per razones de envio, Para asegurarse que su tractor funcione en forma adecuada y segura todas Ias partes y los articulos de ferreteda que se monten tienen que ser apretados en forma segura. Use las herramientas correctas, segSn sea necesado, para asegurarse de que est_n apretados en forma segura, HERRAMtENTAS NECESARIAS PARA 3, Desconecte Ia palanca paratrabar el asiento EL MONTAJE en la posici6n.
PRECAUCION: La palancade Ievantamiento est&accionadapor resorte. Sost_ngalafirmemente apretada, b&jela lentamente y eng&nchela en ta posiciSn m&s baja. Lapalanca de Ievantamiento se encuentra en el tado izquierdo de la defense. 3. GIRE EL VOLANTE HACIA LA.
Haga oscilar el extremo con la arandela integrada de la barra antibalanceo (S) hecia la escuadra de Ia plataforma de la cortadora de c@speden el Iado derecho de la cortadora. Inserte el extremo con Ia arandela integrada de Ia barra en el agujero de la escuadra trasera de la cortadora de c@sped(D). Mueva Ia cortadora de c@spedsegt_n sea necesario para inserter el exttemo con ta arandela integrada de la barra en Ia escuadra trasera de !a cortedora de c@sped (D).
Levante laesquina trasera delacortadora de c_sped yubiquela ranuraen elconjunto deeslabones sobre la chaveta en ]a escuadratrasera Mu6vase haste el lado izquierdo de Ia cortadorae inserte un resorte de retenci6n grande ((3)atrav6e del agujero det eslab6n detantero (E) detr_is de la escuadra de suspensi6n delantera (F). Inserte el otto extmmo de1eslab6n (E) en el agujero de la escuadraderechade tacortadora de c_sped (H) y asegure con una arandela y un resorte de retencibn peque_o (J).
REVISION DE LA PRESION DE LAS LLANTAS Las llantas en su unidad fueron infladas demasiado en la f&brica por razones de envio. La presi6n de las llantas correctas es importante para obtener el mejor rendimiento en el corte. • Reduzca la presi6n de los neum&ticos a la PSI que se indica en estos. REVIS|ON DE LA NIVELACION DEL CONJUNTO Para obtener los mejores resu[tados en et corte, la caja de la segadora tiene que estar nivelada en la forma adecuada.
Estos simbolos pueden aparecer sobre su tractor o on la literatura proporcionada con el producto. Aprenda y comprenda sus significados. R MARQHAATR_.S MOTOR APAGADO N H L I',.! NELrrRo ALTO BAJO ESTRANGULACIC)N R,g, PiBO LENTO MOTOR MOTOR FRENODE ALTURADE LA LEVANTAMIENTO SISTEMA ENCENDIDO EN MAROHA ESTACIONAMIENTO SEGAOOFL_. DE LA SEGADORA F'L_NCIONAM|ENTO ATPJ_S(ROB) ATR/_S HAC]AADEI-_.
FAMtLIARICESE CON SU TRACTOR LEA ESTE MANUAL LAS REGLAS DE SEGURIDAD ANTES DE OPERAR SU TRACTOR Compare las i]ustracionescon su tractor para familiadzarse con las ubicaciones de los diversos controles y ajustes. Guarde este manual para referencia en el futuro. Nuestres tractores cumplen con los est&ndares de seguridad del American National Standard Institute.
La operaci6n de cualquier tractor puede hacer que salten objetos ex_afios dentro de sus ojos, Io que puede producir daSos graves en _stos, Siempre use anteojos de seguridad o protecciones para los ojos mientras opere su tractor o cuando haga ajustes o reparaciones. Recomendamos gafas de seguridad o una m&scara de visi6n amplia de seguridad usada sobre tas galas.
PARA MOVERSE HACIA ADELANTE Y HACIA ATRAS La direccidn y ta velocJdad del movimiento son controladas per medio de Ia patanca de cambio (J). 1. Haga arrancar el tractor con eI pedal deI embrague/freno presionado y con Ia palanca de cambio en la posicidnde neutro. 2. Mueva la palanca de cambio a Ia posiciSn deseada. 3. Lentamente suelte et pedal de embrague/ freno para empezar con eJ movimiento.
FUNCIONAMIENTO ATP._,S Tu tractor est& equipado con el Sistema de Funcionamiento Atr_.s (ROS). Cualquier tentativa del operador de viajar marcha atr&s con el embrague puesto apagar& el motor a manes que la Ilave de ignici6n se ponga en la posici6n de "ON" del ROS. ATENCION: Ir marcha atr&s con el embrague puesto para cortar, no es recomendable.
AGREGUE GASOLINA - Llene el estanque de combustible, Llene haste [a parte inferior del cuello de relleno deI estanque de gasoline. No Io Ilene demasiedo. Use gasoline regular, sin p!omo, nueva y limpie con el minimo de 87 octanes, (Et use de gasolina con plomo aumentar& los dep6sitos de 6xido de plomo y carbono y se reducir& la dureci6n de Ia v&lvula), No mezcle el aceite con ]a gasoline.
• Los accesorios pueden ser utilizados durante el periodo del recalentamiento de1 motor y pueden requerir que et control de la estrangutaci6n sea estirado un poco. AVISO: SI se encuentra a mucha altura (sobre 3000 pies) o en clima frio (por debajo de 32°F [0°C]), Ia mezcla deI combustible del carburador debe ser ajustada para el mejor rendimiento del motor. (Vea "PARA AJUSTAR EL CARBURADOR" en la secci6n de Servicio y Ajustes de este manual).
PROGRAMA MANTEN|MIENTO DE ANTES DE CA_)AUSO i _wisarlaope_ci_n d_IIrene If Rev_sa_ t_ pre_[6nd_las _lanms I/ V_t_ll_zla _mmande }a b;_terJa CADA S0 HO_AS CA_V_ loo i FIO_J_S CADA TE_PO_[_ ALU._AMB_ if d RO_; Af_ar]camb_{la=_uchil{asdela_g Limpiat CADA 25 HORA_ de pr_se_c_ d_oD_ r&teu t el _ sL_le_a CT CAOA a HORi_S u l y los _ aOOt_ ....... _a te#mirta[as V Revis_ e[ _rlfrlamiento deI trans_ _ _ .................. _, ............... Umple I1_ ,_a_idLzos_e la.
TRACTOR Siempre observe las reglas de seguridad cuando d6 mantenimiento. OPERACION DEL FRENO Si el tractor necesita m_s de cinco (5) pies para detenerse a la m_Lximavelocidad al cambio m&s alto en una superficie nivelada, de hormig6n o pavimentada, hayque hacerle el servicioal freno. Vet "PARA VERIFICAR St FUNCIONA BIEN EL FRENO" en el capitulo de Servicio y ajustes de este manual. LLANTAS * Mantengatodos los neum&t[coscon Iapresi6n de aire adecuada (Ver Ia PSI qua se indica en estos). .
PARA LIMPIAR LA BATE'RIA Y LOS TERMINALES La corrosi6n y la mugre de Ia bateda y de lot terminaWespueden producir "escapes" de potencia en Ia bateda. 1. Remueva la protecci6n de los terminales. 2. Desconecte el cabEe de la bater_a NEGRO primero y luego el cable de la bateria ROJO y remueva Ia bateria del tractor. 3. Enjuague la bateria con agua corriente y s6quela. 4. Umpie los terminales y los extremes del cable de la bateria con un cepillo de alambre hasta que queden brillantes. 5.
LIMPIEZA DE LA ENTRADA DE AIRE!AREAS DE ENFRIAMENTO Para asegurar un enfriamiento adecuado, aseg_rese que la rejilta det c_sped, las aletas de enfriamiento, y otras superficies externas de[ motor se mantengan limpias en todo momento. Cada 100 horas de operaci6n (m&s a menudo bajo condiciones extremadamente polvorosas o sucias), remueva la caja del ventiiador y ot_as tapas de enfriamiento. Limpie las aletas de enfriamiento y las superficies externas, seg_n sea necesario.
LIMPIEZA 4, • Limpie todo material extraSo del motor, la bater(a el asiento, el pulido, etc • Limpie los desechos de Ia placa gu(a Los desechos pueden Jimitarel movimiento del e(e del pedal del#eno/embrague, Io que hat& que patine la correa y que se pierda la traccion AI_kPRECAUCI6N: Evite todos los puntos de enganche y tas piezas m6viles Eche hacia atr&s la abrazadera de cierre de( adaptador de Ia boquilla y empuje 6ste en el puerto de lavado de Ia cubierta en el extremo izquierdo de la cubierta de la
ADVERTENCIA:PARA EVITAR LESIONES SERIAS, ANTES DE DAR CUALQUIER SERVICIO O DE HACER AJUSTES: 1, Presione el pedal del ernbragueifreno completamente y aplique el freno de estacionamiento. 2. Ponga la palanca de carnbios en la posici6n de neutro. !3. Ponga el embrague del accesorio en la posici6ndesenganchado (DISENGAGED). _4 . Ponga Ia Ilave de ignici6n en ta posici6n de apagado (STOp) y rernu_vala. 5. Aseg_rese que las cuchiflas y que todas las partes movibles se hayan detenido cornpletamente. 6.
PARA NIVELAR LA SEGADORA Aseg0rese de que los neum,_ticos est_n infladosa la PSI que se indica en estos. Si est_.n demasiado inflados o poco intiados, el c_sped no le quedar_, bien cortado, Io cual podr& tlevarlo a pensar que la SEGADORA no est& bien regulada. REGULACII_N VISUAL DE LADe A LADe 1. Si redes los neum&ticosestb.n correctamente inflados y el c_sped parece haber quedado cortado desparejo, determine qu_ Iado de la cortadora est,_ cortando m_.s at ras.
PARA REEMPLAZAR LA CORREA DE LA CUCHILLA DE LA SEGADORA DESMONTAJE DE LA CORREA DE LA SEGADORA 1. Estacione el tractor en una superfic[e niveIada. Ponga el freno de mane. 2. Baje la palanca elevadora a la posici6n de m&s abajo. 3. Retire la barra de tensi6n de la correa (K) de la barra de sujeci6n (L). _.CUIDADO: DESMONTAJE DE LA CORREA 1. Desmonte la cortadora (Ver "PARA DESMONTAR LA CORTADOR._' en este capttutodeI manual).
REGULAC|ON DE LA PALANCA DE VELOCIDADES NEUTRO DEL CAMBIO MEC/_NICO CON DIFERENCIAL Y TRACCION ANTERIOR El cambio mec&nico con diferencial y tracci6n anterior tiene que estar en posici6n neutro cuando {a relativa pa{anca est,. en posici6n(eierremet&lico, La regulacion ya est& predefinida por la Casa constructora, pero si es necesario efectuar m_.s reguiaciones, proceder de la siguiente manera: 1. Asegurarse que el cambio mec&nico con diferencia! y tracci6n anterior est6 en posici6n neutro.
REEMPLAZAR LA BATERIA _.DVERTENCIA: Nohaga cortocircuitoconlos terminales de la bateria al permitir que una llave de tuerca o cualquier otro objeto entre en contacto con ambos termJnales a Ia misma vez. Antes de instalar Ia bateria remueva las pulseras de metal, los relojes de pulsera de metal, los anillos, etc. El terminal positive tiene que coneetarse pdmero para evitar Ias chispas debido a la conexi6n a tierra par accidente. 1. Levantamos la _po_ a Ia posici6n Ievantada. 2.
Inmediatamente prepare su tractor para el almacenamiento al final de la temporada o si el tractor no se va a usar pot 30 dias o m&s. _IhADVERTENOIA: Nunca almacene el tractor con gasolina en el estanque dentro de un edificio en donde los gases pueden alcanzar una llama expuesta o una chispa. Permita que el motor se enfrie antes de almacenarlo en cualquier recinto privado. TRACTOR Remueva la segadora del tractor para el almacenamiento por el invierno.
IDENTIFICACION DE PROBLEMAS: Vea la secciSn PROBLEMA No arranca apropiada en el manual a menos qua est6 dirigido a un centre de servicio Sears. CORRECCI(_N CAUSA 1, Sin combustible. 2. Motor sin la"ESTRANGULACION" (CHOKE) adecuada. 3. Motor ahogado, t. 2. 3. Uene el estanque de combustible_ Vea"PAPA HACER ARRANCAR EL MOTOR" en la seeciSn de operaciSn, Espere varies minutes antes detratar de affancar. 4. s. 6. 7. Buj[a Filtro Filtro Ague e. Alambrado suelto o dafiado.
IDENTIFICACION Vea la secci6n DE PROBLEMAS: apropiada en el manual a manes que est_ dirigido PROBLEMA : CAUSA P6rdfda de fuerza P6rdida de fuerza (sigue) Vibracibn excesiva 1. 2. a un centre de servicio Sears. CORRECCION CoKa touche cesped, muy r_pido. AceJerac[6n ea la posici6n de _ESTRAN_ GULAOION" (CHOKE), Acumulaci6n de c6sped, hejas y basura debajo de ]a segadora. Filtro de airs sucio, 1. Eleve la altorad e corte/mduzca 2 Ajuste 3. Limpie la parle inferior de la cajade la segadora.
IDENTIFICACION DE PROBLEMAS: Vea la secci6n PROBLEMA Male descarga del c_sped apropiada en el manual a manes que est6 dirigido a un centre de servicio Sears. CAUSA t I. Ve[ocidad del motor m_y tenta, 1. 2. 3. Velocidad de recorddo demasiado r&pida. C_sped mojado, 2. 3. 4. 5. El conjunto segador no est&nivelado, Presi6n de airs de las tlantas baja o dispareia, Cuchilla desggstgda, doblada 0 suelta. 4. 5. Acumulaci6n de c_sped, hojas y basura debajo de la segadora. 8.
89
GUIASUGERIDAPARAMEDIR LAS PENDIENTESCON LA VISTA PARA UNA OPERACIONSEGURA _ OVERTENCIA: Pare evitar da_os graves, haga funcEonar su tractor erribal y abajo de las pendientes, nunca transversalmente con respaeto e ]as pendientes. No cotter pendientes mayores de 15 grados. Haga los virajes graduaimente pare ev]tar volcerse o le p6rdide de control I_ I Tenga muaho auidado auando cambre de direcci6n I en ]as pendientes. 1. P_egar esta p_gina a 1o largo de la Ifnea punteada arriba ind]cada. 2.
Your Home For repair - in your home - of all major brand appliances, lawn and garden equipment, or heating and cooling systems, no matter who made it, no matter who sold it! For the replacement parts, accessories and owner's manuals that you need to do-it-yourself. For Sears professlonal installation of home appliances and items like garage door openers and water heaters. 1-800-4-MY-HOME ® (1-B00-469_t663) www.sears.com Anytime, day or night (U.S.A. and Canada) www.sears.