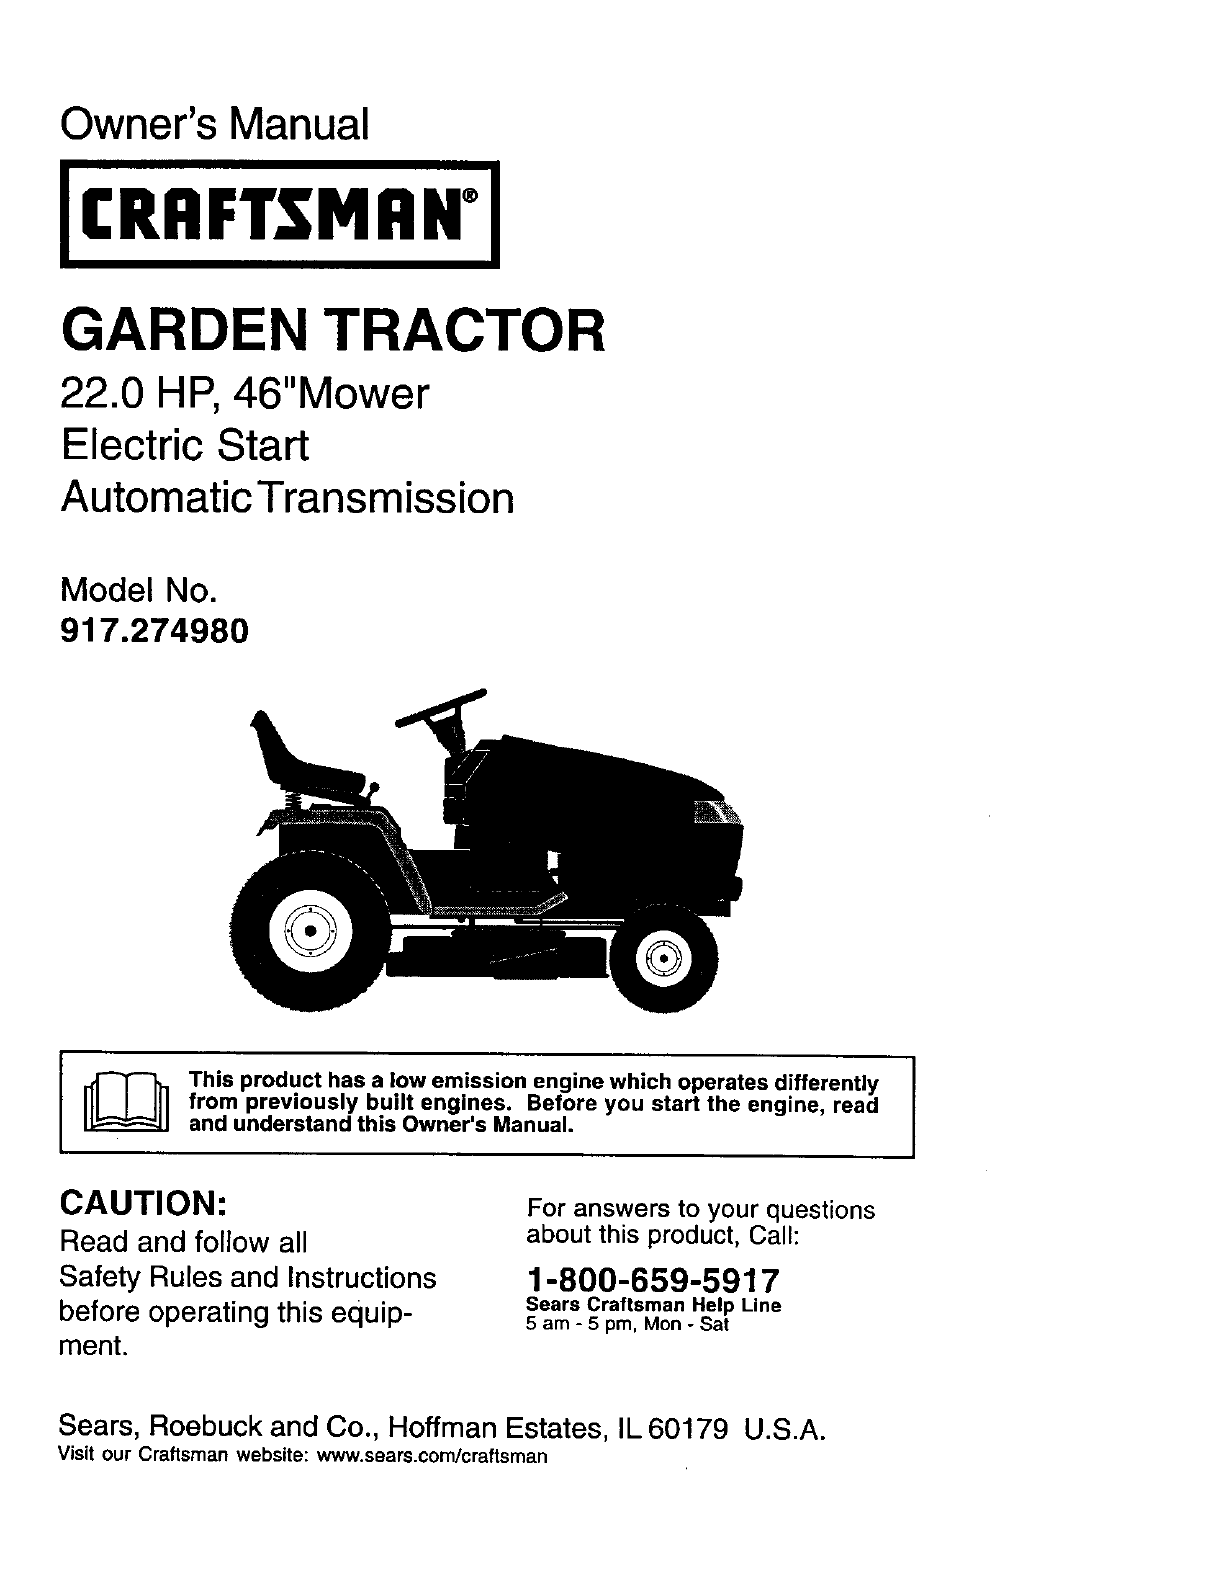
Owner's Manual ICRAFTSMAWI GARDEN TRACTOR 22.0 HP, 46"Mower Electric Start AutomaticTransmission Model No. 917.274980 from previouslyhas built start the engine, read This product a low engines. emission Before engine you which operates differently and understand this Owner's Manual. CAUTION: Read and follow all Safety Rules and Instructions before operating this equipment.
Maintenance ....................................... 16 Service and Adjustments .................... 20 Storage ............................................... 27 Troubleshooting ................................. 28 Repair Parts ........................................ 30 Sears Service ...................... Back Cover Warranty .................................... i.......... 2 Safety Rules ......................................... 3 Product Specifications ..........................
IMPORTANT: This cutting machine is capable of amputating hands and feet and throwing objects. Failure to observe the following safety instructions could result in senous injury or death. • Never carry passengers. • Do not mow in reverse unless absolutely necessary. Always look down and behind before and while backing. • Be aware of the mower discharge direction and do not point it at anyone. Do not operate the mower without either the entire grass catcher or the guard in place. • Slow down before turning.
DO: • Never carry children. They may fall off and be seriously injured or interfere with safe machine operation. • Never allow children to operate the machine. • Use extra care when approaching blind corners, shrubs, trees, or other objects that may obscure vision. • Mow up and down slopes, not across. • Remove obstacles such as rocks, tree limbs, etc. • Watch for holes, ruts, or bumps. Uneven terrain could overturn the machine. Tall grass can hide obstacles. • Use slow speed.
• Be sure the area is clear of other people before mowing. Stop machine anyone enters the area. • Never carry passengers or children even with the blades off. • Do not mow in reverse unless abso- • • • • • • Remove obstacles such as rocks, tree limbs, etc. • Watch for holes, ruts, or bumps. Uneven terrain could overturn the machine. Tall grass can hide obstacles. • Use slow speed. Choose a low gear so that you will not have to stop or shift while on the slope. • Avoid starting or stopping on a slope.
PRODUCT Please read and retain this manual. The instructions will enable you to assemble and maintain your tractor properly. Always observe the "SAFETY RULES". SPECIFICATIONS Gasoline 5 Gallons Capacity and Type: Unleaded Regular Oil Type SAE 30 (above 32°F) API-SF-SJ): 4.0 Pints Spark Plug: (Gap: .030") Champion CUSTOMER Battery: 5.8 2.1 Front: Rear: 14 PSI 10 PSI 16 Amps @ 3600 RPM Amp/Hr: Min. CCA: Case size: RESPONSIBILITIES • Read and observe the safety rules.
Your new tractor has been assembled at the factory. Review the video cassette before you begin. When right or left hand is mentioned in this manual, it means, from your point of view, when you are in the operating position (seated behind the steering wheel). TO REMOVE TRACTOR CARTON UNPACK FROM CARTON Knob Remove all accessible loose parts and parts boxes from carton. 2. Cut, from top to bottom, along lines on all four corners of carton, and lay panels flat. 3.
6. Start the engine. After engine has started, move throttle control to idle position. 7. Release parking brake. 8. Slowly move the motion control lever forward and slowly drive tractor off skid. 9. Apply brake to stop tractor and set parking brake. 10.Turn ignition key to "STOP" position. Continue with the instructions that follow. JCHECKUST Before you operate your new tractor, we wish to assure that you receive the best performance and satisfaction from this Quality Product.
These symbols may appear on your tractor Learn and understand their meaning. or in literature supplied with the product.
KNOW YOUR TRACTOR READ THIS OWNER'S MANUAL YOUR TRACTOR Compare AND SAFETY RULES BEFORE OPERATING the illustrations with your tractor to familiarize yourself with the locations of Ammeter Choke Control Ignition Switch Light Switch Position Attachment Clutch Throttle Plunger Control Motion Drive Belt Tension Handle tJft Brake Pedal Attachment Lift Lever Parking Brake Lever Motion Control Lever Height Adjustment Knob Free Wheel Control Our tractors conform to the safety standards of the Ameri
the eyes, which can result in severe eye damage. Always wear safety glasses or eye shields while operating your tractor or performing any adjustments or repairs. We recommend standard he operation of any tractor can result in foreign objects thrown into safety glasses or a wide vision safety mask worn over spectacles. [_ HOW TO USE YOUR TRACTOR TO SET PARKING • Turn ignition key to "STOP" position and remove key. Always remove key when leaving tractor to prevent unauthorized use.
TO OPERATE • Turn knob clockwise (('_) to raise cutting height. • Turn knob counterclockwise ()_'_)to lower cutting height. The cutting height range is approximately 1-1/2" to 4-1/2". The heights are measured from the ground to the blade tip with the engine not running. These heights are approximate and may vary depending upon soil conditions, height of grass and types of grass being mowed.
TO TRANSPORT • For cold weather operation you should change oil for easier starting (See the oil viscosity chart in the Maintenance section of this manual). • To change engine oil, see the Maintenance section in this manual. When pushing or towing your tractor, be sure to disengage transmission by placing freewheel control in freewheeling position. Freewheel control is located at the rear drawbar of tractor. 1. Raise attachment lift to highest position with attachment lift control. 2.
6. Insert key into ignition and turn key clockwise to start position and release key as soon as engine starts. Do not run starter continuously for more than fifteen seconds per minute. If the engine does not start after several attempts, push choke control in, wait a few minutes and try again. If engine still does not start, pull the choke control out and retry. 1. Be sure the tractor is on level ground. 2. Place the motion control lever in neutral.
6. 7. 8. Engage transmission by placing freewheel control in engaged position (See "TO TRANSPORT" in this section of manual). Sitting in the tractor seat, start engine. After the engine is running, move throttle control to half (1/2) speed. Disengage parking brake. Slowly move motion control lever forward, after the tractor moves approximately five (5) feet, slowly move motion control lever to reverse position.
REGULAR SERVICE Check : T R cA T 0 R E !N IG Brake -t2"_'/_ Operation V Check Tire Pressure Check Operator Presence Interlock Systems Clean Battery Check Tr_saxle Check V-Belts Check Engine and If V's Blades Oil Level if if (with oil filter) 11_12 oil filter) V P V_a Filter V _ _2 if= Arrester N_ Inspect MuttledSpark E Replace 0il Filter (If equipped) Cleaun Engine Cooling Fins =_ Replace Spark I_ _ Replace Air Filter Paper Replace Fuel Filter Plug Cartridge
TRACTOR Always observe safety rules when performing any maintenance. BRAKE OPERATION If tractor requires more than six (6) feet stopping distance at high speed in highest gear, then brake must be adjusted. (See "TO ADJUST BRAKE" in the Service and Adjustments section of this manual). TIRES • Maintain proper air pressure in all tires (See "PRODUCT SPECIFICATIONS" section of this manual). • Keep tires free of gasoline, oil, or insect control chemicals which can harm rubber.
ENGINE • Keep battery and terminals clean. • Keep battery bolts tight. • Keep small vent holes open. • Recharge at 6-10 amperes for 1 hour. NOTE: The original equipment battery on your tractor is maintenance free. Do not attempt to open or remove caps or covers. Adding or checking level of electrolyte is not necessary. TO CLEAN BATTERY LUBRICATION Only use high quality detergent oil rated with API service classification SF-SJ.
3. 4. 5. 6. 7. 8. Unlock drain valve by pushing inward slightly and turning counterclockwise. To open, pull out on the drain valve. After oil has drained completely, close and lock the drain valve by pushing inward and turning clockwise until the pin is in the locked position as shown. Remove the drain tube and replace the cap onto the end of the drain valve. Refill engine with oil through oil fill dipstick tube. Pour slowly. Do not overfill.
4. Immediately gasoline. CLEANING wipe up any spilled • Clean engine, battery, seat, finish, etc. of all foreign matter. • Keep finished surfaces and wheels free of all gasoline, oil, etc. • Protect painted surfaces with automotive type wax. We do not recommend using a garden hose to clean your tractor unless the electrical system, muffler, air filter and carburetor are covered to keep water out. Water in engine can result in a shortened engine life.
TO LEVEL MOWER HOUSING • To lower front of mower housing, loosen nut "G" on both front links an equal number of turns. • When distance "P is 1/8" to 1/2" lower at front than rear, tighten nut "H" against trunnion on both front links. • To raise front of mower housing, loosen nut "H" from trunnion on both front links. Tighten nut "G" on both front links an equal number of turns. • When distance =P is 1/8" to 1/2" lower at front than rear, tighten nut "H" against trunnion on both front links.
TO REPLACE MOWER MOWER DRIVE BELT MOWER DRIVE BELT INSTALLATION 9. Install belt in both idlers. Make sure belt is in both belt keepers at the idlers as shown. 10.Install new belt onto electric clutch pulley. 11 .Roll belt into upper groove of L.H. mandrel pulley. 12.Carefully check belt routing making sure belt is in the grooves correctly and inside belt keepers. 13.Reassemble L.H. mandrel cover, DRIVE BELT REMOVAL 1. Park tractor on a level surface. Engage parking brake. 2. Remove screws from L.H.
TO REPLACE BELT MOWER BLADE DRIVE TO ADJUST and entire upper deck surface. 7. Check secondary idler arm and idler to see that they rotate freely. 8. Be sure spring is hooked in secondary idler arm and anti-sway bar bracket. 9. Install new belt in lower groove of L.H. mandrel pulley, idler pulley, and center mandrel pulley as shown. 10. Roll belt over R.H. mandrel pulley. Make sure belt is in all grooves properly. 11. Reconnect spring to bolt in mower housing and reinstall R.H. mandrel cover. 12.
FRONT Retaineri_J_ Spring Ddve Belt _ Tension Handle Engine Pulley Transaxle Pulley WHEEL TO CHECK Belt Keeper _ Belt V-Idler Keeper Clutching Idler Belt Keeper Clutching Flat Idler The motion control lever has been preset at the factory and adjustment should not be necessary. 1. Park Tractor on level surface. Stop tractor by turning ignition key to "OFF" position and engage parking brake. 2. Loosen the adjustment bolt in front of the right rear wheel. 3.
REARWHEEL1. Block rear axle securely. Remove five (5) hub bolts to allow wheel removal. 3. Repair tire and reassemble. Replace and tighten hub bolts securely. NOTE: To seal tire punctures and prevent flat tires due to slow leaks, purchase and use tire sealant from Sears. Tire sealant also prevents tire dry rot and corrosion. 2. Weak or Dead Battery Washers Retaining Ring REPLACING ENGINE WITH A WEAK RNING: Lead-acid batteries generate explosive gases.
INTERLOCKS AND RELAYS TO ADJUST CHOKE CONTROL Loose or damaged wiring may cause your tractor to run poorly, stop running, or prevent it from starting. • Check wiring. See electrical wiring diagram in the Repair Parts section. TO REPLACE FUSE The choke control has been preset at the factory and adjustment should not be necessary. Check adjustment as described below before loosening cable. If adjustment is necessary, proceed as follows: Replace with 30 amp automotive-type plug-in fuse.
Immediately prepare your tractor for storage at the end of the season or if the tractor will not be used for 30 days or more. _IbCAUTION: Never store the tractor with gasoline in the tank inside a building where fumes may reach an open flame or spark. Allow the engine to cool before storing in any enclosure. TRACTOR Remove mower from tractor for winter storage. When mower is to be stored for a period of time, clean it thoroughly, remove all dirt, grease, leaves, etc. Store in a clean, dry area. 1.
TROUBLESHOOTING CHART: See appropriate section in manual unless directed PROBLEM CAUSE Will not start CORRECTION 1, Out of fuel. 2. Engine not "CHOKED" properly. 3. Engine flooded. 4. Bad spark plug. 5. Dirty air filter. 6. Dirty fuel filter. 7. Water in fuel. 8. Loose or damaged wiring. 9. Carburetor out of adjustment. 10. Engine valves out of adjustment. 11. Extreme Cold Conditions. Hard to start 1. Dirty air filter. 2. Bad spark plug. 3. Weak or dead battery. 4. Dirty fuel filter. 5.
TROUBLESHOOTING CHART: See appropriate section in manual unless directed to Sears service center PROBLEM Loss of power CAUSE CORRECTION 1. Cutting too much grass/too fast. 2. Throttle in "CHOKE" position. 3. Build-up of grass, leaves and trash under mower. 4. Dirty air filter. 5. Low oil level/dirty oil. 6. Faulty spark plug. 7. Dirty fuel filter. 8. Stale or dirty fuel. 9. Water in fuel. 10.Spark 11 .Dirty plug wire loose. engine air screen/fins. 12. Dirty/clogged muffler. 13.
TROUBLESHOOTING CHART: See appropriate section in manual unless directed to Sears service center PROBLEM Mower blades will not rotate CAUSE 1. Obstruction in clutch mechanism. 2. Worn/damaged mower drive belt. 3. 4. Poor grass discharge CORRECTION Frozen Frozen 1. Engine 2. 3. Worn, bent or loose blade. blades used. 11 .Clogged mower deck vent holes from buildup of grass, leaves, and trash around mandrels. !5. Battery will not charge Switch Bulb(s) Faulty Loose is "OFF". or lamp(s) burned out.
TRACTOR -- MODEL NUMBER 917.274980 SCHEMATIC BL_CK RED BA'PFERY SOLENOID AMMETER ) RE D WPHTE ....... ] FUEL SHUT_)FF SOLENOID A @ IGNITION CIRCUIT OFF _+G÷All NONE ON + LIGP_, B+AI L+A2 B + AI NONE START 3+ S + A1 I "MAKE" _ ¥EU-OW 28 V_4_TS AC @ 3_¢¢_ PTO SWITCH OFF POSITION ON C+G,B+H --CIRCUIT C+F,B+E,A+D HEADLIGHTS ] RELAY • NONE WIRING INSULATED CLIPS NOTE: IF WIRJNG INSULATED CLIPS WERE REMOVED FOR SERViCiNG OF UNIT.
TRACTOR - - MODEL NUMBER 917.
TRACTOR-- MODEL NUMBER 917.274980 ELECTRICAL KEY NO. PART NO. DESCRIPTION 1 2 8 10 11 12 16 21 22 24 25 26 27 28 29 30 33 40 41 42 43 45 50 52 79 81 144927 74760412 7603J 145211 150109 145769 176138 175688 4152J 4206J 146149 108824X 73510400 170697 160784 175566 140403 170238 17720408 131563 178861 122822)( 174652 141940 179763 109748X Battery Bolt Hex Head 1/4-20 x 3/4 Tray, Battery Bolt 1/4-20 x 7.
TRACTOR - - MODEL NUMBER CHASSIS AND ENCLOSURES 917.274980 141.
TRACTOR - - MODEL NUMBER CHASSIS AND ENCLOSURES KEY NO. 1 2 4 5 6 7 8 14 15 16 17 18 19 20 21 24 25 28 30 31 32 33 34 35 36 37 39 43 44 45 50 PART NO. 180372 175282 73680700 163976X428 157882 17720408 145166 175259X558 161841 121794X 1706o0612 174515X558 19131312 STD523710 STD541437 179717X558 161842 179716X558 145052 161419 161327 161326 177018 19111116 1706o0512 178510X558 175278 136939 136940 154913 175476 917.274980 KEY PART NO. NO.
TRACTOR -- MODEL NUMBER 917.274980 GROUND DRIVE 42 6 38 46 36 77 35 37 65 127 38 56 120 151 .-:'; .
TRACTOR - - MODEL NUMBER 917.274980 GROUND DRIVE KEY NO. PART NO. 1 ..... 2 3 6 7 9 20 22 23 29 33 34 35 36 37 38 39 40 41 42 46 48 50 52 55 56 58 61 64 65 68 69 70 73 74 77 89 94 98 KEY PART NO. NO. DESCRIPTION Transaxle Hydro Gear 331-3000 (See Breakdown) 7070E Key 1/4 x 2.
TRACTOR STEERING ASSEMBLY - - MODEL NUMBER 917.
TRACTOR STEERING ASSEMBLY - - MODEL NUMBER 917.274980 KEY PART NO. NO. DESCRIPTION 1 2 3 4 5 6 7 8 9 10 11 12 13 14 15 16 17 18 19 20 21 22 23 24 25 26 27 28 29 31 32 33 34 35 36 37 38 39 40 41 42 46 47 48 49 50 Wheel, Steedng Axle Asm., Front Fitting,Grease Spindle Asm, LH Spindle Asro.,RH Bearing, RaceThrust Harden Washer 25/32 x 1-5/8 x 16 Ga. Ring, Klip#T5304-75 Cap, Spindle Bolt, Fin Hex 5/6-11 x 2-3/4 Spacer Bearing Axle Front Nut, Lock Flange 5/8-11 Unc Washer 25/32 x 1-1/4 x 16 Ga.
TRACTOR - - MODEL NUMBER 917.274980 ENGINE 69 84 18 15 13 37 29 26 _7 37 8 39 I SPARK ARRESTER KIT I 40 KEY NO. PART NO. 1 ....... 2 8 9 10 11 12 15 18 20 21 22 24 25 26 27 28 29 31 35 37 149723 121361X 177748 175287 170056 143996 179115 179124X428 175437X428 164863 175440X428 11050600 73920600 3645J 139277 7834R 137180 145006 10040500 123487X DESCRIPTION Engine Briggs, Model No. 446777 (Order parts from engine manuf.) MufflerSide Pulley V-Idler Keeper Asm.
TRACTOR - - MODEL NUMBER 917.274980 SEAT ASSEMBLY \ \ 5 21 KEY NO. PART NO. 1 2 3 5 6 7 8 10 12 13 14 15 180597 180166 140675 145006 STD541437 124181X 171877 180186 121246X 121248X 72050412 134300 DESCRIPTION Seat Bracket Pivot Fender Strap, Fender Clip, Push In, Hinged Nut, Crownlock 3/8-16 Unc Spring, Seat Cprsn Bolt5/16-18Uncx 3/4 w/Sems Pan, Seat Bracket, Mounting Switch Bushing,Snap Bolt, Carriage 1/4-20 X 1-1/2 Spacer, Split KEY PART NO. NO.
TRACTOR -- MODEL NUMBER 917.274980 DECALS 15 6 4 10 8 19 12 23 17 KEY NO. PART NO. 1 2 3 4 5 182168 164094 171700 171701 149516 6 7 8 9 10 11 133644 140837 183726 163204 156439 181252 WHEELS DESCRIPTION Decal, Dash Panel Decal, Dash Decal, Hood, Craftsman, RH Decal, Hood, Craftsman, LH Deced,BatteP/DNG PJpS N ENG Asm Decal, Maintenance Decal, Brake Parking Decal SD, PNL Decal, Fender, Craftsman Decal, Fender Danger Decal, Clutch/Brake & TIRES 3 4 7 10 KEY NO. PARr NO.
TRACTOR - - MODEL NUMBER 917.274980 LIFTASSEMBLY 35 73 34 7 10 1 7O 8 16 2O 15 12_ KEY PART NO. NO. DESCRIPTION 1 2 3 4 5 6 7 8 9 10 11 12 13 14 23 24 26 29 30 31 Rod Asm., Lever Shaft Asm., Lift Vgt Lever Asm., Lift Rh E-RingTruarc #5133-87 Washer 29/32 x 1-1/4 x 16 Ga.
TRACTOR -- MODEL NUMBER 917.
TRACTOR - - MODEL NUMBER 917.274980 MOWER DECK KEY NO. 1 3 5 6 8 9 10 11 13 14 15 16 18 19 2O 21 23 24 25 26 27 28 29 30 31 32 33 34 35 PART NO, 156948 138457 STD624008 178024 85O857 DESCRIPTION DeckWeldment BracketAsm., Sway Bar RetainerSpring Bar Sway Deck Bolt, Patched 3/8-24 x 1-1/4 Gr. 8 STD551137 Washer, Lock Hvy., Unplated 3/8 140296 Washer, Hard Blade, Mower Vented 176084 Blade 137553 Shaff Asm.
TRACTOR -- MODEL NUMBER TRANSAXLE-MODEL NUMBER 331-3000 917.
TRACTOR - - MODEL NUMBER TRANSAXLE-MODEL NUMBER 331-3000 KEY NO. PART NO.
TRACTOR - - MODEL NUMBER 917.
TRACTOR -- MODEL NUMBER 917.274980 BRIGGS & STRATTON ENGINE-MODEL NUMBER 446777, TYPE NUMBER 0177-E1 1022 211 1023A 240,,_I_ [ 505 IB _ 335 _ o" _ 7_ 628 _' ,251 141 121 CARBURETOR OVERHAUL KIT 108_ 51 I_,:_J 104 _ 105 117 137 276 633 e 987 • 672 _A c.D 977 CARBURETOR 672 I _ : _-_-c,--_ 11311130 _ _r_ 1123 O 4O40 1124 _' 332A 8 691 6 GASK]_'T SET 987 • _ 1123 _ O 1124 _G' 118 _ 276 ] . 117 • 150 r_ 5.
TRACTOR - - MODEL NUMBER 917.274980 BRIGGS & STRATTON ENGINE-MODEL NUMBER 446777, TYPE NUMBER 0177-E1 ,4I ,o,olr 1005_ 474 332 s2sI 4O5 363 6951 48 358 ENGINE G,ASKE'I SET 51ol 783010_ 1o01_ 1022 691 I_ 1o_ 803 311 842 276 0 .
TRACTOR -- MODEL NUMBER 917.274980 BRIGGS & STRATTON ENGINE-MODEL NUMBER 446777, TYPE NUMBER 0177-E1 KEY NO. PART NO.
TRACTOR -- MODEL NUMBER 917.274980 BRIGGS& STRATTONENGINE-MODELNUMBER446777,TYPE NUMBER0177-E1 KEY NO. PART NO.
SUGGESTED GUIDE FOR SIGHTING SLOPES FOR SAFE OPERATION 1. Fold this page along dotted line Indicated above. 2, Hold page before you so that Its left edge Is vertically parallel to a tree trunk or other upright structure. 3. Sight across the fold in the direction of hill slope you want to measure. 4.
Your Home For repair - in your home - of all major brand appliances, lawn and garden equipment, or heating and cooling systems, no matter who made it, no matter who sold it! For the replacement parts, accessories and owner's manuals that you need to do-it-yourself. For Sears professional installation of home appliances and items like garage door openers and water heaters. 1-800-4-MY-HOME Q_> Anytime, day or night (1-800-469-4663) www.sears.com (U.S.A. and Canada) www.sears.