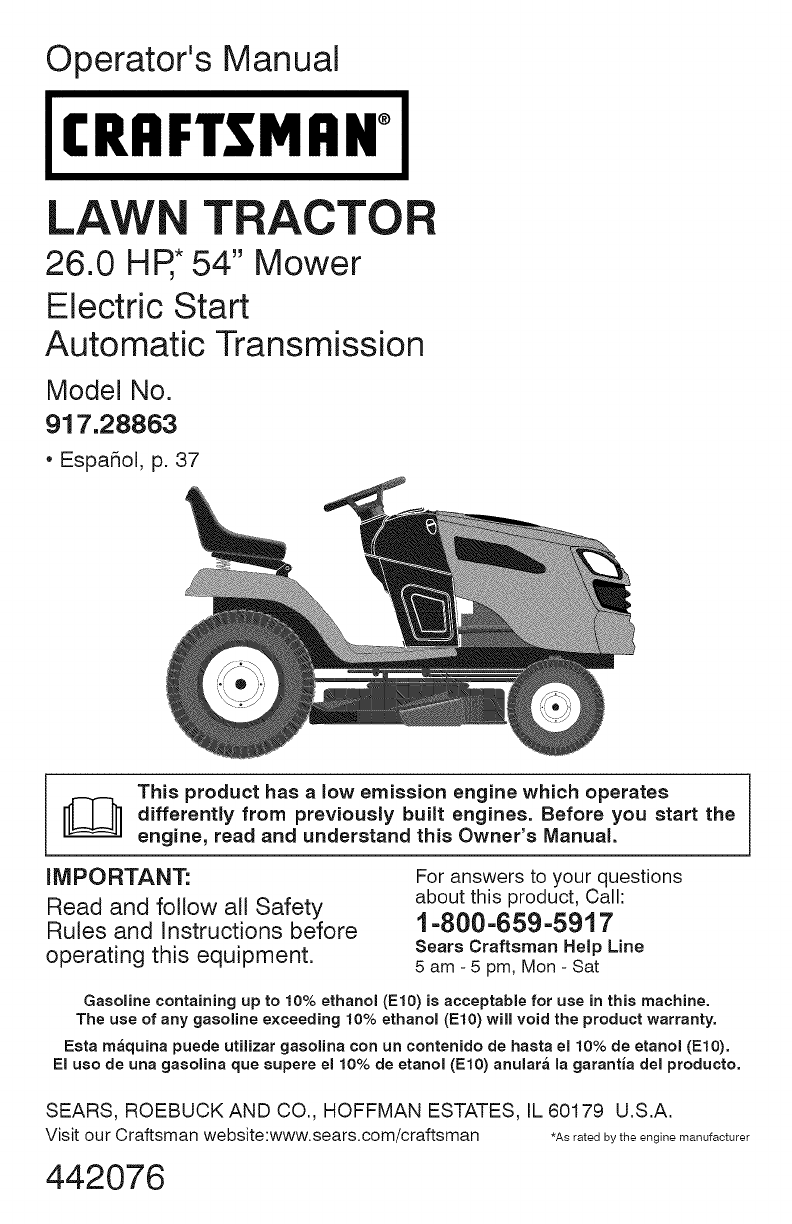
Operator's Manual LAW TRACTOR 26.0 HP,*54" Mower Electric Start Automatic Transmission Model No. 917.28863 , EspaSol, p. 37 ! This product has a low emission engine which operates differently from previously built engines. Before you start the engine, read and understand this Owner's Manual. iMPORTANT: Read and follow all Safety Rules and Instructions before operating this equipment.
Warranty .................................................. Safety Rules ............................................ Product Specifications ............................. Assembty/Pre-Operation ......................... Operation ............................................... Maintenance Schedule .......................... 2 3 6 7 13 21 Maintenance .......................................... 21 Service and Adjustments ....................... 26 Storage ..................................................
_DANGER: This cutting machine is capable of amputating hands and feet and throwing objects. Failure to observe the following safety instructions could result in serious injury or death. _,WARNING: In order to prevent accidental starting when setting up, transporting, adjusting or making repairs, always disconnect spark plug wire and place wire where it cannot contact spark plug. _WARNING: Do not coast down a hill in neutral, you may lose control of the tractor.
II.SLOPEOPERATION Slopes area majorfactorrelated tolossof control andtip-over accidents, whichcan resultinsevere injuryordeath.Operation onallslopesrequires extra caution. If you cannot back up the slope or if you feet uneasy on it, do not mow it. * Mow up and down slopes, not across. * Watch for holes, ruts, bumps, rocks, or other hidden objects. Uneven terrain could overturn the machine. Tall grass can hide obstacles.
• Keepthenozzleincontact withtherim ofthefueltankorcontainer opening at alltimesuntilfueling iscomplete. Donot usea nozzlelock-open device. • Iffuelisspilled onclothing, change clothingimmediately. • Never overfill fuettank. Replace gascap andtighten securely. GENERAL SERVICE • • • • • • • • Never operate machine in a closed area. Keep all nuts and bolts tightto be sure the equipment is in safe working condition. Nevertamperwithsafetydevices.Check their proper operation regularly.
PRODUCT SPECiFiCATiONS REPAIR PROTECTION AGREEMENTS Congratulations on making a smart purchase. Your new Craftsman@ product is designed and manufactured for years of dependable operation. But like all products, it may require repair from time to time. That's when having a Repair Protection Agreement can save you money and aggravation. Purchase a Repair Protection Agreement now and protect yourself from unexpected hassle and expense.
Mower Mower (2) Rear (5) 1-3/16 O.D. Washers Retainer Wheel _\ Lift Link Assemblies (1) Small _-_ Front (1) Shoulder Bolt (1) 1-1/40.D. Washer _7 Springs (1) Front Aaaembl (I) Wheel (1) 3/8-16 Locknut (5) Large Retainer Springs Slope Sheet If Equipped Keys (1) Anti=Sway Bar (1) 3/40.D.
Your new tractor has been assembled at the factory with exception of those parts left unassembled for shipping purposes. To ensure safe and proper operation of your tractor all parts and hardware you assemble must be tightened securely. Use the correct tools as necessary to ensure proper tightness. TOOLS REQUIRED FOR ASSEMBLY • Release lever to lock seat in position. A socket wrench set will make assembly easier. Standard wrench sizes are listed.
AI_CAUTION: Lift lever is spring loaded. Have a tight grip on lift lever, lower it slowly and engage in lowest position. Lift lever is located on left side of fender. 3. TURN STEERING WHEEL LEFT AND POSITION MOWER • Lift Lever Turn steering wheel to the left as far as it wilt go and position mower on right side of tractor with deflector shield (Q) to the right. Front Engine ? 2. ASSEMBLE FRONT GAUGE WHEEL (W) TO FRONT OF MOWER °IL__ Transaxle Q. Deflector Shield 4. SLIDE MOWER UNDER TRACTOR • H. W. X.
* * Pivot the integrated washer end of antisway bar (S) towards mower deck bracket on right side of mower. Insert integrated washer end of bar into hole in rear mower bracket (D). Move mower as needed to insert integrated washer end of bar into rear mower bracket (D). Secure with small washer and small retainer spring as shown. A. Mower Side Suspension Arms Q. Deflector Shield 5.
9 • • INSTALL BELT ON ENGINE CLUTCH PULLEY (M) Disengage belt tension rod (K) from locking bracket (L). Install belt onto engine clutch pulley (M). C. Rear Lift Link(s) D. Right Side Rear Mower Bracket 'U. Hole 8 • ATTACH FRONT LINK (E) Turn steering wheel to position wheels straight forward. • From front of tractor, insert rod end of front link (E) through front hole in tractor front suspension bracket (F).
CHECK TIRE PRESSURE The tires on your tractor were overinftated at the factory for shipping purposes. Correct tire pressure is important for best cutting performance. * Reduce tire pressure to PSI shown on tires. CHECK DECK _fCHECKLIST Before you operate your new tractor, we wish to assure that you receive the best performance and satisfaction from this Quality Product. Please review the following checklist: J" All assembly instructions have been completed. _/No remaining loose parts in carton.
These symbols may appear on your tractor or in literature supplied with the product. Learn and understand their meaning.
KNOW YOUR TRACTOR READ THiS OWNER'S MANUAL AND SAFETY RULES BEFORE OPERATING YOUR TRACTOR Compare the illustrations with your tractor to familiarize yourself with the locations of various controls and adjustments. Save this manual for future reference. Our tractors conform to the applicable safety standards of the American National Standards Institute. (A) ATTACHMENT LIFT LEVER - Used to raise and lower the mower or other attachments mounted to your tractor.
The operation of any tractor can result in foreign objects thrown into the eyes, which can result in severe eye damage. Always wear safety | glasses or eye shields while operating your tractor or performing any | adjustments or repairs. We recommend standard safety glasses or a | wide vision safety mask worn over spectacles. NOTE: Failure to move throttle control between half and full speed (fast) position, before stopping, may cause engine to "backfire".
TOMOVE FORWARD ANDBACKWARDThe cutting height range is approximately 1" Thedirection andspeedofmovement is to 4". The heights are measured from the controlled bytheforward andreverse drive ground to the blade tip with the engine not running. These heights are approximate and may pedals. 1. Starttractorand releaseparking vary depending upon soil conditions, height brake. of grass and types of grass being mowed. 2.
TO STOP MOWER BLADES - TO OPERATE ON HILLS * Disengage attachment clutch control. _WARNING: Do not drive up or down hills with slopes greater than 15 ° and do not drive across any slope. Use the slope guide provided at the back of this manual. • Choose the slowest speed before starting up or down hills. • Avoid stopping or changing speed on hills. • If stopping is absolutely necessary, push brake pedal quickly to brake position and engage parking brake.
SERVICE REMINDER/HOUR METER Service reminder shows the total number of hours the engine has run and flashes to indicate thatthe engine or mower needs servicing. When service is required, the service reminder will flash for two hours. To service engine and mower, see the Maintenance section of this manual. NOTE: Service reminder runs when the ignition key is in any position but "STOP". For acurate reading, be sure key remains in the "STOP" position when engine is not running.
PURGE COLD WEATHER STARTING (50°F(10°0) and below) 6. When engine starts, leave throttle control in choke position until engine warms up and begins to run roughly. Once rough running begins, immediately move the throttle control to the fast position. Engine warm-up may take from several seconds to several minutes (the colder the temperature, the longer the warm-up). AUTOMATIC TRANSMISSION WARM UP Before driving the unit in cold weather, the transmission should be warmed up as follows: 1.
MOWING TiPS • Tire chains cannot be used when the mower housing is attached to tractor. Mower should be properly leveled for best mowing performance. See "TO LEVEL MOWER HOUSING" in the Service and Adjustments section of this manual. The left hand side of mower should be used for trimming. Drive so that clippings are discharged onto the areathat has already been cut. Have the cut area to the right of the tractor. This will result in a more even distribution of clippings and more uniform cutting.
MAINTENANCE SCHEDULE BEFORE EACH EVERY 8 USE Check Brake Operation EVERY 25 EVERY 50 EVERY 100 EVERY SEASON BEFORE STORAGE .OURS NOURS .
TRACTOR CHECK REVERSE OPERATION (ROS) SYSTEM Always observe safetyruleswhenperforming anymaintenance. When the engine is running with the BRAKE OPERATION ignition switch in the engine "ON" position and the attachment clutch engaged, Iftractor requires morethanfive(5)feetto any attempt by the operator to shift into stopathighest speedinhighest gearona reverse should shut off the engine. level,dryconcrete orpaved surface, then brakemustbeserviced.
NOTE: The original equipment battery on your tractor is maintenance free. Do not attempt to open or remove caps or covers. Adding or checking level of electrolyte is not necessary. TO CLEAN BATTERY AND TERMINALS Corrosion and dirt on the battery and terminals can cause the battery to "leak" power. 1. Remove terminal guard. 2. Disconnect BLACK battery cable first then RED battery cable and remove battery from tractor. 3. Rinse the battery with plain water and dry. 4.
ENGINE OIL FILTER CLEAN AIR SCREEN Replace the engine oil filter every season or every other oil change if the tractor is used more than 100 hours in one year. AIR FILTER Air screen must be kept free of dirt and chaff to prevent engine damage from overheating. Clean with a wire brush or compressed air to remove dirt and stubborn dried gum fibers.
CLEANING • Clean engine, battery, seat, finish, etc. of all foreign matter. Clean debris from steering plate. Debris can restrict clutch/brake pedal shaft movement, causing belt slip and loss of drive. • Nozzle Ada Washout Port _, CAUTION: Avoid all pinch points and movable parts Clutch/brake pedal Clean top side iMPORTANT: Tug hose ensuring connection is secure. 5. Turn the water on. 6.
WARNING: TOAVOID SERIOUS iNJURY, BEFORE PERFORMING ANYSERVICE OR ADJUSTMENTS: 1. Depress clutch/brake pedalfullyandsetparking brake. 3. Placeattachment clutchin"DISENGAGED" position. 4. Turnignition keyto"STOP" andremove key. 5. Makesuretheblades andallmoving partshavecompletely stopped. 6. Disconnect sparkplugwirefromsparkplugandplacewirewhereitcannot come incontact withplug. 7. Goto otherside of mowerand disconnect _ithe suspension arm and rear lift link.
TO LEVEL MOWER Make sure tires are properly inflated to the PSI shown on tires. If tires are over or under inflated, it may affect the appearance of your lawn and lead you to think the mower is not adjusted properly. 4. If adjustment is necessary, see steps 2 and 3 in Visual Adjustment instructions above. 5. Recheckmeasurements, adjustifnecessary until both sides are equal. FRONT-TO-BACK ADJUSTMENT iMPORTANT: Deck must be level sideto-side.
TO REPLACE MOWER DRIVE BELT TO REPLACE MOTION DRIVE BELT MOWER DRIVE BELT REMOVAL Park the tractor on level surface. Engage parking brake. For assistance, there is a belt installation guide decal on bottom side of left footrest. 1. Park tractor on a level surface. Engage parking brake. 2. Lower attachment lift lever to its lowest position. 3. Disengage betttension rod (K) from lock bracket (L). AUTION: Betttension rod is spring loaded. Have a firm grip on rod and release slowly. 4.
TO CHECK BRAKE TO START ENGINE WITH A WEAK BATTERY _I,,WARNING: Lead-acid batteries generate explosive gases. Keep sparks, flame and smoking materials away from batteries. Always wear eye protection when around batteries. Ifyour battery is too weak to start the engine, it should be recharged. (See "BATTERY" in the MAINTENANCE section of this manual). If "jumper cables" are used for emergency starting, follow this procedure: IMPORTANT: Your tractor is equipped with a 12 vott system.
REPLACING BATTERY TO REMOVE SEMBLY _WARNING: Do not short batteryterminals by allowing a wrench or any other object to contact both terminals at the same time. Before connecting battery, remove metal bracelets, wristwatch bands, rings, etc. Positive terminal must be connected first to prevent sparking from accidental grounding. 1. Lift hood to raised position. 2. DisconnectBLACKbatterycabte (A)then RED battery cable and carefully remove battery from tractor. 3.
ENGINE FUEL SYSTEM IMPORTANT: It is important to prevent gum deposits from forming in essential fuel system parts such as carburetor, fuel hose, or tank during storage. Also, alcohol blended fuels (called gasohol or using ethanol or methanol) can attract moisture which leads to separation and formation of acids during storage. Acidic gas can damage the fuel system of an engine while in storage. * Empty the fuel tank by starting the engine and letting it run until the fuel lines and carburetor are empty.
TROUBLESHOOTING CHART: See appropriate section in rnanual unless directed to Sears service center PROBLEM Will not start CAUSE 1 Out of fuel. 1 Fill fuel tank. 2 Engine not "CHOKED" 2 See "TO START ENGINE" Operation section. 3 Engine flooded. 3 Wait several minutes attempting to start. 4 Bad spark 4 Replace 5 Dirty air filter. 5 Clean/replace 6 Dirty fuel filter. 6 Replace 7 Water 7 Empty fuel tank and carburetor, refill tank with fresh gasoline and replace fuel filter.
TROUBLESHOOTING CHART: See appropriate section in manual unless directed to Sears service center PROBLEM Engine clicks but will not start Loss of power Excessive vibration CAUSE CORRECTION 1 Weak battery. 2 Corroded 3 Loose or damaged 4 Faulty solenoid or dead 1 Recharge terminals. 2 Clean wiring. 3 Check all wiring. or starter. 4 Check/replace 1 Raise cutting speed. 2 Adjust 3 Clean underside housing. 4 Clean/replace 5 Check oil level/change 6 Clean plug.
TROUBLESHOOTING CHART: See appropriate section in manual unless directed to Sears service center PROBLEM Poor cut - uneven cutting Mower blades will not rotate CAUSE 1 Worn, bent or loose blade. 1 Replace 2 Mower 2 Level mower 3 Buildup of grass, leaves, and trash under mower. 3 Clean underside housing. Bent blade mandrel. 4 Contact a Sears or other qualified service center. Clogged mower deck vent from build-up of grass, leaves, and trash around mandrels.
TROUBLESHOOTING CHART: See appropriate section in manual unless directed to Sears service center PROBLEM Battery will not charge Loss of drive Engine "backfires" when turning engine reverse o Get a personalized CORRECTION 1 Bad battery 2 Poor cable 3 Faulty regulator 4 1 2 Motion drive belt worn, or broken. 3 Air trapped in transmission shipment or servicing. 1 Engine between position 1 Reverse operation system (ROS) is not "ON" while mower or other attachment is engaged.
Z 0 InLU It. / / 0 / I.U It. / 0 _ / nO E / / ii / . LU It. 0 O_ O0 0 iI og 0 Z IZ 0 o= nO / It. LU / a / Nc_E / C_ 0 / / I.U I-- / LU / C_ C_ / / 36 _.
Garantia .......................................................... Reglas de Seguridad ...................................... Especificaciones del Producto ........................ Montaje/Pre OperaciSn ................................... OperaciSn ....................................................... Mantenimiento ................................................ 37 38 41 42 48 56 Programa de Mantenimiento .......................... 56 Servicio y Ajustes ...........................................
IMPORTANTE: Esta Maquina cortadora es capaz de amputar las manosy los pies y de lanzar objetos, si no se observan las instrucciones de seguridad siguientes se pueden producir lesiones graves o la muerte. L FUNOJONAMIENTO GENERAL • No hacer funcionar la m&quina sin el captador de hierba entera, la protecci6n de descarga u _IADVERTENCIA: Siempre desconecte el otros dispositivos de seguridad en su lugar y alambre de la bujia y p6ngalo donde no pueda en buenas condiciones.
o o Escoger una velocidad de marcha baja de modo que no sea necesario pararse o cambiar estando en una pendiente. No cortar la hierba mojada. Las ruedas pueden perder tracci6n. Poner siempre una marcha cuando se est& en pendientes. No poner en punto muerto e ir cuesta abajo. Evitar arrancar, pararse o girar en una pendiente. Si las ruedas pierden tracci6n, desconectar las cuchillas y proceder despacio cuesta abajo en la pendiente. Mantener todo los movimientos en las pendientes lentos y gradual.
• Mantener la m&quina libre de hierba, hojas u otros residuos acumulados. Limpiar las salpicaduras de aceite o carburante y quitar cualquier cosa mojada con carburante. Dejar que la m&quina se enfrJe antes de guardarla. • Si se golpea un objeto ajeno, hay que pararse e inspeccionar la m&quina. Reparar, si es necesario, antes de volver a poner en marcha. • Nunca hacer ningQn ajuste o reparaci6n con el motor en funci6n.
ESPECJFICACJONES DEL PRODUCTO Capacidad y Tipo de gasolina: 3.0 Galones (11,35 L) Regular Sin Plomo Tipo de Aceite: (APJ-SG-SL) SAE 30 (Sobre 32°F / 0°C) SAE 5W30 (Debajo 32°F/0°C) Capacidad de Aceite: Con filtro: 64 oz.(1,9 L) Sin filtro: 60 oz.(1,7 L) Buj[a: Champion (Abertura: Velocidad de Delante: Recorrido (MPH/KPH):Marcha En el estado de California, la ley exige Io anterior (Secci6n 4442 del "California Public Resources Code"). Otros estados pueden contar con otras leyes parecidas.
Segadora Rueda Delantera De La Segadora (5) 1=3/16" (2) ¢onjunto "_ de ealabones de levantarniento ,_-_ Arandela traaeroa (1) Perno _ (1) Abrazadera _ pequeflo de retenci6n _ \\ Q (1) Rueda .....
Su tractor nuevo ha sido montado en la f&brica con la excepci6n de aquellas partes que no se han montado por razones de envio. Para asegurarse que su tractor funcione en forma adecuada y segura todas las partes y los articulos de ferreteria que se monten tienen que ser apretados en forma segura. Use las herramientas correctas, seg0n sea necesario, para asegurarse de que esten apretados en forma segura. HERRAMIENTAS NECESARIAS PARA EL MONTAJE Un juego de Ilaves de tubo facilitar& el montaje.
GIRE EL VOLANTE HACIA LA IZQUIERDA Y UBIQUE LA CORTADORA DE CESPED EN SU LUGAR 3. PRECAUCION: La palanca de levantamiento est&accionada por resorte. Sostengalafirmemente apretada, b&jela lentamente y eng&nchela en la posici6n m&s baja. La palanca de levantamiento se encuentra en el lado izquierdo de la defensa. Gire el volante completamente hacia la izquierda y ubique la cortadora de cesped en el lado derecho del tractor con el blindaje deflector (Q) a la derecha. Palanca De Parte Delantera _ 2.
Haga oscilar el extremo con la arandela integrada de la barra antibalanceo (S) hacia la escuadra de la plataforma de la cortadora de cesped en el lado derecho de la cortadora. Inserte el extremo con la arandela integrada de la barra en el agujero de la escuadra trasera de la cortadora de cesped (D). Mueva la cortadora de cesped segQn sea necesario para insertar el extremo con la arandela integrada de la barra en la escuadra trasera de la cortadora de cesped (D).
Levante laesquina trasera delacortadora de Muevase hasta el lado izquierdo de la cortacesped yubique laranura enelcon junto deesdora e inserte un resorte de retenci6n grande labones sobre lachavetaen laescuadratrasera(G) atraves del agujero del eslab6n delantero delacortadora (D);asegure conuna arandela (E) detr&s de la escuadra de suspensi6n grande yunresorte deretenci6n grande. delantera (F). Inserte el otro extremo del eslab6n (E) en el Repita enelladoopuesto deltractor.
REVISION DE LA PRESI6N DE LAS LLANTAS Las Ilantas en su unidad fueron infladas demasiado en la f&brica por razones de envio. La presiSn de las Ilantas correctas es importante para obtener el mejor rendimiento en el corte. • Reduzca la presiSn de los neum&ticos a la PSi que se indica en estos. ,/LISTA Antes de operar y de disfrutar de su tractor nuevo, le deseamos que reciba el mejor rendimiento y la mayor satisfaccion de este producto de calidad.
Estos simbolos pueden aparecer sobre su tractor o en la literatura proporcionada Aprenda y comprenda sus significados. R N MARCHA ATR_,S MOTOR APAGADO NEUTRO con el producto. I',,I H ALTO BAJO ESTRANGULACION R,_PIDO LENTO (@) _ MOTOR MOTOR FRENO DE ALTURA DE LA LEVANTAMIENTO SlSTEMA ENCENDIDO ENMARCHA ESTAClONAMIENTO SEGADORA DE LA SEGADORA FUNClO.NAMIENTO _D ATRAS (ROS) LUCES ENSENDIDAS COMBUSTIBLE BATERIA MARC.
FAMILIARICESE CON SU TRACTOR LEA ESTE MANUAL DEL DUENO Y LAS REGLAS DE SEGURIDAD ANTES DE OPERAR SU TRACTOR Compare las ilustraciones con su tractor para familiarizarse con las ubicaciones de los diversos controles y ajustes. Guarde este manual para referencia en el futuro. Nuestros tractores cumplen con los est&ndares de seguridad American National Standard institute.
La operaci6n de cualquier tractor puede hacer que salten objetos extraSos dentro de sus ojos, Io que puede producir daSos graves en estos. Siempre use anteojos de seguridad o protecciones para los ojos mientras opere su tractor o cuando haga ajustes o reparaciones. Recomendamos gafas de seguridad o una m&scara de visi6n amplia de seguridad usada sobre las gafas.
MOVERSE HACIA ADELANTE Y HACIA ATRAS La direcci6n y la velocidad de movimientos est_.n controlados por los pedales de marcha adelante y atr&s. 1. Poner en marcha el tractor y quitar el freno de mano. 2. Apretar lentamente el pedal marcha adelante (K) y atr&s (L) para iniciar el movimiento. M&s se aprieta el pedal y mayor es la velocidad. La gama de la altura de cortees de aproximadamente 1 a 4 pulgadas. Las alturas se miden desde el suelo a la punta de la cuchilla cuando el motor no est& funcionando.
PARA OPERAR LA SEGADORA Su tractor viene equipada con un interruptor sensor que exige la presencia del operador. Si el motor est& funcionando y el embrague del accesorio est& enganchado y el operador trata de bajarse del asiento, se apagar& el motor. Tiene que mantenerse sentado completa y centralmente en el asiento para impedir que el motor vacile o se apague cuando se opere su equipo en terreno disparejo, &spero o en cerros. 1. Elija a que altura cortar& el cesped por medio de la palanca elevadora. 2.
PARA TRANSPORTAR Cuando empuje o arrastre su tractor asegt_rese de desenganchar la transmisiSn poniendo el control de la rueda libre en la posiciSn de marcha de rueda libre. El control de marcha de rueda libre esta situado en la barra de tracciSn trasera del tractor. 1. Levante la palanca de levantamiento del accesorio a su posiciSn m&s alta. 2. Tire del mando de la rueda libre hacia afuera y hacia abajo hasta que se coloque en la guia y sueltalo de manera que se mantenga en la posiciSn de desenganchada.
PARA HACER ARRANCAR EL MOTOR CALENTAMIENTO AUTOMATICA AI hacer arrancar el motor por la primera vez o si se ha acabado el combustible del motor, se necesitar& tiempo para el arranque extra para mover el combustible desde el estanque hasta el motor. 1. 2. Antes de conducir la unidad en un tiempo frJo, la transmisi6n debe ser calentada como las instrucclones siguientes: 1. AsegOrese que el tractor este situado en una superficie nivelada. Asegt_rese.
PURGAR LA TRANSMiSION CONSEJOS PARA SEGAR • No se pueden usar las cadenas para las Ilantas cuando la caja de la segadora est& adjunta al tractor. • La segadora debe estar nivelada en forma adecuada para obtener el mejor rendimiento al segar. Vea "PARA NIVELAR LA CAJA DE LA SEGADORA_' en la secci6n de Servicio y Ajustes de este manual. • El lado izquierdo de la segadora se debe usar para recorte. • Maneje de modo que los recortes se descarguen en el &rea que ya ha sido cortada. Mantenga el _.
PROGRAMA DE MANTENIMmENTO Revisar la operaci6n Revisar la presi6n t V_rifi_z F_ d'oD_rateur A C T Tabla de si hay sujetad las DE CAsDA USO HORAS CADA 25 HORAS F_ Limpiar la bater[a Revisar el enfriamiento _ ........
TRACTOR Siempre observe las reglas de seguridad cuando de mantenimiento. OPERAOION DEL FRENO • Cuando el motor esta en marcha con el interruptor de Ilave del sistema de funcionamiento atr&s (ROS) en la posici6n "ON" y el embrague del accesorio conectado, cualquier tentativa del operador de viajar marcha atr&s, NO apagar& el motor. Si el tractor necesita m&s de cinco (5) pies para detenerse a la ma.
PARA LIMPIAR NALES LA BATERiA Y LOS TERMI- AVISO: A pesar de que los aceites de multiviscosidad (5W30, 10W30, etc.) mejoran el arranque en clima frio, estos aceites de multiviscosidad van a aumentar el consumo de aceite cuando se usan en temperaturas sobre 32 ° F (0 ° C). Revise el nivel del aceite del motor m&s a menudo, para evitar un posible daSo en el motor, debido a que no tiene suficiente aceite.
6. Vuelva a Ilenar el motor con aceite LIMPIEZA DE LA REJILLA DE AIRE La rejilla de aire debe mantenerse sin mugre y paja para evitar el daSo al motor debido al sobrecalentamiento. Limpiela con un cepillo de alambre o con aire comprimido para remover la mugre y las fibras de goma secas, pegadas. a traves del tubo de la varilla indicadora de nivel para relleno del aceite. Vacielo lentamente. No Io Ilene demasiado.
LJMPIEZA 3, Limpie todo material extraSo del motor, la bateria, el asiento, el pulido, etc. Limpie los desechos de la placa guJa. Los desechos pueden limitar el movimiento del eje del pedal del freno/embrague, Io que hare. que patine la correa y que se pierda la tracci6n. _PRECAUCi6N: Evite todos los puntos de enganche y las piezas m6viles. 4, Enrosque el adaptador de la boquilla (empaquetado con el manual del operador del tractor) en el extremo de la manguera del jardJn.
,_ 1. 2. 3. 4. 5. 6. ADVERTENCIA:PARA EVITAR LESI6NES SERIAS, ANTES DE DAR CUALQUIER SERVI, CIO O DE HACER AJUSTES: Presione el pedal del embrague/freno completamente y aplique el freno de estacionamiento. Ponga la palanca de control de movimiento en la posici6n de neutro. Ponga el embrague del accesorio en la posici6n desenganchado (DISENGAGED). Ponga la Ilave de ignici6n en la posici6n de apagado (STOP) y remuevala.
PARA NIVELAR LA SEGADORA Asegt_rese de que los neumaticos esten inflados a la PSI que se indica en estos. Si esta.n demasiado inflados o poco inflados, el cesped no le quedar& bien cortado, Io cual podr& Ilevarlo a pensar que la SEGADORA no esta. bien regulada. REGULACKDN VISUAL DE LADO A LADO 4. 1. IMPORTANTE: El piso debe quedar bien nivelado de lado a lado.
PARA REEMPLAZAR LA CORREA DE LA CUCHLLA DE LA SEGADORA DESMONTAJE DE LA CORREA DE LA SEGADORA NOTE: Observe toda la correa de impulsi6n de movimiento y la posici6n de todas las guias y guardacorreas. 2. Desconecte elarnes del cable del embrague (A). 3. Quite la pieza de uni6n anti-rotaci6n (B) que est& del lado derecho del tractor. 4. Retire la correa del pi56n estacionario (C) y del pi56n del embrague (D). 5. Retire la correa del pi56n central (E). 6.
VERIFIQUE ELFRENO Siel tractor exige m&s de cinco PARA HACER ARRANCAR UNA BATERiA BAJA (5) pies para pararse a una velocidad m&s alta en el cambio m&s alto en una superficie nivelada de hormig6n seco o pavimentada, entonces se debe controlar y ajustar el freno. _&.DVERTENCIA: Las baterias de a.cido-plomo generan gases explosivos. Mantenga las chispas, las llamas y los materiales para fumar alejados de las baterias. Siempre use una protecci6n para los ojos alrededor de las baterias.
REEMPLAZAR LA BATERIA _DVERTENCIA: No haga cortocircuito con los terminales de la bateria al permitir que una Ilave de tuerca o cualquier otro objeto entre en contacto con ambos terminales a la misma vez. Antes de instalar la bateria remueva las pulseras de metal, los relojes de pulsera de metal, los anillos, etc. El terminal positivo tiene que conectarse primero para evitar las chispas debido a la conexi6n a tierra por accidente. 1. Levante el asiento a la posici6n elevada. 2.
Inmediatamente prepare su tractor para el almacenamiento al final de la temporada o si el tractor no se va a usar por 30 dias o m&s. _ADVERTENCIA: Nunca almacene el tractor con gasolina en el estanque dentro de un edificio en donde los gases pueden alcanzar una llama expuesta ouna chispa. Permita que el motor se enfrie antes de almacenarlo en cualquier recinto privado. TRACTOR Remueva la segadora del tractor para el almacenamiento por el invierno.
PROBLEMA No arranca CAUSA 1. 2. 1. 2. 3. 4. Bujia mala. 4. Cambie la bujia. 5. 6. Filtro de aire sucio. Filtro de combustible 5. 6. Limpie/cambie el filtro de aire. Cambie el filtro de combustible. 7. Agua en el combustible. 7. Vaciar el estanque de combustible y el carburador, vuelva a Ilenar el estanque con gasolina nueva cambie el filtro de combustible. 8. Alambrado suelto o daSado. 8. Revise todo el alambrado. 9. Carburador desajustado. 9.
PROBLEMA CAUSA P6rdida fuerza Agua en el combustible, de CORRECCNON (eigue) Vibracion exceeiva 10. 11. 12. 13. Alambrado de la bujia suelto. Rejilla/aletas de aire del motor sucias. Silenciador sucio/taponado. Alambrado suelto o daSado. 14. Carburador 15. V&lvulas del motor desajustadas. 15. 1. Cuchilla desgastada, 2. Mandril de la cuchilla doblado. 2. 3. Parte(s) suelta(s)/da_ada(s). 3. El motor conti.
PROBLEMA CORRECCmON CAUSA Las luz (ces) de lantera(e) no funcionando La bateria no carga 1_ 2. El interruptor 3. Interruptor 4. Alambrado 5. 1. 2. 3. 4-_ Perdida de impulsibn 1. 2. 3. est&'APAGADO"(OFF). 1: ;'ENCiEND,_; (ONiei]nterruptor. o I&mpara(s) quemada(s). 2. Oambie la bombitla(s) o lampara(s). 3. Revise/cambie 4. Revise el alambrado y tas conexiones. Fusible quemado. 5. Cambie el fusible. Elemento(s) de la bateria malo(s). Malas conexiones de cables. 1. Cambie la bateria.
if) / / / rn _'_m rrl _:1. ro -- OO -- rrl ro N.
%)uql find tlhe answe_ a_d mo_e on managemyhe_neo_em Find this and a[[ your other product manuals ... for free! online. : _ Get answers from our team of home experts. Get a personat]zed maintenance plan for your home. Find information and too[s to help with home projects.