Owner's Manual i CRHFTSMHN'i Permanently Lubricated Single Stage Side Stack AIR COMPRESSOR Model No. 919.167461 • Safety Guidelines • Assembly • Operation • Maintenance • Service • Troubleshooting • Repair CAUTION: and Adjustments Parts Read the Safety Guidelines and All Instructions Operating. Sears, Carefully Before Roebuck and Co., Hoffman Estates, IL 60179 Visit our Craftsman website: www.sears.com/craftsman D28071 Revl 7/24/03 U.S.A.
h q;_:3! :1 EoJ_,_ [_o] _hi _h I_-_ WARRANTY ............................................. SPECIFICATION CHART .................................... SAFETY GUIDELINES-DEFINITIONS .......................... 2 3 3 IMPORTANT SAFETY INSTRUCTIONS ....................... GLOSSARY .............................................. ACCESSORIES .......................................... DUTY CYCLE ............................................ 3-8 9 9 9 ASSEMBLY .............................................
-"1".1=[e]I _1[_:_1 II[o] _ I[e] "!':_t.tl Model No. Max. Developed HP Bore Stroke Voltage-Single Phase Minimum Branch Circuit Requirement Fuse Type Air Tank Capacity - Gallons Approximate Cut-in Pressure Approximate Cut-out Pressure SCFM@ 40 psig SCFM@ 90 psig 919-167461 3 2.375" 1.35" 120V 15 amps Time Delay 4 120 150 7.9 5.5 E.'T:I;I_ I_'lrll] Im]=1II I_I =_.']-,I m]=1;ll_lil II[o_]_."] This manual contains information that iS important for you to know and understand.
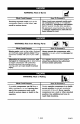
I I_ I_o] ;k IP'.'q +IInl[,.'Y.,_ _1_ &'d __JL_[,._)III,_]LI_+']IIT[_o _+]L_,[,._ Save these instructions Improper operation or maintenance of this product could result in serious injury and property damage. Read and understand all warnings and operation instructions before using this equipment.
WARNING: Risk of Bursting Air Tank: The following conditions could lead to a weakening of the tank, and result in a violent tank explosion and could cause property damage or serious injury. What Could Happen How To Prevent It Failure to properly drain condensed Drain tank daily or after each use. If tank water from tank, causing rust and develops a leak, replace it immediately thinning of the steel tank. with a new tank or replace the entire compressor. Modifications the tank.
:f:I"4..I;I _ WARNING: Risk of Electrical Shock What Could Happen How To Prevent It Your air compressor is powered by electricity. Like any other electrically powered device, If it is not used properly it may cause electric shock, Never operate the compressor outdoors when it is raining or in wet conditions. Never operate compressor with protective covers removed or damaged.
WARNING: Risk of Burns What Could Happen How To Prevent It Touching exposed metal such as the compressor head or outlet tubes, can Never touch any exposed metal parts on compressor during or immediately after operation. Compressor will remain hot for several minutes after operation. Do not reach around protective shrouds or attempt maintenance until unit has been allowed to cool.
WARNING: Risk of Serious Transporting Injury or Property Damage When Compressor (Fire, Inhalation, Damage to Vehicle Surfaces) What Could Happen How To Prevent It Oil can leak or spill and could result in fire or breathing hazard; serious injury or death can result= oil leaks will damage carpet, paint or other surfaces in vehicles or trailers, Always place COMPRESSOR on a protective mat when transporting to protect against damage to vehicle from leaks.
Become familiar with these terms before operating the unit. CFM: Cubic feet per minute. SCFM: Standard cubic feet per minute; a unit of measure of air delivery. PSIG: Pounds per square inch gauge; a unit of measure of pressure. Code Certification: Products that bear one or more of the following marks: UL, CUL, ETL, CETL, have been evaluated by OSHA certified independent safety laboratories and meet the applicable Underwriters Laboratories Standards for Safety.
Unpacking 1. Remove unit from car_on and discard all packaging. HOW TO SET UP YOUR UNIT Location must be installed and grounded in accordance with all local codes and ordinances. of the Air Compressor 2. Locate the air compressor in a clean, dry and well ventilated area. The air compressor should be located at least 12" away from the wall or other obstructions that will interfere with the flow of air. The air compressor pump and shroud are designed to allow for proper cooling.
Extension Cords Voltage and Circuit Protection Refer to the Parts Manual for the voltage and minimum branch circuit requirements. Use extra air hose instead of an extension cord to avoid voltage drop and power loss to the motor, and to prevent overheating. If an extension cord must be used, be sure it is: Certain air compressors can be operated on a 15 amp circuit if the following conditions are met. * 1. Voltage supply through branch circuit is 15 amps. 2.
Know Your Air Compressor READ THIS OWNER'S MANUAL AND SAFETY RULES BEFORE OPERATING YOUR UNIT. Compare the illustrations with your unit to familiarize yourself with the location of various controls and adjustments. Save this manual for future reference. Air Compressor Pump Outlet Gauge Regulator Universal Quick Connect Bodies Description of Operation Become familiar with these controls before operating the unit. regulator.
design cooling system. At the heart of this cooling system is an engineered fan. It is perfectly normal for this fan to blow air through the vent holes in large amounts. You know that the cooling system is working when air is being expelled. Air Compressor Pump: Compresses air into the air tank. Working air is not available until the compressor has raised the air tank pressure above that required at the air outlet. Pressure Release Valve How to Use Your Unit How to Stop: 1.
5. Run the compressor for 15 minutes. Make sure the drain valve is open and there is minimal air pressure build-up in tank. 6. After 15 minutes, close the drain valve (clockwise). The air receiver will fill to "cut-out" pressure and the motor will stop. The compressor Before 1. is now ready for use. How to Start: 1. Turn the On/Auto/Off lever to "AUTO" and allow tank pressure to build. Motor will stop when tank pressure reaches "cut-out" pressure. 2.
Customer Responsibilities Before Daily _ach a_er each use use ol F_quently Yearly Check Safety Valve Drain Tank Air Filter • (1) Air compressor pump intake and exhaust valves 1- more frequent in dusty or humid conditions I_ Unit cycles automatically when power is on. When performing maintenance, you may be exposed to voltage sources, compressed air, or moving parts. Personal injuries can occur.
6. After the water has been drained, close the drain valve (clockwise). The air compressor can now be stored. NOTE: If drain valve is plugged, release all air pressure. The valve can then be removed, cleaned, the reinstalled. Air Filter - Inspection Replacement Air Compressor Pump and Exhaust Valves Once a year have a Trained Service Technician check the air compressor pump intake and exhaust valves. MoOr and Hot surfaces. Risk of burn. Compressor heads are exposed when filter cover is removed.
_'V_II Unit cycles automatically when power is on. When doing Maintenance, you may be exposed to voltage sources, compressed air or moving parts. Personal injuries can occur. Before performing any Maintenance or repair, unplug the compressor and bleed off all air pressure. 4. Using an adjustable wrench loosen pressure relief tube nut at air tank and pressure switch. Carefully move pressure relief tube away from check valve. 5.
Before you store the air compressor, make sure you do the following: 1. Review the "Maintenance" section on the preceding pages and perform scheduled maintenance as necessary. 2. Set the On/Auto/Off "OFF". Water will condense in the air tank. If not drained, water will corrode and weaken the air tank causing a risk of air tank rupture. 7. lever to 3. Turn the regulator counterclockwise and set the outlet pressure to zero. 4.
Innl-[-oll_'-] _[oIo]nJJP,[_ _ Performing repairs may expose voltage sources, moving parts or compressed air sources, moving parts or compressed air sources. Personal injury may occur. Prior to attempting any repairs, unplug the air compressor and bleed off all air tank air pressure. PROBLEM Excessive tank pressure - safety valve pops off. CAUSE Pressure switch does not shut off motor when com3ressor reaches "cut-out" pressure. Pressure switch "cut-out" too high.
PROBLEM CORRECTION CAUSE Pressure reading on the regulated pressure gauge (if equipped) drops when an accessory is used. It is normal for "some" pressure drop to occur. If there is an excessive amount of pressure drop when the accessory is used, adjust the regulator as instructed in the Operation section. NOTE: Adjust the regulated pressure under flow conditions (while accessory is being used).
PROBLEM Motor will not run. CORRECTION CAUSE Motor overload protection switch has tripped. Tank pressure exceeds 3ressure switch "cut-in" 3ressure. Let motor cool off and overload switch will automatically reset. Motor will start automatically when tank pressure drops below "cut-in" pressure of pressure switch. 2,heck valve stuck open. Remove and clean, or replace. Loose electrical connections. Check wiring connection inside pressure switch and terminal box area.
++ 17-I Tot ue 80_O0+n-Ibs / 17-2 Torque 17-8 25-31in.+tbs. Totque SO-6Oin+.lbs. 14 15 Torque 30.40 in.-Ibs. 8 13 12 7 / 43 6 / \\\\\\\\ 17 21 j 22\ 23\ 24\ jl 25 \39 _38 © 35 \\ 31 Torque 10-20 in..t bs.
KEY NO. 4 5 6 7 8 9 10 11 12 13 14 15 16 17 17-1 17-2 17-3 17-4 17-5 17-6 17-8 19 20 21 22 23 24 25 27 28 31 32 33 34 35 36 37 38 39 40 41 42 43 46 47 48 PART NO.
84Torque 7-10 ft.-Ibs. 89 __'_ 83 86 0 _-80 _ 79-4 _L_ -,_ _ 79-3 79-2 73 7+ 74___ _-_ in.-Ibs. D28071 24+ENG 72 Torque 100-120 in.-Ibs.
KEY NO. • 70 72 73 74 76 77 +x 78 + 79 +x 79-2 + 79-3 +x 79-4 +x 80 81 +x 82 83 84 85 86 87 88 89 X + PART NUMBER Z-D26713 SSF-615 AC-0140 AC-0108 SSF-586 DAC - 161 DAC-308 ACG-29 SSF-3158-1 SSG-8156 AC-0032 ACG-45 AC-0039 SSF-589 SSF-927 CAC-1046-1 DAC- 142 DAC-143 DAC-144 DESCRIPTION Motor Screw, 1/4-20 x 1.25" Eccentric Bearing Assembly Fan Screw 1/4-20 x .75", SEMS Shim Cylinder Sleeve Connecting Rod Assembly Formed Compression Ring Connecting Rod Cap Screw #10-24 x .
GARANT|A CUADRO .................................................... DE ESPECIFICACIONES DEFINICIONES DE NORMAS IMPORTANTES INSTRUCCIONES GLOSARIO 26 ..................................... DE SEGURIDAD 27 ........................... DE SEGUR|DAD 27 ..................... 27-32 ....................................................... ACCESORIOS CICLO DE SERVICIO ENSAMBLADO 34 34-35 ................................................... 36-38 ..................................................
Modelo N ° M&x.
GUARDE ESTAS INSTRUCCIONES La operaciSn o el mantenimiento inadecuados de este producto serias lesiones y daSos a la propiedad. Lea y comprenda todas instrucciones de funcionamiento antes de utilizar este equipo. ADVERTENCIA: qud puede podrian ocasionar las advertencias e Riesgo de Explosi6n o Incendio occurrir cbmo prevenirlo Para los contaotos el_ctricos es normal la existencia de chispas entre el motor y el interruptor a presi6n.
'J=lml[tt ;{a ADVERTENCIA: Tanque de aire: determinar las siguientes su explosi6n qu6 puede Riesgo condiciones violenta, dafios de Explosibn podrian, causar a la propiedad occutrir el debilitamiento o serias cbmo del tanque, prevenirlo Drenaje inadecuado del agua condensada en el tanque, siendo la causa del bxido que reduce el espesor del tanque de acero= Drene el tanque diariamente o despu_s de cada uso.
•,,l :::1 nnl [_1;{q ADVERTENCIA: qud puede Riesgo de Descarga Eldctrica occurrir cbmo _/F prevenirlo Su compresor de aire est_ accionado por elect_ dcidad. Como cualquier otto dispositivo elect ri_ co impulsado electricamente, si no se Io utiliza adecuadamente, podria causarle una descarga el_ctrica. Jam_s opere eJ compresor a la intemperie cuan_ do est_ Iloviendo o en condiciones de humedad, Nunca opere el compresor sin sus defensas o sus cubiertas removidas o dafiadas.
ADVERTENCIA: Riesgo de Quemaduras qu_ puede occurrir c6mo prevenirlo Jam&s toque partes de metal expuestas en el compresor durante o inmediatamente despu_s de la operaci6n+ el compresor permanecerd caliente pot varios minutos luego de la operaci6n, Tocar el metal expuesto tal eomo el cabezal del compresor o los tubos de sal+da del escape, puede ocasionar_e serias quemaduras.
ADVERTENCIA: Riesgo de Serias Lesiones o Da_os a la Propiedad al Transportar el Compresor (Fuego, inhalacibn, da_o a la superficie de vehiculos) qud puede occurrir c6mo El aceite puede derramarse y etlo podrla resultar en serias lesiones o la muerte debido al riesgo de incendio o inhalaci6n. E_ derrame de aceite da_a 8Jfombras, pinturas u otrss 8upe_cies de veh_cuIos o remolques.
motor est& apagado, la presi6n del tanque de aire baja a medida que osted continea usando su accesorio. Cuando la presion del tanque baja al valor fijado en f&brica como punto bajo, el motor vetver& a arrancar autom&ticamente La presi6n baja a la cual el motor arranca autom&ticamente, se llama presion "minima de corte _, Familiarieese con los siguientes terminos, antes de operar la unidad: CFM: (Cubic feet per minute) Pies cebicos por minuto.
Desempaque 1. Extraiga la unidad de su caja y descarte todas las partes de embalaje. COMO PREPARAR LA UNIDAD IMPORTANTE: El tomacorriente que set& utilizado debera haber side conectado a Ubicacibn tierra conforme a todos los c6digos locales y ordenanzas. del compresor de aire Ubique el cempresor de aire en una zona limpia, seca y bien ventilada. La bomba del compresor de elre y su carcasa hart sido disefiadas para permitir un enfriamiento adecuado. Las aberturas de ven- 2.
Cables de extensibn eldctrica Proteccibn Use extensiones de manguera de aire antes que prolongaciones de cables electricos, a fin de prevenir cafdas de tension, circuitos requeridos, de piezas. perdida de la potencia el_ctdca al motor, y tambi6n su recalentamiento.
Conozca su compresor de aire LEA ESTE MANUAL DEL PROPIETARIO Y SUS NORMAS DE SEGURIDAD ANTES DE OPERAR LA UNIDAD. Compare las ilustraciones contra su unidad a fin de familiarizarse con la ubieaci6n de los distintos controles y regulaciones Conserve este manual para referencias futuras. Man6metro de presidn del tanque Bomba de compresidn del aim Universal Quick Connect Bodies Descripcibn de operaciones Familiarfcese con estos controles antes de operar la unidad.
Bomba de compresi6n del aire: Comprime el aire dentro de{ tanque. El aire de trabajo no se encuentra disponible haste que el compresor haya alcanzado a Ilenar el tanque haste un nivel de preeion por encima del requerido pare la salida del aire. Valvula de drenaje: La v&lvula de drenaje se encuentr8 ubicada sobre la base del tanque de aire y se usa pare drenar la condensaci6n al fin de cada uso Vdlvula aliviadora de presi6n Cbmo utilizar su unidad C6mo detenerla: 1.
drenaje (sentido horario). El aire recibido ira llenando hasta el punto de "corte" de presi6n, y el motor se detendra. El compresor estara ahora listo para ser usado. Antes de cada puesta en marcha: 1. Coloque el interruptor On/Auto/Off en la posici6n "OFF" y cierre el regulador de aire. Demasiade pre* sibn de aire podrb set la causa de riesgo de exploeibn. Verifique los valores de mbxima presibn dedoe pot el fabricante de lae herramientas neumaticas y los accesorios.
Responsabilidades del cliente Antes de cada uso :recuentemente 0iueg0 de cada us0 AnuaJmente Verifique la vAIvula de seguridad Drenaje del tanque Filtro de aire 1 V&lvules de entrada y escape de la bomba del compresor de aire 1- MAs frecuente en condiciones polvorientas Cbmo dad Cuando se real* izan trabajos de mantenimiento, usted puede estar expuesto e fuentee de voltaje, aire comprimido o piezes en movimiento. Pueden oeurrir lesiones personales.
Vdlvulas Dentro del tanque se producira condensacibn de agua. Si no drena, el agua Io corroera y debilitard causando un riesgo de ruptuta del tanque de aire. 6. bomba NOTA: Si la v&lvula de drenaje fuera del tipo enchufe, elimine toda la presion de aire. La v&lvula podr& entonces ser extraida, limpiada y finatmente reinstalada. Inspeccibn y reempla- Superficies calientes. Riesgo de quemaduras. Las cabezas del com-presor estan expuestas cuando se retira la cubierta del filtro.
en cuanto la energla el_ctrica es conectada. AI efectuar el mantenimiento, ustad quedara expuesto a tansi6n viva, airs comprimido o partes en movimiento. Debido a tales circunstancias, podrian ocurrirle lesiones personales. Antes de efectuar mantanimiento o reparaci6n alguna, desenchufe el comprssor y purgue cualquier presi6n de aire. 4 Utilizando una Ilave regulable, afloje el tube aliviador de presi6n del tanque de aire y el interrupter de presion.
Antes de guerdar su compresor de aire, asegt_rese de hacer Io siguiente: El aguedentro se condensa del Revise la secci6n "Mantenimiento" de las p&ginas preeedentes y ejecute el mantenimiento programado de aeuerdo a la necesidad. 2. Coloque la palanca On/Auto/Off la posici6n "OFF". 3. Gire el regulador en sentido antihorario y fije la presion de salida en cero. 4. Extraiga la herramienta el accesorio. neamatica en 7. o seguridad. 8.
El desarrollo de reparaciones puede exponer a sitios con corriente viva, partes en movimiento o fuentes de aire comprimido que podrian oeasionar lesiones personales. Antes de inten* tar reparaci6n alguna, desenchufe el compresor de aire y purgue toda la presi6n de aire del tanclue. PROBLEMA Presi6n excesiva del tanque - la valvula de seguridad se dispara, Las conexiones pierden aire CORRECCION CAUSA El interruptor de presion no interrumpe al motor cuando el compresor alcanza la presion "de corte_.
PROBLEMA La lectura de la presion sobre un man6metro (si viene equipado con este) desciende cuando se utiliza un 8cce- CORRECCION CAUSA ESnormal que ocurra algQn descenso en 18presion. Si hubiese una caida excesiva de presi6n durante el uso del accesorio, ajuste el regulsdor de 8cuerdo 8 18s instrucciones de la seccion Operacidn.
PROBLEMA CAUSA CORRECCION El motor no funcion& El interruptor de protecci6n des obrecarga del motor se ha abler to+ Deje enfriar el motor y el interruptot de eobrecarga se reajustara automAticamente. La presi6n del tanque excede la presion de "corte maximo" del interruptor de presi6n. El motor arr&qcar& autom&ticamente cu&qdo la presi6n del t&qque caiga por debajo de la presbn de corte m_xima del interruptor de presi6n La v&lvula de retenci6n se ha quedado abierta.
D2807_ 46-SP
_ SP D2807@
Your Home For repair - in your home - of all major brand appliances, lawn and garden equipment, or heating and cooling systems, no matter who made it, no matter who sold it! For the replacement parts, accessories and owner's manuals that you need to do-it-yourself. For Sears professional installation of home appliances and items like garage door openers and water heaters. 1-800-4-MY-HOME (%S00-469-4663) www.sears.com ® Anytime, day or night (U.S.A. andCanada) www.sears.