Instruction Manual LAWN EDGER ATTACHMENT Model No. C944.511572 • Safety • Assembly • Operation • Maintenance • Parts List • Fran_ais WARNING: Read and follow all Safety Rules and Operating Instructions before first use of this product. For answers to your questions about this product: Call 7 am-7 pm, Mon.-Sat., or 10 am-7 pm, Sun. 1-800-235-5878 Sears Canada, 530164829 1122104 Inc., Toronto, _.
Warranty Statement Identification of Symbols Safety Rules Assembly Operation Maintenance 2 2 2 6 7 9 Service & Adjustments Storage Parts List French Parts and Ordering 10 10 11 12 Back Cover LIMITED TWO (2) YEAR WARRANTY ON CRAFTSMAN ® LAWN EDGER ATTACHMENT For two (2) years from the date of purchase, Sears Canada, Inc., will repair or replace free of charge, at Sears option, parts which are defective as a result of material or workmanship.
terial or hold material to be cut when the blade is in motion. Make sure powerheed is stopped and spark plug wire is disconnected (or powerhead is disconnected from power source) when removing jammed material from the cutting blade. Do not grab or hold attachment by the cutting blade. • Dress properly. Always wear safety glasses or similar eye protection when operating, or performing maintenance on your unit (safety glasses are available). Eye protection should be marked Z87.
each use.Ifthere isanydamage, do notuseuntildamage isrepaired by yourSears Service Centre. • Donotpullorcarry bycord; donot usecordasahandle, close adoor on cord, orpullcord around sharp edges appliance. Failure to have the unit repaired by your Sears Service Centre can cause the double insulation construction to become ineffective and resuit in serious injury. UNIT/MAINTENANCE SAFETY or comers. Keep cord away from heated surfaces. Do not unplug by pulling on cord. To unplug, grasp the plug, not the cord.
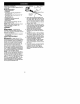
• Hold the unit firmly with both hands. • Keep firm footing and balance. Do not overreach or stand on unstable surfaces. • Always keep the wheel in contact with the ground. • Keep all parts of your body away from the blade and muffler. • Always push the unit sfowly over the ground. Stay aled for uneven sidewalks, holes in the terrain, large roots, etc. Safety Glasses • Do not force the unit Use only for jobs explained in this manual. Use only for edging. Do not abuse unit.
CARTON CONTENTS Check carton contents against the foF lowing list, Model 0944.511572 • Edger attachment • Handlebar • Handlebar mounting bracket for 1" (2.5 cm) shaft • Handlebar mounting bracket for 7/8" (2.2 cm) shaft • Bracket cover (2) • Handlebar bracket screws (4) • Attachment Hanger • Hex Wrench Examine parts for damage. Do not use damaged parts. NOTE: If you need assistance or find parts missing or damaged, call 1-800-235-5878. ASSEMBLY _WARNING: If received Handlebar _.
KNOW YOUR EDGER ATTACHMENT READ THIS INSTRUCTION MANUAL AND SAFETY RULES BEFORE OPERATING YOUR EDGER ATTACHMENT Compare the illustrations with your attachment to familiarize yourself with the location of the various controls and adjustments. Save this manual for future reference. Hanger Depth Adjustment Knob Blade Shield .Wheel Gearbox Edger Blade DEPTH ADJUSTMENT KNOB The DEPTH ADJUSTMENT KNOB is used to adjust the wheel for blade cutting depth. BLADE TheBLADEisdesignedtocutsod.
INSTALLING ATTACHMENT 1. Remove the shaft cap from the attachment (if present) and discard. 2. Position locking/release button of attachment into guide recess of upper shaft coupler. Coupler Primary Hole Upper Shaft Locking/ Release Button ,_ WARNING: Never attempt fo adjust the edger wheel when the unit is in operation. Always stop the powerhead, wait until the blade stops turning, and disconnect the spark plug (or disconnect powerhead from power source) before making adjustments.
1. Loosen the depth adjustment knob. 2. Slide the wheel to the desired position. • Raising the wheel will increase the cutting depth. • Lowering the wheel will decrease the cutting depth. 3. Tighten the depth adjustment knob securely. MAINTENANCE SCHEDULE WARNING: Always stop unit and disconnect spark plug wire (or disconnect powerhead from power source) before performing maintenance.
BLADE REPLACEMENT _WARNING: The blade wilt con- tinue to spin after the engine stops or after the throttle trigger has been released. To avoid serious injury, make sure the blade has stopped coasting and disconnect the spark plug (or disconnect powerhead from power source) before performing work on the blade. 3. While holding the screwdriver in position, remove blade nut by turntng clockwise. 4. Remove both washers, and the blade from the blade shaft.
Garantie 12 Entretien Explication des Symboles R_gles de S6curit6 Montage Fonctionnement 12 12 17 18 R_parations et R_giages 21 Rangement 22 Liste de pi_ces 11 Commande de pi_ces Page arri_re GARANTIE BORDURE 20 LIMITI_E DE DEUX (2) ANS SUR LE ACCESSOIRE CRAFTSMAN ® DE COUPE- Ourante une p_riode de deux (2) ans a compter de la date d'achat, Sears Canada Inc.
SECURITE SUR IN,FORMATION DE UAPPAREIL SECURITE DE L'UTILISATEUR _ DANGER: RISQUE DE COUPURE. TENEZ TOUJOURS LES MAINS ET LES PIEDS ELOIGNEES DE LA LAME ET DE UENDROIT DE LA COUPE. Pendant que le moteur toume ou quand le lame de coupe est en mouvement, n'essayez d'enlever aucun mat6riau coup6 ni de tenir du mat6dau a coupec Avant d'enlever du mat6dau pris dans le lame de coupe, assurez-vous que la bougie est d6branch_e (ou cet appareil est d6branch_e de la source de courant).
appareils d'ext6rieur etdontlevolt- • age61ectrique n'estpasinf_rieur celuideI'appareiL Lefildoltporter leslettre "W".Assurez-vous que votrerallonge estenbon6tat.Inspectez-la avant deI'utiliser etrem- • placez-la sielleestendommag6e. N'utilisez jamais avecunerallonge endommag_e. Lerallonge doltavoir unisolement enbon6tat,sanscra- • quelures nid6t6rioration. Lesfiches deconnexion doivent 6treenbon 6tat.
rendre la construction & double isolement inefficace et de causer des blessures graves. SECURITE DE L'APPAREIL ET DANS LE ENTRETIEN _ AVERTISSEMENT: D6brancbez toujours la bougie (ou d6branchez le source de courant) quand vous faites le maintien. • Inspectez I'appareil et changez les pi6ces endommag6es ou branlantes avant chaque utilisation de I'appareiL R6parez toute fuite de carburant avant d'utiliser I'appareiL Assurezvous que toutes les raccords esten place et serr6s fermement.
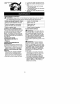
• Gardez Fappareil defa£on queper- Siunesituation paspr6vue dansce sonne nepuisse seblesser acciden- manuel seproduit, proc6dez avecprutalement, dence etjugement. Sivousavezbe• Gardez rappareil &rint6rieur, hors soind'aide, mettez-vous enrapport avecvotreCentre deService Sears ou deport6e desenfants. aveclet_16phone 1-800-554-6723, "_P_Ob" t -Jes • Ut_ li I m .... _, J _ lid Lunettes de s_curitBo tt!n es I _ ADVERT SSEMERT . . La lame peut projeter vto_ementdes o1_ jets.
CONTENU DU CARTON V6rifiez ce contenu par rapport & la liste suivante: Model C944.511572 • Accessoire de coupe-bordure • Poign6e-guidon • Support de montage du poign6eguidon pour l'axe de 2,5 cm (1 pouce) • Support de montage du poign6eguidon pour l'axe de 2,2 cm (7/8 pouce) • Couvert-support (2) • Vis de support de montage du poign6e-guidon (4) • Crochet pour I'accessoire • CI_ hexagonale V6dfiez que les pi_ces soient en bon 6tat. N'utilisez pas de pi_ces endommag6es.
FAMILIARISEZ-VOUS AVEC VOTRE ACCESSOIRE DE COUPE-BORDURE LISEZ BIEN CE MANUEL ET LES REGLES DE SECURITE AVANT D'UTILISER VOTRE ACCESSOIRE DE COUPE-BORDURE. Comparez I'appareil aux illustrations pour bien voir oQ se trouvent les commandes. Conservez ce manuel pour vous y reporter plus tar& Molette de R6giage de Profondeur Crochet Axe Protecteur de la Lame Roue \\\\\ Botte de Vitesses Lame LAME Le LAME est con£ue pour couper le sol.
3. Tout en tenant solidement I'axe su_e6rieur, tirez I'accessoire droit pour faire sortir du raccord. INSTALLATION DE L'ACCESSOIRE 1. Enlevez le capuchon d'axe de I'accessoire (s'il yen a un). 2. Mettez le bouton de verrouillage/ d6verrouillage de I'accessoire dans I'enfoncement guide du raccord. Trou Principal __t/_Raccord e Sup6rieur Enfoncement Guide Bouton de Accessoire Verrouillage/ Inf6rieur D_verrouillage 3.
REGLAGE DE LA PROFONDEUR _ AVERTISSEMENT: Ne ajustez la profondeur de coupe quand le moteur tourne. Rei_chez toujours le g&chette d'acc616rateur, mettez i'interrupteur ON/OFF en position {>,d6branchez la bougie (ou d6branchez la source de courant), et assurez-vous que la lame ne tourne plus avant de faire tout r6glage. Molette de R6gtage de Profor_- 1. Desserrez le molette de r_glage de profondeur. 2.
,_.AVERTISSEMENT: Remplacez toujours une lame qui est d6form6e, recourb_e, cass_e ou endommag6e de quelque mani6re que ce soit. N'essayez jamais de redresser et d'utiliser une lame endommag_e. Utilisez seulement la lame indiqu6e de rechange. Pertez des gants protecteurs quand vous manipulez ou entretenez la lame pour 6viter des blessures. REMPLACEMENT DE LA LAME ,_.
,_.AVERTISSEMENT: Ex6cutez les _tapes suivantes apr_s chaque utilisation: • Laissez le moteur et le bofte de vitesses se refroidir avant de le garder ou de le transporter. • Entreposez I'appareil avec tousles m6canismes de protection en place. Placez I'appareil de mani_re & ce qu'aucun objet coupant ne puisse causer accidentellement des blessures. • Entreposez I'appareil a I'int_rieur, dans un endroit sur61ev6, sec et hors de port6e.des enfants.
Dear Customer, _nmanufacturing this product, many steps have been taken to provide you with the highest quality. Unfortunately, errors or omissions cccasionally occur. In the eventthatyou find a mis* sing or defective part, please contact your nearest Sears store. SERVICE AND REPAIR PARTS CALL 1-800-665-4455" Keep this number ha ndy should you require a service cal_or need to order repair parts. _fordering parts make sure you have the name, make and model no.