INSTRUCTION MANUAL | GUIDE D’UTILISATION | MANUAL DE INSTRUCTIONES 20V Max* 1/2" (13 mm) Hammer Drill Marteau perforateur à mandrin de 13 mm (1/2 po) 20 V max* Rotomartillo de 13 mm (1/2") 20 V Máx* CMCD711 IF YOU HAVE QUESTIONS OR COMMENTS, CONTACT US. POUR TOUTE QUESTION OU TOUT COMMENTAIRE, NOUS CONTACTER. SI TIENE DUDAS O COMENTARIOS, CONTÁCTENOS. 1-888-331-4569 final page size: 8.5 x 5.5 in WWW.CRAFTSMAN.
English English (original instructions) 1 Français (traduction de la notice d’instructions originale) 13 Español (traducido de las instrucciones originales) 26
LangRef_U_NA_U_U-ENG English Definitions: Safety Alert Symbols and Words This instruction manual uses the following safety alert symbols and words to alert you to hazardous situations and your risk of personal injury or property damage. DANGER: Indicates an imminently hazardous situation which, if not avoided, will result in death or serious injury. WARNING: Indicates a potentially hazardous situation which, if not avoided, could result in death or serious injury.
English 20V Max* 1/2" (13 mm) Hammer Drill CMCD711 GENERAL POWER TOOL SAFETY WARNINGS WARNING: Read all safety warnings, instructions, illustrations and specifications provided with this power tool. Failure to follow all instructions listed below may result in electric shock, fire and/or serious injury.
English e ) Maintain power tools and accesories. Check for misalignment or binding of moving parts, breakage of parts and any other condition that may affect the power tool’s operation. If damaged, have the power tool repaired before use. Many accidents are caused by poorly maintained power tools. f ) Keep cutting tools sharp and clean. Properly maintained cutting tools with sharp cutting edges are less likely to bind and are easier to control. g ) Use the power tool, accessories and tool bits, etc.
English • as those dust masks that are specially designed to filter out microscopic particles. Avoid prolonged contact with dust from power sanding, sawing, grinding, drilling, and other construction activities. Wear protective clothing and wash exposed areas with soap and water. Allowing dust to get into your mouth, eyes, or lay on the skin may promote absorption of harmful chemicals.
English • Contents of opened battery cells may cause respiratory irritation. Provide fresh air. If symptoms persist, seek medical attention. WARNING: Burn hazard. Battery liquid may be flammable if exposed to spark or flame. WARNING: Fire hazard. Never attempt to open the battery pack for any reason. If the battery pack case is cracked or damaged, do not insert into the charger. Do not crush, drop or damage the battery pack.
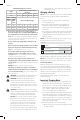
English Minimum Gauge for Cord Sets Total Length of Cord in Feet Volts (meters) 120 V 25 (7.6) 50 (15.2) 100 (30.5) 150 (45.7) 240 V 50 (15.2) 100 (30.5) 200 (61.0) 300 (91.4) Ampere Rating More Not American Wire Gauge Than More Than 0 6 18 16 16 14 6 10 18 16 14 12 10 12 16 16 14 12 12 16 14 12 Not Recommended • Do not place any object on top of the charger or place the charger on a soft surface that might block the ventilation slots and result in excessive internal heat.
English b. Check to see if receptacle is connected to a light switch which turns power off when you turn out the lights; c. Move the charger and battery pack to a location where the surrounding air temperature is approximately 65 °F – 75 °F (18 °C – 24 °C); d. If charging problems persist, take the tool, battery pack and charger to your local service center. 4. The battery pack should be recharged when it fails to produce sufficient power on jobs which were easily done previously.
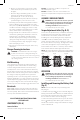
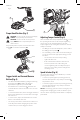
English Fig. E Fig. G 7 2 6 1 Proper Hand Position (Fig. F) WARNING: To reduce the risk of serious personal injury, ALWAYS use proper hand position as shown. WARNING: To reduce the risk of serious personal injury, ALWAYS hold securely in anticipation of a sudden reaction. Proper hand position requires one hand on the main handle 10 . one hand on the battery 6 . Fig. F 10 6 Trigger Switch and Forward/Reverse Button (Fig.
English Screw Driving Fig. H • 4 For driving fasteners, the forward/reverse button should be pushed to the left. • Use reverse (button pushed to the right) for removing fasteners. NOTE: When moving from forward to reverse, or vice versa, always release the trigger switch first. Hammerdrilling (Fig. D) • Keyless Chuck (Fig. I) WARNING: Make certain the battery pack is removed to prevent tool actuation before installing or removing accessories. To insert a drill bit or other accessory: 1.
English • • Keep the motor running while pulling the bit out of a drilled hole. This will help reduce jamming. Make sure switch turns drill On and Off. Drilling in Wood Holes in wood can be made with the same twist drill bits used for metal or with spade bits. These bits should be sharp and should be pulled out frequently when drilling to clear chips from the flutes. Drilling in Metal Use a cutting lubricant when drilling metals. The exceptions are cast iron and brass which should be drilled dry.
English IMPORTANT: When attaching or replacing the belt hook, use only the screw 12 that is provided. Be sure to securely tighten the screw. The belt hook can be be attached to either side of the tool using only the screw 12 provided, to accommodate left- or right- handed users. If the hook is not desired at all, it can be removed from the tool. To move the belt hook, remove the screw that holds the belt hook in place then reassemble on the opposite side. Be sure to securely tighten the screw.
English TROUBLESHOOTING GUIDE BE SURE TO FOLLOW SAFETY RULES AND INSTRUCTIONS For assistance with your product, visit our website at www.craftsman.com for a list of service centers, or call CRAFTSMAN at 1-888-331-4569. PROBLEM Unit will not start. Battery pack will not charge. Unit shuts off abruptly. 12 POSSIBLE CAUSE SOLUTION Battery pack not installed properly. Check battery pack installation. Battery pack not charged. Check battery pack charging requirements. Internal components too hot.
Français (traduction de la notice d’instructions originale) LangRef_U_NA_U_U-FRE Français Définitions : symboles et termes d'alarmes sécurité Ces guides d'utilisation utilisent les symboles et termes d'alarmes sécurité suivants pour vous prévenir de situations dangereuses et de risques de dommages corporels ou matériels. DANGER : indique une situation dangereuse imminente qui, si elle n’est pas évitée, entraînera la mort ou des blessures graves.
Français Marteau perforateur à mandrin de 13 mm (1/2 po) 20 V max* CMCD711 AVERTISSEMENTS GÉNÉRAUX SUR LA SÉCURITÉ DES OUTILS AVERTISSEMENT : lisez tous les avertissements de sécurité, toutes les instructions, les illustrations et les caractéristiques fournis avec cet outil électrique. Ne pas suivre toutes les instructions comprises aux présentes peut conduire à un choc électrique, un incendie et/ou des blessures graves.
Français h ) Ne pas laisser votre connaissance acquise suite l’utilisation fréquente des outils vous permettre de baisser la garde et ignorer les principes de sécurité de l’outil. Un acte irréfléchi peut causer une blessure grave en une fraction de seconde. b) 4) Utilisation et entretien d’un outil électrique a ) Ne pas forcer un outil électrique. Utiliser l’outil électrique approprié à l’application.
Français • • • • entrer en contact avec un câble électrique dissimulé. Tout contact entre un fil « sous tension » et l’accessoire de coupe pourrait également mettre « sous tension » les pièces métalliques exposées de l’outil et donner un choc électrique à l’utilisateur. Utiliser des brides de fixation ou un autre dispositif de fixation permettant de fixer solidement et de soutenir la pièce sur une plateforme stable.
Français 3N x ................ Alimentation triphasée avec neutre ................... Courant nominal du fusible adéquat en ampères ............. Là où un X est placé comme caractéristique du ...................... Éviter de regarder directement le flux de lumière. A courant vs temps, un fusible miniature différé selon la norme IEC 60127-3 est de mise. IPXX..................... Symbole IP • • BLOCS-PILES ET CHARGEURS Le bloc-piles n’est pas totalement chargé d’usine.
Français Appel à Recycler Canada, Inc., en collaboration avec CRAFTSMAN et d’autres utilisateurs de piles, a mis sur pied de programme aux États-Unis et au Canada pour faciliter la collecte des piles au nickel-cadmium, à l’hydrure métallique de nickel ou au lithium-ion usagées.
Français • • électriques. Le fait de retirer le bloc-piles ne réduira pas ces risques. NE JAMAIS tenter de connecter 2 chargeurs ensemble. Le chargeur a été conçu pour être alimenté en courant électrique domestique standard de 120 volts. Ne pas tenter de l’utiliser avec toute autre tension. Cela ne s’applique pas aux chargeurs de postes mobiles. AVERTISSEMENT : risques de chocs électriques.
Français 4. Recharger le bloc-piles lorsqu’il ne produit plus assez de puissance pour effectuer un travail qu’il faisait facilement auparavant. NE PAS CONTINUER à l’utiliser dans ces conditions. Suivre la procédure de charge. Si nécessaire, il est aussi possible de recharger un bloc-piles partiellement déchargé sans effet nuisible sur le bloc-piles. 5.
Français Fig. E la détente avant de changer la position du bouton de commande. Fig. G 7 2 6 Position correcte des mains (Fig. F) AVERTISSEMENT : pour réduire tout risque de dommages corporels graves, adopter SYSTÉMATIQUEMENT la position des mains illustrée. AVERTISSEMENT : pour réduire tout risque de dommages corporels graves, maintenir SYSTÉMATIQUEMENT l’outil fermement pour anticiper toute réaction soudaine.
Français REMARQUE : la lampe de travail permet d’éclairer la surface immédiate et n’est pas destinée à servir de lampe de poche. Fig. H Mode tournevis 4 • Pour enfoncer des attaches, pousser le bouton de commande de marche arrière vers la gauche. • Pousser le bouton vers la droite pour les retirer. REMARQUE : On doit toujours relâcher l’interrupteur à gâchette lorsqu’on change la position du bouton de la marche avant à la marche arrière, ou vice versa. Perçage à percussion (Fig.
Français • • • • • • • Faire fonctionner la perceuse très lentement en exerçant une légère pression, jusqu’à ce que le trou soit suffisamment profond pour empêcher la mèche d’en sortir. Appliquer une pression en ligne droite au moyen de la mèche en exerçant juste assez de pression pour permettre à la mèche de mordre dans la pièce, en évitant de caler le moteur ou de faire dévier la mèche.
Français Nettoyage Fig. J 11 12 Crochet de ceinture Accessoire en option AVERTISSEMENT : pour réduire tout risque de dommages corporels graves, placer le bouton de marche avant/arrière en position de verrouillage ou arrêter l’outil et déconnecter le bloc-piles avant tout réglage ou avant de retirer ou installer toute pièce ou tout accessoire. Un démarrage accidentel peut provoquer des blessures.
Français CONTRAT D’ENTRETIEN GRATUIT DE DEUX ANS SUR LES BLOC-PILES CRAFTSMAN CMCB201, CMCB2011 CONTRAT D’ENTRETIEN GRATUIT DE TROIS ANS SUR LES BLOC-PILES CRAFTSMAN CMCB202, CMCB204 REMARQUE : La garantie de se produit sera annulée si le bloc-piles a été altéré de quelque façon que ce soit. CRAFTSMAN ne peut être tenu responsable de tout dommage corporel causé par l’altération du produit et pourra poursuivre toute fraude en matière de garantie dans toute l’étendue permise par la loi.
LangRef_U_NA_U_U-SPA Español Definiciones: Símbolos y Palabras de Alerta de Seguridad Este manual de instrucciones utiliza los siguientes símbolos y palabras de alerta de seguridad para alertarle de situaciones peligrosas y del riesgo de lesiones corporales o daños materiales. PELIGRO: Indica una situación de peligro inminente que, si no se evita, provocará la muerte o lesiones graves.
Español Rotomartillo de 13 mm (1/2") 20 V Máx* CMCD711 ADVERTENCIAS GENERALES DE SEGURIDAD PARA HERRAMIENTAS ELÉCTRICAS ADVERTENCIA: Lea todas las advertencias de seguridad, instrucciones, ilustraciones y especificaciones incluidas con esta herramienta eléctrica. La falla en seguir todas las instrucciones siguientes puede resultar en descarga eléctrica, incendio y/o lesiones serias.
Español uso de dispositivos de recolección de polvo puede reducir los peligros relacionados con el polvo. h ) No permita que la familiaridad obtenida a partir del uso frecuente de herramientas le permitan volverse descuidado e ignorar los principios de seguridad de la herramienta. Una acción descuidada puede causar lesiones severas en una fracción de segundo. 4) Uso y Mantenimiento de la Herramienta Eléctrica a ) No fuerce la herramienta eléctrica.
Español Reglas de Seguridad Adicionales para Taladros • • • • • • • Use protectores auditivos con rotomartillos. La exposición al ruido puede causar pérdida de audición. Use el o los mangos auxiliares, si se suministran con la herramienta. La pérdida del control puede provocar lesiones personales. Al realizar una operación en la que el accesorio de corte pueda entrar en contacto con cables eléctricos ocultos, sostenga la herramienta eléctrica por las superficies de agarre aisladas.
Español ../min or ..min-1.. Revoluciones o movimientos ...................... protección auditiva alternativos por ...................... lea toda la minuto documentación 2 .................. corriente alterna ............. enlace de fusible bifásica miniatura de registro de tiempo 2N ................ corriente alterna donde X es el bifásica con neutro símbolo para la 3 .................. corriente alterna característica de trifásica tiempo/corriente, 3N ................
Español El sello RBRC® El sello RBRC® (Rechargeable Battery Recycling Corporation) en las baterías (ounidades de batería) de níquel cadmio, níquel e hidruro metálico o de iones de litio indica que el costo de reciclaje de estas baterías (o unidades de batería) al llegar al final de su vida de servicio ya ha sido pagado por CRAFTSMAN.
Español • • • • • • • No coloque ningún objeto encima del cargador ni coloque a este sobre una superficie blanda que pudiera bloquear las ranuras de ventilación y resultar en un calor interno excesivo. Coloque el cargador en un lugar alejado de cualquier fuente de calor. El cargador se ventila a través de las ranuras que se encuentran en la parte superior e inferior de la caja protectora. No opere el cargador si su cable o enchufe están dañados.
Español c. Mueva el cargador y la unidad de batería a un lugar donde la temperatura ambiental sea aproximadamente 18 °C – 24 °C (65 °F – 75 °F); d. Si el problema de carga continúa, lleve la herramienta, unidad de batería y el cargador a su centro de servicio local. 4. La unidad de batería debería ser recargada cuando no sea capaz de producir suficiente potencia para trabajos que eran fácilmente realizados antes. NO CONTINÚE usándola bajo estas circunstancias. Siga el procedimiento de carga.
Español Para instalar la unidad de batería 6 en el mango de la herramienta, alinee la unidad de batería con los rieles en el interior del mango de la herramienta y deslícela en el mango hasta que la unidad de batería quede firmemente insertada en la herramienta; verifique que ésta no se salga sola. Para retirar la unidad de batería de la herramienta, presione el botón de liberación 7 y tire firmemente de la de batería para sacarla del mango de la herramienta.
Español detenga. Deslice el selector de velocidad 4 hacia el lado contrario del mandril. • Para seleccionar el ajuste de velocidad alta, torque bajo (posición 2), apague la herramienta y permita que se detenga. Deslice el selector de velocidad hacia el mandril. NOTA: No cambie velocidades cuando la herramienta esté operando. Si tiene problemas cambiando velocidades, asegúrese que el selector de velocidad esté completamente oprimido hacia el frente o completamente retraído. Fig. H Fig.
Español Taladrado • • • • • • • • • • • • AVISO: Si perfora material delgado, use un bloque de madera de “respaldo” para evitar daño al material. Seleccione el rango de velocidad/torque deseado con la palanca de cambio de velocidad para igualar la velocidad y torque para la operación planeada. Gire el collar 3 al símbolo de taladro. Use solamente brocas para taladro afiladas.
Español IMPORTANTE: Cuando conecte el gancho para colgar Versatrack, sólo use el tornillo incluido. Asegúrese de apretar bien el tornillo. Los accesorios Versatrack™ montan herramientas compatibles con seguridad al sistema Trackwall de Versatrack™. 1. Apague la herramienta, retire los accesorios y retire el paquete de batería. ATENCIÓN: Cualquier producto con dientes de corte expuestos debe tenerlos cubiertos de forma segura si va a estar en el Trackwall. 2. Conecte el gancho de colgar 11 ala herramienta.
Español PARA OTRAS LOCALIDADES: Si se encuentra en México, por favor llame al (55) 5326 7100 Si se encuentra en U.S., por favor llame al 1-888-331-4569 Póliza de Garantía IDENTIFICACIÓN DEL PRODUCTO: Sello o firma del Distribuidor. Nombre del producto: ___________________________ Mod./Cat.: ____________________________________ Marca: ______________________________________ Núm.
Español 2 AÑOS DE SERVICIO GRATUITO PARA UNIDADES DE ALIMENTACIÓN CRAFTSMAN CMCB201, CMCB2011 3 AÑOS DE SERVICIO GRATUITO PARA UNIDADES DE ALIMENTACIÓN CRAFTSMAN CMCB202, CMCB204 NOTA: La garantía del producto quedará nula si la unidad de batería ha sido alterada de cualquier manera. CRAFTSMAN no es responsable de ninguna lesión causada por alteraciones y podría iniciar un procedimiento judicial por fraude de garantía hasta el máximo grado permisible por la ley.
CRAFTSMAN BATTERY AND CHARGER SYSTEMS Chargers . Chargeurs . Cargadores de baterías Battery Cat # Output Voltage CMCB201 CMCB2011 CMCB202 CMCB204 20 20 20 20 CMCB100 C C C C Charger CMCB102 C C C C CMCB104 C C C C “C” Indicates that the battery pack is compatible with that specific charger. Read the instruction manual for more specific information. “C” indique que le bloc-piles est compatible avec ce chargeur. Lire le manuel d’utilisation pour obtenir des renseignements plus précis.