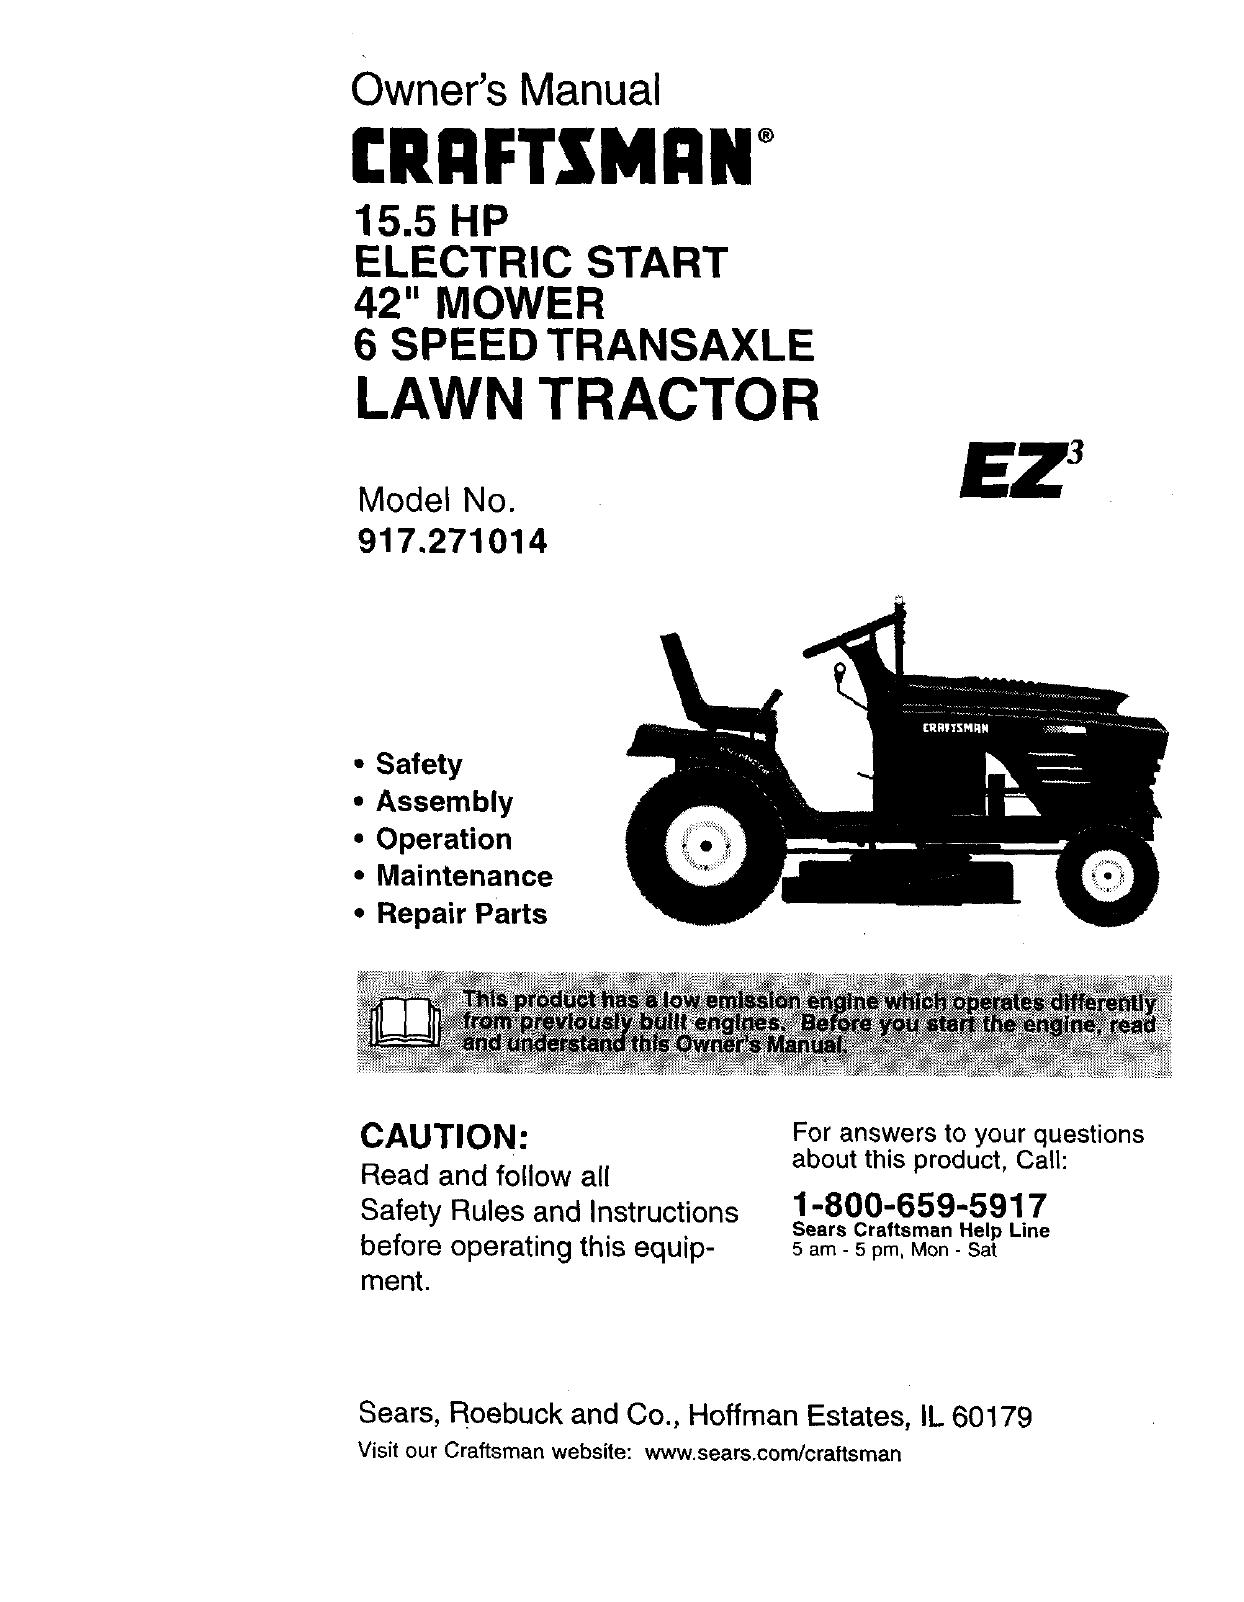
Owner's Manual CRAFTS[MAN + 15.5 HP ELECTRIC START 42" MOWER 6 SPEED TRANSAXLE LAWN TRACTOR Model No. 917.271014 • • • • Safety Assembly Operation Maintenance • Repair Parts CAUTION: For answers to your questions about this product, Call: Read and follow all Safety Rules and Instructions before operating this equipment 1-800-659-5917 Sears Craftsman Help Line 5 am - 5 pro, Mon - Sat Sears, Roebuck and Co., Hoffman Estates, IL 60179 Visit our Craftsman website: www.sears.
.Warranty............................................... 2 Safety Rules ..:...................................... 2 ProductSpecifications .......................... 5 Assembly .............................................. Operation ............................................ Maintenance Schedule ...................... LIMITED TWO YEAR WARRANTY Maintenance ....................................... 18 Service and Adjustments .................... 22 Storage ...............................................
• • • • • • • Turn off blades when not mowing. Stop engine before removing grass catcher or unclogging chute. Mow only in daylight or good artificial light. Do not operate the machine while under the influence of alcohol or drugs. Watch for traffic when operating near or crossing roadways. Use extra care when loading or unloading the machine into a trailer or truck. Data indicates that operators, age 60 years and above, are involved in a large percentage of riding mower-related injuries.
• Keep machine free of grass, leaves, or other debris build-up. Clean oil or fuel spillage. Allow machine to cool before storing. • Stop and inspect the equipment if you strike an object. Repair, if necessary, before restarting. • Never make adjustments or repairs with the engine running. • Grass catcher components are subject to wear, damage, and deterioration, which could expose moving parts or allow objects to be thrown.
PRODUCT SPECIFICATIONS GASOUNE CAPACITY ANDTYPE: 1.25 GALLONS UNLEADED REGULAR )ILTYPE SAE IOW-30 API-SF/SG/SH): (above 32°F) SAE 5W-30 (below 32°F) OIL CAPACITY." SPARK PLUG: W/FIL'I'B:_:4.0 PINTS W/O RL]E_ &5 PINTS Champion RC12YC (GAP:.040") VALVE CLEARANCE: GROUND SPEED VlPH): NOT ADJUSTABLE FORWARD: 1s-r 2 ND 3 RD 4 n_ 5TH 6_ REVERSE: 1.2 1,5 2.3 3.5 4.7 5.4 1.5 TIRE PRESSURE: FRONT: 14 PSI REAR: 10 PSI _HARGING SYSTEM: 3 AMPS BATTERY 5 AMPS HEADUGHTS BATTERY: AMP/HR: 30 MIN.
Parts Bag contents shown full size (1) Hex Bolt 5/16-18 x 1-1/4 (1) Hex Bolt 3/8-16 x 1 (1) Lockwasher 3/8 (1) Large Flat Washer (1) Locknut 5/16-18 (1) Knob (1) Shoulder Bolt 5/16-18 (1) Washer 17/32 x 1-3/16 x 12 Gauge (2) Washers 3/16 x 3/4 x 16 Gauge (2) Weld Nuts #10 __ #10 x 5/8 R (2) Lock Washers #10
Parts packed separately in carton F-7 Steering Boot Seat Video Cassette Mulcher Plate m I ii " I I I I I I Steering Wheel I Manual Parts Bag Parts Bag contents not shown full size Steering Extension Shaft _ Sth:r_g Insert ..
Your new tractor has been assembled at the factory with exception of those parts left unassembled for shipping purposes. To ensure safe and proper operation of your tractor all parts and hardware you assemble must be tightened securely. Use the correct tools as necessary to insure proper tightness. Review the video cassette before you begin. TOOLS REQUIRED Insert FOR ASSEMBLY A socket wrench set wilt make assembly easier. Standard wrench sizes you need are listed below.
HOWTO CHECK SET UPYOURTRACTOR BA'I-I'ERY • Lift seat pan to raised position and open battery box door. • If this battery is put into service after month and year indicated on label (label located between terminals) charge battery for minimum of one hour at 6-10 amps. (See "BATTERY" in MAINTENANCE section of this manual for • Remove banding holding discharge guard up against tractor. charging instructions).
CHECKTIRE PRESSURE The tires on your tractorwereoverinflated at the factoryfor shippingpurposes.Correcttire pressureis importantfor best cutting performance. • Reducetire pressureto PSI shown in "PRODUCT SPECIFICATIONS" of this manual. CHECK DECK Weld Nut From Hook Points The Top Down Weld Lock Washer section Latch Latch Hook LEVELNESS For best cutting results, mower housing should be properly leveled. See 'q-O LEVEL MOWER HOUSING" in the Service and Adjustments manual.
•F CHECKLIST Before you operate and enjoy your new tractor, we wish to assure that you receive the best performance and satisfaction from this Quality Product. Please review the following checklist: _/All assembly instructions have been completed. J No remaining loose parts in carton. ,/Battery is properly prepared and charged. (Minimum 1 hour at 6 amps). 4' Seat is adjusted comfortably and tightened securely. ,/All tires are properly inflated.
These symbols may appear on your tractor Learn and understand their meaning. or in literature supplied BATTERY CAUTION OR WARNING REVERSE FORWARD ENGINE ON ENGINE OFF OIL PRESSURE OGHTS ON FUEL CHOKE MOWER HEIGHT PARKING BRAKE LOCKED with the product.
KNOWYOUR TRACTOR READ THIS OWNER'S TRACTOR MANUAL AND SAFETY RULES BEFORE OPERATING YOUR Compare the illustrations with your tractor to familiarize yourself with the locations of various controls and adjustments. Save this manual for future reference. Attachment Clutch Lever Ignition Switch Ught Switch Position s Throttle/Choke Control ." .
The operation of any tractor can result in foreign objects thrown into the eyes, which can result in severe eye damage. Always wear safety glasses or eye shields while operating your tractor or performing any adjustments or repairs. We recommend a wide vision safety mask over spectacles, or standard safety glasses. HOWTO USEYOURTRACTOR TO SET PARKING BRAKE Yourtractoris equipped with an operator presence sensingswitch.
• The average lawn should be cut to approximately 2-1/2 inches during the cool season and to over 3 inches during hot months. For healthier and better looking lawns, mow often and alter moderate growth. • For best cutting performance, grass over 6 inches in height should be mowed twice. Make the first cut relatively high; the second to desired height.
TOWING MENTS CARTS AND OTHER A'rrACH. Tow onlythe atiachmentsthat are recommended byandcom_ w_ spec_a_nsofthemanofactutor of your_'actor.Use common sense when towing.Tooheavy of a Icad, while on a slope,is dangerous._res can lose tractionwith the ground and cause you to lose control of your tractor. BEFORE CHECK STARTING ENGINE THE ENGINE OIL LEVEL • The engine in your tractor has been shipped, from the factory, already filled with summer weight oil. • Check engine oil with tractor on level ground.
MOWING'rIPS • Mower shouldbe properlyleveled for best mowing performance. See "TO LEVEL MOWER HOUSING" intheServiceand Adjustments sectionof this manual. • The left hand side of mower should be used for trimming. • Drive so that clippingsare discharged onto the area that has been cut. Have the cut area to the right of the tractor.This will result in a more even distribution of clippings and more uniform cutting.
CUSTOMER RESPONSIBILITIES FILL IN DATES AS YOU COMPLETE REGULAR SERVICE J___ /___k-_O/_n_o'_y./_'_'F_/_@J ,_,_ R._ _ R.j_ .j_j_ _% _cj_ _ SERV,CE DATES CheokOrakoOpe,ation Check Tire Pressure T a Check Operator Presence InterloCk Systems Check for Loose Fasteners A Sharpen/Replace T Lubrication 0 Check Battery.
TRACTOR Always observe safety rules when performingany maintenance. BRAKE OPERATION If tractor requires more than six (6) feet stopping distance at high speed in highest gear, then brake must be adjusted. (See 'TO ADJUST BRAKE" in the Service and Adjustments section of this manual). TIRES • Maintain proper air pressure in all tires (See "PRODUCT SPECiFiCATiONS" section of this manual). • Keep tires free of gasoline, oil, or insect control chemicals which can harm rubber.
TO CLEAN BATIERY AND TERMINALS Corrosion and dirt on the battery and terminals can cause the battery to "leak" power. • Open battery box door. • Disconnect BLACK battery cable first then RED battery cable and remove battery from tractor. • Rinse the battery with plain water and dry. • Clean terminals and battery cable ends with wire brush until bright. • Coat terminals with grease or petroleum jelly.
AIR FILTER Your engine will not run properly using a dirty air filter. Clean the foam pre-cleaner after every 25 hours of operation or every season. Service paper cartridge every 100 hours of operation or every season, whichever occurs first. Service air cleaner more often under dusty conditions. • Remove knob and cover. • Remove wing nut and air cleaner from base. TO SERVICE • Install replacement oil filter on filter adapter.
_CAUTION: Before.performing any service or adjustments: Depress ciutch/braKe peaai Tullyana set parking crake. Place gearshift lever in neutral (N) position. Place attachment clutch in "DISENGAGED" position. Turn ignition key "OFF" and remove key. • Make sure the blades and all moving parts have completely stopped. • Disconnect spark plug wire from spark plug and place wire where it cannot come in contact with plug. TRACTOR TO REMOVE MOWER Mower will be easier to remove from the right side of tractor.
TO LEVEL MOWER HOUSING Adjust the mower while tractor is parked on level ground or driveway. Make sure tires are properly inflated (See "PRODUCT SPECIFICATIONS"). If tires are over or underinflated, you will not properly adjust your mower. SIDE-TO-SIDE ADJUSTMENT • Raise mower to its highest position. • At the midpoint of both sides of mower, measure height from bottom edge of mower to ground. Distance "A" on both sides of mower should be the same or within 1/4" of each other.
BELT INSTALLATION • Install new belt in reverse order of removal. Make sure belt is in all pulley grooves and inside all belt guides. • Install mower in reverse order of removal instructions. ey Mandrel Pulle_ Mandrel Pulley Idler Pulley TO ADJUST BRAKE Your tractor is equipped with an adjustable brake system which is mounted on the right side of the transaxle. If tractor requires more than six (6) feet stopping distance at high speed in highest gear, then brake must be adjusted.
Lever / / Neutral Lock Gate "_" Adj Bolt TO REMOVE WHEEL FOR REPAIRS • Block up axle securely. • Remove axle cover, retaining ring and washers to allow wheel removal (rear wheel contains a square key - Do not lose). • Repair tire and reassemble. • On rear wheels only: align grooves in rear wheel hub and axle. Insert square key. • Replace washers and snap retaining ring securely in axle groove. • Replace axle cover.
ENGINE Maintenance, repair, or replacement of the emission control devices and systems, which are being done at the customers expense, may be performed by any non-road engine repair establishment or individual. Warranty repairs must be performed by an authorized engine manufacturer's service outlet. Seat Pan Battery Door Hex Bolt Positive (Red) Cable Negative (Black) Cable TO REPLACE HEADLIGHT BULB • Raise hood. • Pull bulb holder out of the hole in the backside of the grill.
IMPORTANT: Damage to the needles and the seats in carburetor may result if needle is turned in too tight. NOTE: The carburetor on this engine is low emission. It is equipped with an idle fuel adjusting needle with a limiter cap, which allows some adjustment within the limits allowed by the cap. Do not attempt to remove the limiter cap. The limiter cap cannot be removed without breaking the adjusting needle.
Immediately prepare your tractor for storage at the end of the season or if the tractor will not be used for 30 days or more. _L,CAUTION: Never store the tractor with gasoline in the tank inside a building where fumes may reach an open flame or spark. Allow the engine to cool before storing in any enclosure. TRACTOR Remove mower from tractor for winter storage. This will allow you to clean it thoroughly. Remove all dirt, grease, leaves, etc. Store in a clean, dry area.
TROUBLESHOOTING CHART PROBLEM Will not start CAUSE • Out of fuel • Engine not "CHOKED" properly. Engine flooded. • Engine valves out of adjustment. • Fill fuel tank. • See "TO START ENGINE" in Operation section. • Wait several minutes before attempting to start. • Replace spark plug. • Clean/replace air filter. • Replace fuel filter. Drain fuel tank and carburetor, refill tank with fresh gasoline and replace fuel filter. Check all wiring. See "To Adjust Carburetor" in Service and Adjustments section.
TROUBLESHOOTING PROBLEM _ of Dower (cont'd) CHART CAUSE CORRECTION • Faulty spark plug. Clean and regap or change spark plug. Replace fuel filter. Drain fuel tank and refill with fresh gasoline. Drain fuel tank and carburetor, refill tank with fresh gasoline and replace fuel filter. Connect and tighten spark plug wire. Clean engine air screen/fins, Clean/replace muffler. Check all wiring. See "To Adjust Carburetor" in Service and Adjustments section. Contact an authorized service center.
TROUBLESHOOTING CHART PROBLEM Poor grass discharg_ (cont'd) CAUSE CORRECTION • Buildup of grass, leaves and trash under mower. • Mower drive belt worn. • Blades improperly installed. • Clean underside of mower housing. • Replace mower drive belt. • Reinstall blades sharp edge down. • Replace with blades listed in this manual. • Clean around mandrels to open vent holes. • Improper blades used. • Clogged mower deck vent holes from buildup of grass, leaves, and trash around mandrels.
TRACTOR - - MODEL NUMBER 917.271014 SCHEMATIC RED BATTERY SOLENOID I- CLUTCH/ FUSEBRAKE (PEDAL UP) i wHl_ ',_ _ a_CK STARTER • I II IWHI_ L ....... , 1 I FUEL I ....
TRACTOR - - MODEL NUMBER 917.
TRACTOR - - MODEL NUMBER 917.271014 ELECTRICAL KEY NO, t 2 8 16 19 2O 21 22 24 25 26 27 28 29 30 31 32 33 40 41 42 43 44 45 52 70 81 PART NO. DESCRIPTION 163465 74760412 156417 161343 STD551125 733504O0 166182 4152J 4799J 146147 166180 73510400 4207J 160784 140301 124211X 141226 109310X 166147 71110408 131563 145673 7364040O 121433X 141940 166662 109748)( Battery,12 Vo!t28 Amp Bolt, Hex 1/4-20 x 3/4 Case, Battery Mesh Hinge Switch, Interlock N. OPN./N.
TRACTOR - - MODEL NUMBER 917.
TRACTOR - - MODEL NUMBER 917.271014 CHASSIS AND ENCLOSURES KEY PART NO. NO. DESCRIPTION 165583 140356 17490612 19131216 155272 161917)(013 STD533710 155927 145660 155934X010 17490608 144983X558 126_38X 19131312 s'rD541437 14519_X558 155217X599 151287X558 139976 17490508 139886 139887 738004O0 19091416 145201 161464 1452O2 STD552507 150127 Sl13533707 154798 STD541437 158112 17490620 19131614 158418 165867 154966 154207 156524 5479J Chassis Assembly Dra..Voar Screw, Thd., Roll.
TRACTOR - - MODEL NUMBER 917.271014 GROUND DRIVE 57 116 ,62 80 ,o 85 / 3 - "1"_ 113 " A ".
TRACTOR - - MODEL NUMBER 917.271014 GROUND DRIVE KEY NO. PART NO. DESCRIPTION .... 2 3 4 5 6 8 10 11 13 14 18 19 21 22 24 25 26 27 28 29 3O 32 34 35 36 37 38 39 40 41 42 47 48 49 50 51 52 53 55 56 57 59 61 62 Trenasxle(See Breakdown) Peedass, Model 206-545C 146682 Spring, Return, Brake 123O66X Pulley,Tranasxle 12000028 Ring, Retainer 121520X Strap,Torque 17490512 Screw,Thd., Roll.
TRACTOR - - MODEL NUMBER STEERING ASSEMBLY "--11--(13 -39 ' • ...... _...... J ;_ 1 41 ,"----_ 42 44 4O 917.
TRACTOR - - MODEL NUMBER 917.271014 STEERING ASSEMBLY KEY NO. 1 2 3 4 5 6 7 8 9 10 11 13 15 17 18 19 22 23 25 26 27 28 29 30 32 36 37 38 39 40 41 42 43 44 46 47 51 54 62 63 65 66 67 68 79 80 PART NO.
TRACTOR - - MODEL NUMBER 917.
TRACTOR - - MODEL NUMBER 917.271014 ENGINE KEY NO. PART NO. 1 2 3 4 13 14 15 16 23 29 31 32 33 35 37 162156 17720410 38 ....... 40 44 46 62 77 79 80 81 101 159420 12-041-03 13280328 13200300 STD551231 15988O 137180 109202X 158990 123487X 17490512 137040 124028X 17490412 lg091416 STD551131 19101216 M74010e_25 74760508 128861 M73030800 DESCRIPTION Control, Throt / Ch Screw, HexThd Cut 1/4-20x5/8 T Engine (See Breakdown) Kohler Model CV15S-41567 Muffler Gasket Kohler CV13-CV16.
TRACTOR - - MODEL NUMBER 917.271014 SEAT ASSEMBLY NO. 1 2 3 4 5 6 7 8 9 10 11 12 PART NO. DESCRIPTfON 140123 140551 STD523710 19131610 145OO6 STD541437 124151X 17490616 1913_614 155925 166_ 121246X Seat Bracket, Pivot, Seat Bolt Washer 13/32 x 1 x 10 Gauge Clip, Push-In Hinged Nut SDring,Seat Screw,Thd., Roll 3/8-16 x 1 Washer "f3/3"2x "fx 14 Gauge Pan, Seat Emboss QCK Conn. KnobSeat Adj Wingnut Bracket,Switch Mounting KEY NO. PART NO.
TRACTOR - - MODEL NUMBER 917.271014 DECALS 6 4 3 10 13 20 12 KEY NO. PART NO. 1 3 2 156368 16320O 168354 4 5 163202 163261 6 8 9 10 133644 166887 1632O4 156439 WHEELS KEY NO. DESCRIPTION Decal, Ober. InStr. Decal, Hood, R.H. Decal, Replacement Parts Sears 9G Decal, Hood, LH. Decal, Dash Phi Kohler15.5 OHM Decal,Customer Maintenance Decal, Deck Mower EZ3 Decal, Fender, Craftsm_m Decal, Fender Danger 12 13 14 20 21 ----- - KEY NO. &TIRES PART NO.
TRACTOR - - MODEL NUMBER 917.271014 LIFT ASSEMBLY 7 .
TRACTOR - - MODEL NUMBER 917.271014 LIFT ASSEMBLY KEY NO. 1 2 3 4 5 6 7 8 11 12 13 15 16 17 18 19 20 31 32 PART NO, DESCRIPTION 159460 159471 105767X 12000002 19211621 120183X 125631X 122"365X 139865 139866 S'rO6240(_ 127218 733,50800 130171 73680800 13_868 163552 140302 73540600 WireAsm InneriSprgw/PlungerLT Shaft Asm. Lift PinGroove ERing #5133-62 Washer 21/32x lx21Ga.
TRACTOR - - MODEL NUMBER 917.
TRACTOR - - MODEL NUMBER 917.271014 MOWERDECK KEY NO. PART NO.
TRACTOR - - MODEL NU MBER 917.
TRACTOR - - MODEL NUMBER 917.271014 PEERLESS TRANSAXLE - - MODEL NUMBER 206-545C REF NO. PART NO.
TRACTOR - - MODEL NUMBER 917.
TRACTOR - - MODEL NUMBER 917.271014 KOHLER ENGINE - MODEL NUMBER CV15S, TYPE NUMBER PS-41567 ENGINECONTROLS AIR INTAKE KEY NO, 1 PART NO. t2-743_5 2 3 4 5 6 7 8 9 25-341-02 12-_36-24 12-083-08 12-100-01 X-25_3 12_83-05 12-313-04 12-094-12 t0 11 12-072-05 t2-086_1 12 12,041-02 NOTILLUSll:IA'RED -12-113-53 DESCRIPTION Kit,Air Cleaner (Incl. Key Numbers2 thru 12) Knob,Air Cleaner Cover Cover, Air Cleaner Predeaner Element W_ngNut Washer, Plain 1/4 Element, Air Cleaner (Incl.
TRACTOR - - MODEL NUMBER 917.
TRACTOR - - MODEL NUMBER 917.271014 KOHLER ENGINE - MODEL NUMBER CV15S, TYPE NUMBER PS-41567 FUEL SYS'I_M KEY NO. 1 2 3 RNRT NO. 12-853-56 12-041-02 12_o3-56 4 5 5 7 8 9 10 11 12 13 14 15 16 17 18 19 20 12_41-01 12-089,23 12-079-07 12-265-04 X-426-9 25,353_I0 25-(T00-52 47-154.
TRACTOR - - MODEL NUMBER 917.271014 KOHLER ENGINE - MODEL NUMBER CV15S, TYPE NUMBER PS-41567 IGNITION I ELECTRICAL] OIL PAN / LUBRICATION I 9--' Q--2 CRANKCASEJ STARTING SYSTEM 23 @ 19 o.
TRACTOR - - MODEL NUMBER 917.271014 KOHLER ENGINE - MODEL NUMBER CV15S, TYPE NUMBER PS-41567 IGNmON/ a.ECrRICAL KEY NO. 1 P/_tr NO. 12-086-34 2 3 4 5 6 7 8 9 10 12-4684_ 24-162-(3G M-0639016 12-11201 12o157_2 X-4,?.-15 12-02537 12-155-(_ MO548Q25 11 M.0545010 12 13 14 15 16 17 12q54._2 12-(385.O7 12-13_ X-728-1 12-584.O1 M-05450_0 NOT_ -* 12-518-11 KEY NO. 1 2 3 4 5 6 Screw,HexF'eage M10x 1.5x46 Wash_, PtaJn3/8 Screen,Grass Screw,l'-IexFlange M6xlx16(4) Spacer,Fan (4) Fan Key Flywheet/k.
SUGGESTED I GUIDE FOR SIGHTING SLOPES FOR SAFE OPERATION "SIGHTING GUIDE ONLY RIDE UP AND DOWN HILL, NOT ACROSS HILL I /_ _1 _ Operate your Tractor up and down the face of slopes (not I greater than 15°), never acro_;s the face. Make turns gradu- I ally to prevent tipping or loss of control. Exercise extreme J caution when changing direction on slopes.
For in-home major brand repair service: Call 24 hours a day, 7 days a week 1-800-4-MY-HOME SM (1-800-469-4663) Para pedir servicio de reparacibn a domicilio 1-800-676-5811 In Canada for all your service and parts needs call Au Canada pour tout le service ou les pieces 1-800-665-4455 For the repair or replacement parts you need: Call 6 am - 11 pm CST, 7 days a week PartsDirect SM 1-800-366-PART (1-800-366-7278) Para ordenar piezas con entrega a domicilio 1-800-659-7084 For the location of a Sears Parts