Instruction Manual J€:RAFTSMA#°J 32cc/1.9 cu.in. 2-Cycle GASOLINE WEEDWAOKER ® Model No. C944,515570 • • Safety Assembly • • Operation Maintenance • Parts List For Occasional Use Only WARNING: Read and follow all Safety Rules and Operating Instructions before first use of this product.
Warranty 2 Storage Safety Rules Assembly Operation Maintenance Statement 2 4 5 8 Troubleshooting Service & Adjustments 9 Parts and Ordering LIMITED TWO (2_ YEAR WARRANTY WEEDWACKER _ LINE TRIMMER Emissions 11 Table 12 Statement Parts List 13 Center Section Back Cover ON CRAFTSMAN For two (2) years from the date of purchase, Sears Canada, Inc., will repair or replace free of charge at Sears option parts which are defective as a result of material or workmanship.
Ifsituations occur which arenotcoveredinthismanual, usecareand goodjudgment. Ifyouneedassistance, contact yourSears Service Center. OPERATOR SAFETY • Make carburetor adjustments with lower end supported to prevent line from contacting any object. • Keep others away when making carburetor adjustments. • Use only recommended Craftsman accessories and replacement parts. • Have all maintenance and service not explained in this manual performed by a Sears Service Centre.
• Store unitsolinelimiter blade cannot SPECIAL NOTICE: This unit is accidentally cause injury. Theunitcan equipped with a temperature limiting behungbytheshaft. muffler and spark arresting screen • Store unitoutofreach ofchildren. which meets the requirements of CaliSAFETY NOTICE: Exposure tovibra- fornia Codes 4442 and 4443. All U.S.
KNOW YOUR TRIMMER READ THiS iNSTRUCTiON MANUAL AND SAFETY RULES BEFORE OPERATING YOUR UNIT, Compare the illustrations with your unit to familiarize yourself with the location of the various controls and adjustments. Save this manual for future reference. Assist Handle J Shaft Trimmer Head X_ STOP Switch Starter Handle Shield Primer Bulb Line Limiter Blade Throttle Trigger Choke Lever Muffler STOP SWITCH The STOP switch is used to stop the engine.
Toavoidengine problems, empty the fuelsystem before storage for30days orlonger. Drain thegastank, startthe engine andletitrununtilthefuellines Choke andcarburetor areempty. Usefresh position fuelnextseason. decal Never useengine orcarburetor cleanerproducts inthefueltankorpermanentdamage mayoccur. SeetheSTORAGE section foradditionalinformation. 4. Squeeze the throttle trigger fully and HOW TO STOP YOUR UNIT hold through all remaining steps.
• IWARNING: Always wear eye protection. Never lean over the trimmer head. Rocks or debris can ricochet or be thrown into eyes and face and cause blindness or other serious injury. When operating unit, stand as shown and check for the following: • Wear eye protection and heavy clothing. • Hold trigger handle with right hand and assist handle with left hand. • Keep unit below waist level. • Cut only from your left to your right to ensure debris is thrown away from you.
MOWING - Your trimmer is ideal for • Fortrimming orscalping, useless thanfullthrottle toincrease linelife mowing in places conventional lawn anddecrease headwear, especially: mowers cannot reach. In the mowing position, keep the line parallel to the • During lightdutycutting. • Near objects around which theline ground. Avoid pressing the head into the ground as this can scalp the canwrap such trees orfence wassmall ire. posts, ground and damage the tool.
GENERAL RECOMMEN DATIONS The warranty on this unit does not cover items that have been subjected to operator abuse or negligence. To receive full value from the warranty, the operator must maintain unit as instructed in this manual. Various adjustments will need to be made periodically to properly maintain your unit.
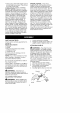
NOTE: Line glide plate must be reinstalled in cutting head before inserting new line. 4. Insert both ends of your line through the proper holes in the side of the cutting head. ! Positioning Tunnel 5. Pull the line and make sure the line is against the hub and extended full through the positioning tunnels. Line against the hub Positioning Tunnel \ 6. Correctly installed line will be the same length on both ends. REPLACING THE CUTTING HEAD 1.
all.WARNING: Perform the following steps after each use: • Allow engine to cool before storing or transporting. • Store unit and fuel in a well ventilated area where fuel vapors cannot reach sparks or open flames from water heaters, electric motors or switches, furnaces, etc. • Store unit with all guards in place. Position unit so that any sharp object cannot accidentally cause injury. • Store unit and fuel well out of the reach of children.
TROUBLESHOOTING _, TABLE WARNING: Always stop unit and disconnect spark plug before performing all of the recommended remedies below except remedies that require operation of the unit. TROUBLE CAUSE Engine will not start. 1. Engine flooded. 1, 2. Fuel tank empty. 3. Spark plug not firing. 4. Fuel not reaching carburetor. 2. 3. 4. 5. Carburetor requires adjustment. 5. Engine will not idle properly. 1. Carburetor requires adjustment. 2. Crankshaft seals worn. 3. Compression low. 1.
YOUR WARRANTY RIGHTS AND OBLIGATIONS: The U. S. Environmental Protection Agency/Environment Canada and Sears Canada, Inc., are pleased to explain the emissions control system warranty on your year 2005 and later small off-road engine. Sears Canada must warrant the emission control system on your small off-road engine for the periods of time listed below provided there has been no abuse, neglect, or improper maintenance of your small off-road engine.
MAINTENANCE, REPLACEMENT AND REPAIR OF EMISSION RELATED PARTS: Any Sears Canada approved replacement part used in the performance of any warranty maintenance or repair on emission related parts will be provided without charge to the owner if the part is under warranty. EMISSION CONTROL WARRANTY PARTS LIST: Carburetor, Ignition System: Spark Plug (covered up to maintenance schedule), Ignition Module.