Model 3312 Beverage Freezer Manual Grindmaster Corporation 4003 Collins Lane Louisville, KY 40245 USA (502) 425-4776 (800) 695-4500 FAX (502) 425-4664 www.grindmaster.
Table of Contents Safety Precautions .................................................................................................... 2 Freezer Applications & Specifications ..................................................................... 2-3 Installation ................................................................................................................. 4-6 Operation and Adjustments ......................................................................................
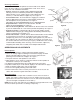
OPERATOR’S SAFETY PRECAUTIONS IMPORTANT: Failure to comply with the following safety precautions may result in severe personal injury or damage to the machine. 1. Read and understand the operating instructions in this manual thoroughly. Only allow properly trained persons to operate this machine. 2. Note all warning labels on the freezer. If any warning labels are missing or damaged replace them immediately. 3. Do not wear loose fitting garments or jewelry which could cause a serious accident. 4.
Product Tips (cont.) Some cappuccino or latté mixes contain dairy products which can spoil if not refrigerated. If the freezer is to be turned off at night these products must be removed from the freezer. Contact your local health department regarding its regulations for proper mix handling and storage.
INSTALLATION Shipment Transit 1. The freezer has been operated and tested at the factory. Upon arrival the complete freezer must be thoroughly checked for any damage which may have occurred in transit. Note: A Tip (N) Tell warning device is placed on each shipping carton at the factory. If the indicator is red, the carton has been tipped in transit. (See Figure B) 2. THE CARRIER IS RESPONSIBLE FOR ALL DAMAGE IN TRANSIT WHETHER VISIBLE OR CONCEALED.
Installing Your Unit (cont.) 6.
Accessory Installation The Model 3312 has several optional accessories that can be added to the unit in the field to meet your application’s needs. These accesElectrical box sories come with installation instructions. • Spinner - Spinners are typically used in applications that add flavoring to a frozen neutral base product after it is dispensed. Allows operator to serve a wider variety of frozen drinks from one Mounting screws machine (i.e. hazelnut added to cappuccino). See Figure E.
Consistency Adjustment From time to time, it may become necessary to readjust the consistency setting (thickness) to compensate for variation between different mixes or to switch from one type of product to another. This adjustment is made as follows: 1. Disconnect electrical power. WARNING Do not attempt to readjust the freezer until electrical power has been disconnected. 2. Remove right side panel (facing the freezer). 3.
CARE AND CLEANING Drain and Rinse (cont.) 4. Remove the carburetor tube and pour water into the storage hopper. Allow the water to fill the freezing cylinder. 5. Turn the panel switch to “CLEAN” for 5 minutes. 6. Open the dispensing valve and drain the water from the freezer. 7. Turn the freezer “OFF”. Disassembly and Cleaning Note: For cleaning and sanitizing before initial start-up remove carb tubes, dispense plungers, handles and springs from parts bag first. 1.
Disassembly and Cleaning (cont.) 8. Remove drip tray and empty contents. 9. Take all components to the cleaning area. 10. Prepare 1 gallon solution of hot tap water and a good grade of dishwashing detergent. 11. Thoroughly wash all components in a warm, mild detergent solution including the inside of the freezing cylinder and the mix storage hopper. DO NOT WASH COMPONENTS IN A DISHWASHER. 12.
Sanitizing and Refilling 1. Reassemble carburetors by installing the two o-rings at the bottom of the carb tubes. 2. Place the carburetor assemblies in the bottom of each hopper. 3. Install the o-rings on each valve plunger and lay plunger assembly on a clean piece of paper towel. 4. Prepare a minimum of 2.5 gallons (9.5 liters) of sanitizing solution (Kay-5 Sanitizer/Cleaner or equivalent) following the manufacturer’s instructions. NOTE: Add 1 ounce of Kay-5 to 2.5 gallons (9.
Clean-In-Place Procedure (Daily Cleaning) This equipment has been approved for a Clean-In-Place procedure that does not require complete disassembly on a daily basis. The unit still requires regular complete disassembly for cleaning and sanitizing. To perform the C-I-P procedure follow the instruction below: 1. Empty any product in the machine and turn to OFF. 2. Disassemble the dispensing valve assembly following the instructions in Disassembly and Cleaning. NOTE: Leave the valve block in place.
Preventative Maintenance Procedure (Every 6 to 12 Months) A preventative maintenance visit should be performed every 6 to 12 months depending on the usage and environment where the unit is placed. (Ex. seasonal machines - once before season, year round machines - twice per year). The following procedures should be performed during a preventative maintenance visit. This does not take the place of daily care and cleaning procedures as described by local health codes and the manual.
How to Clean Condenser (Air-Cooled Unit Only) NOTE: Loss of refrigeration efficiency will result if condenser is allowed to become dirty. Excessive compressor run time or loss of capacity are a good indication that the condenser needs to be cleaned. 1. Disconnect electrical power. 2. Remove side panels. 3. Place a damp towel over the side of the condenser opposite the fan motor. 4. Use compressed air or CO2 blow out dirt from the fan side of the condenser.
GENERAL TROUBLESHOOTING Freezer problems typically originate from three sources - improper operation, mix problems or mechanical malfunction. Always check for improper operation and mix problems first, as they are the most common cause of most equipment problems. CAUTION Always disconnect power before attempting any maintenance procedures. Only a qualified service technician should perform electrical and mechanical adjustments or repairs.
Model 3312 Page 15 Thick Product Plunger (W0480451) Slush Plunger (W0480438) (W0430026) Scraper Blade Dasher (W0430089) Coconut Oil Seal (W0340210) and Standard Seal (W0340201) include 1,2, & 3.
Model 3312 Exploded View 115V Air-Cooled Model ITEM NO. 1 2 3 4 5 6 7 8 9 10 11 12 13 14 15 16 17 18 19 20 21 22 23 24 25 Page 16 PART NO.
Model 3312 Exploded View 220V Air-Cooled Model ITEM NO. 1 2 3 4 5 6 7 8 9 10 11 12 13 14 15 16 17 18 19 20 21 22 23 24 25 Model 3312 PART NO.
Model 3312 Base Assembly 115V Air-Cooled Model Item Part No. Description 1 W0210075 Base Pan Assembly, 3312 2 W0211210 Frame Assembly 3 W0200135 Compressor 4 W0200807 Condenser Assembly 5 W0321029 Fan Assembly, 115V 6 see below Motor, 1/4HP 7 W0611410 Rivet, Magna-Lok 8 W0611410 1/4 Int.
Model 3312 Base Assembly 220V Air-Cooled Model Item Part No. Description Item Part No.
Model 3312 Electrical Box Assembly 115V Air-Cooled Model Item Part No. Description Item Part No. Description 1 W0572297 Electrical Box, 3312 15 83151 Washer, Lock, #8, Ext.
Model 3312 Electrical Box Assembly 220V Air-Cooled Model Item Part No. Description Item Part No. Description 1 W0572297 Electrical Box, 3312 15 0076 8-32 x 3/8 Hex Head Ground Screw 2 W0570054 Socket, Light-Leviton 16 83151 Washer, Lock, #8, Ext.
Model 3312 Wiring Diagram 115V Air-Cooled Model Item No. Part No. Page 22 Description Item No. Part No.
Model 3312 Wiring Diagram 220V Air-Cooled Model Item No. Part No. Model 3312 Description Item No. Part No.
Model 3312 Compressor Wiring 115V Air-Cooled Model 220V Air-Cooled Model Page 24 Model 3312
Model 3312 Ladder Diagram 115V Air-Cooled Model Model 3312 Page 25
Model 3312 Ladder Diagram 220V Air-Cooled Model Page 26 Model 3312
Model 3312 (AC Units) Spinner Hook-Up 115V Model Model 3312 Spinner Hook-Up 220V Model Model 3312 Page 27
Model 3312 Refrigeration 115V Air-Cooled Model Page 28 Model 3312
Model 3312 Refrigeration 220V Air-Cooled Model Model 3312 Page 29
Model 3312 Refrigeration Schematic (AC Units) 115V & 220V Models Page 30 Model 3312
Model 3312 Page 31
Page 32 Model 3312
Model 3312 Page 33
Grindmaster® Coffee Grinders and Brewers • Espressimo® Espresso Machines • Crathco® Hot Beverage Dispensers Crathco® Cold and Frozen Beverage Dispensers • American Metal Ware® Coffee and Tea Systems Tel (502) 425-4776 • Fax (502) 425-4664 • 1-800-695-4500 P.O. Box 35020 • Louisville, KY 40232 • USA 0608 Form # WH-313-05 © Grindmaster Corporation, 2004 www.grindmaster.com • email: info@grindmaster.