
Installation Guide


9/15
Page: 3 of 9
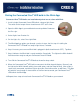
Pairing the Connected Cree
®
LED bulb in the Wink App:
Connected Cree
®
LED bulbs are installed and paired one at a time with Wink.
1. Install a single Connected Cree
®
LED bulb in a lamp or light fixture.
The switch to the lamp or fixture should remain OFF at this time.
2. Open the Wink App in your mobile device and tap Add a Product or
the Plus sign.
3. Select Lights from Product list.
4. On the Lights list, select Cree Light Bulb.
5. The Wink App then guides you through a series of steps; the first step is installing the
Connected Cree
®
LED bulb in a lamp or light fixture, if needed.
6. Step 2 instructs you to ensure Wink Hub is plugged in (bulb should remain OFF). Tap Next.
7. Step 3 indicates the Wink Hub is ready to add the Cree
®
bulb. The light on the Wink Hub will
flash blue when ready to add your Connected Cree
®
LED bulb.
8. Turn ON the Connected Cree
®
LED bulb at the wall or lamp switch.
9. When the Connected Cree
®
LED bulb is connected, the Wink App will display “Success” and
the light on the Wink Hub will quickly show solid green, and then stop flashing. After a light is
successfully connected, tap Name Light to give your Cree bulb a name, or tap Done. The App
will walk the user through a short tutorial session on how to control your Connected Cree
®
LED bulb in the Wink App.
10. Repeat these steps to install each Connected Cree
®
LED bulb on your network.