
Installation Guide


Page: 3 of 6
3. Select Lights from Product list.
4. On the Lights list, select Cree Light Bulb.
5. The Wink App then guides you through a series of steps; the first step is installing the
Connected Cree
®
LED bulb in a lamp or light fixture, if needed.
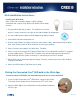
6. Step 2 instructs you to ensure Wink Hub is plugged in (bulb should remain OFF). Tap Next.
7. Step 3 indicates the Wink Hub is ready to add the Cree
®
bulb. The light on the Wink Hub will
flash blue when ready to add your Connected Cree
®
LED bulb.
8. Turn ON the Connected Cree
®
LED bulb at the wall or lamp switch.
9. When the Connected Cree
®
LED bulb is connected, the Wink App will display “Success” and
the light on the Wink Hub will quickly show solid green, and then stop flashing. After a light is
successfully connected, tap Name Light to give your Cree bulb a name, or tap Done. The App
will walk the user through a short tutorial session on how to control your Connected Cree
®
LED bulb in the Wink App.
10. Repeat these steps to install each Connected Cree
®
LED bulb on your network.
Controlling Connected Cree
®
LED bulbs with the Wink App
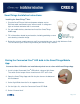
1. Open the Wink App and tap the Lights Icon.
2. Tap On to turn light on. Tap Off to turn light off. Adjust slider
around light icon to dim and brighten.
3. Tap Groups to create groups of lights to control together with
one tap.